|
|
Post by Yeti's Yell on Oct 1, 2010 20:55:29 GMT -5
Hey everybody, long time lurker and now coming forward with what I hope is a long blog on my IG. About 15 years ago I started a Valhalla IG army. Since none of us really cared about finished models or not, I just painted what interested me. I painted a few squads, some tanks/vehicles and a Lightning fighter from FW. I made a whole 4x6’ ice world terrain set and enjoyed it for many years. Now? Meh. Various old, crappy pics: Troops running from Great Unclean One 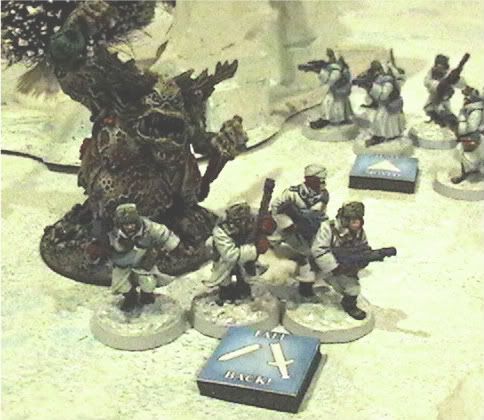 Commisar: 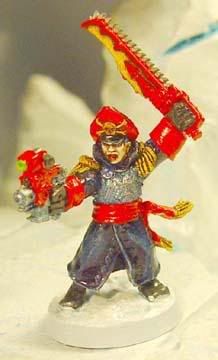 Vehicles: 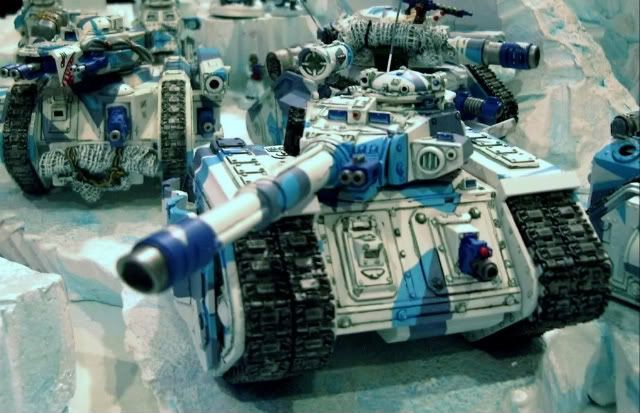 As the years went on I didn’t play or paint much but still picked up Valhalla stuff as I went along, always intending on finishing what I started a long time ago. A few months ago I noticed that packed away I have more than 120 metal Valhallens as well as assorted units/HQ/characters, a lot of armor and FW stuff. Almost all of it unpainted. Looking at the Warmachine/Hordes, 40K, Mordheim, LOTR and BFG I have I decided that I need to get this IG stuff done or dump it all and move on. At the time, my white-based troopers were ok. Now, the thought of painting all of those guardsmen in the old way makes me want to ditch them. So I looked for something faster since the goal was to get them done, not win a Golden Daemon. I experimented and modified the classic polyurethane dip method but used water based stain in a custom tinted color instead that worked well with some simple base colors. I dipped a few guys and I like the look almost as much as I like the minimal time taken to get them painted. Up next: My first tester models along with a Valhallen Sly Marbo. Best, Yeti |
|
|
|
Post by Yeti's Yell on Oct 1, 2010 23:38:39 GMT -5
Water-based stain: I wanted a “cold” palette so I played around with some color theory and used my knowledge of GW paints to pick something that is both similar to my old scheme, color-wise, and yet is an update and still works with the vehicles I have already done (I’m not repainting them.) I read lots of articles on various methods over my summer vacation and recalled my experience making polyurethane while working at a paint store. I picked up some Minwax water based Poly Shade stain and left the brown, deep based stain theories/norms aside in favor for this cooler, accent base color called Verdigris. With a dark sea green finish this shade still has some black in it so I hoped it could do the lining/shading that polyu is known for. I picked my colors based on complementary harmony and went for it. First test guy took me 20 minutes to lay in the base colors, including laying in the pupils. The second guy took me about 14 minutes, since I figured out the right order of putting down color. Then I brushed on the stirred Minwax (I didn’t dip it.) First pic of laid in color. Note that I later decided to change the color of weapon receivers from Ultramarine blue to a light blue (as seen on my Sly Marbo: 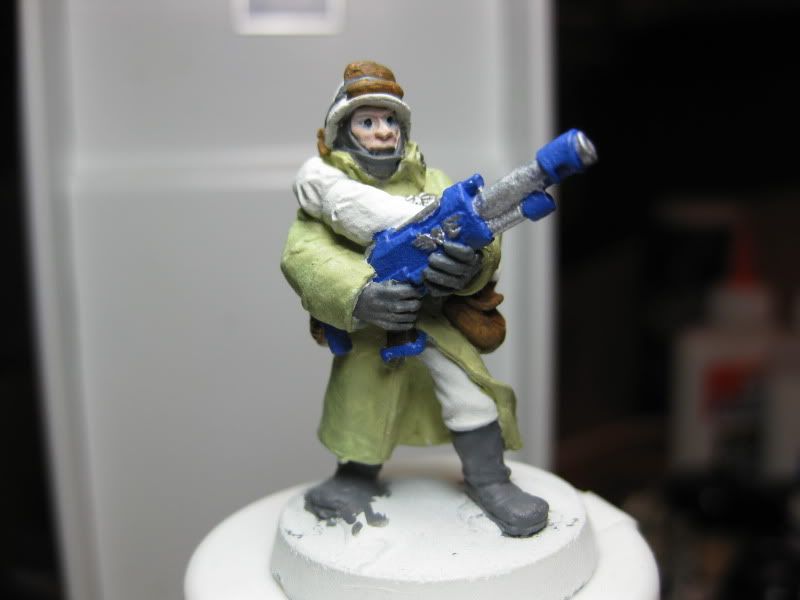 Second pic after dip: 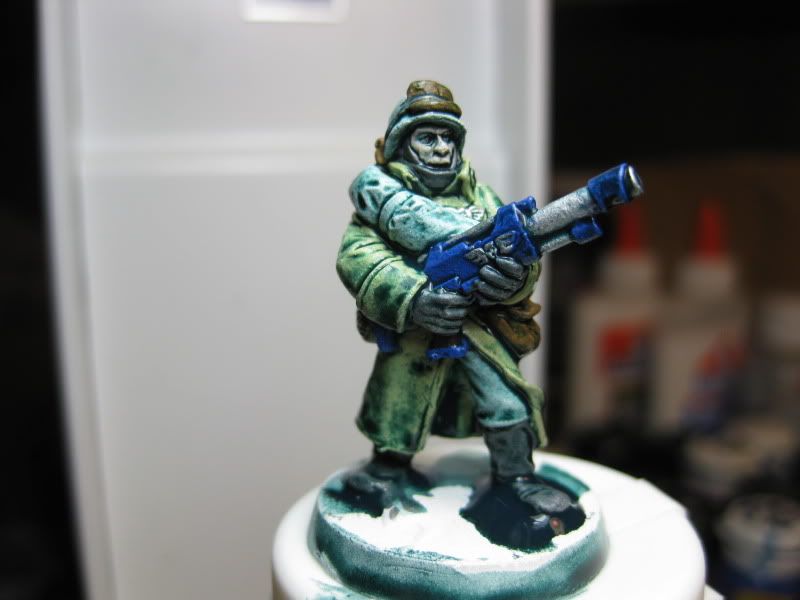 Originally a converted Last chancer but now my Sly Marbo with demo charge and converted ripper pistol. For him I just greenstuffed him some sleeves and added a Necromunda pistol plus Ork magazine. 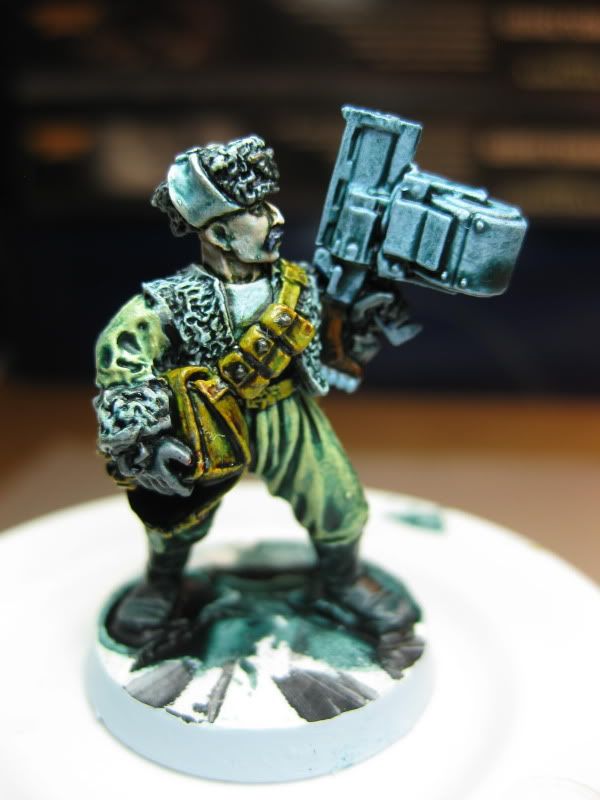 |
|
|
|
Post by 3ff3ct on Oct 2, 2010 9:17:09 GMT -5
It gives a great effect! How quickly do you expect to get the 100+ models done?
I love the ice on your 'marbo' base too, how on earth did you do that?!
|
|
|
|
Post by Dedrier on Oct 2, 2010 14:48:40 GMT -5
Thats some nice painting you've done! I like how the washes bring a whole new flavor and texture to the miniatures.
|
|
|
|
Post by Yeti's Yell on Oct 2, 2010 18:45:53 GMT -5
It gives a great effect! How quickly do you expect to get the 100+ models done? I love the ice on your 'marbo' base too, how on earth did you do that?! Thanks! I'm doing it in chunks, looking to have 50 guardsmen done by Christmas. I work fulltime, have a familiy and go to university almost fulltime as well. Point is, I'm keeping the painting method intentionally easy, since I literally have about 3 or 4 hours a week to dedicate to this project of everything painted. Ice effect: That's pretty great, there is no ice effect intended, it's just the pooling from the stain around his feet and some other brushstrokes from painting. I plan on basing them in rocks and snow, exactly like my Warmachine army. |
|
|
|
Post by Yeti's Yell on Oct 2, 2010 18:46:44 GMT -5
Thats some nice painting you've done! I like how the washes bring a whole new flavor and texture to the miniatures. Thanks, Dedrier! |
|
|
|
Post by Yeti's Yell on Oct 11, 2010 9:34:45 GMT -5
Practical lessons learned on this first finished squad. All in all I’d say I have around 4 hours invested in painting the squad before dip but I did play around a lot with experimenting/trying things out. That’s about 24 minutes a fig. The first guys were 14 minutes but it stretched out as I got into the squad. I guess it’s a stamina/intensity thing when using water based stain (polyu.) 1. Quality of primer coat will be really important. If it goes on frosty in one batch and solid on the next then there will be color differences as the wash does different things to the primer. A loose coat will mean a grainy coalescence. A solid coat will be smooth. Personally I like the gritty finish but that will be hard to reproduce. We’ll see how much deviation there is. On the table it is probably just something you’d notice if pointed out. 2. Related to the above, surface prep is ultra important. Flash lines will totally haunt your waking hours when the dip finds it which is like flash/mold line highlighter. Still, if you are doing lots of minis then who really cares. I have a trick for this that I use when I need to artificially paint shadows on things like cloaks: take a digital picture and adjust the contrast up or down when viewing the image back. This can guide you on what sticks out and what doesn’t, what is in shadow and what isn’t. Seeing it differently will allow you to pick things out that your eye missed or you can exaggerate areas for effect. Also, taking a macro shot of the mini before painting simply helps you find stuff the naked eye missed. 3. You must keep stirring the polyu between applications. It settles that quickly. 4. You will have to learn the features of sculpts and get good with anticipating where the polyu pools in excess. More importantly you need to learn how to do what I call “walking a coat into the corners.” That means when you brush on the dip you have to intentionally brush along all surfaces and get the dip on the surface of the mini into crack/crannies with each stroke; that coat of dip you just put on is a wet sheet that needs to sit on the surface and find an area of different surface tension to draw the dip in as it dries, i.e. a nook or seam. When dip pools too much, you need to guide it down the miniature, down crevices, not lift it off with the brush which will leave a dry spot. In all cases you can’t count on the dip spreading on its own. The main goal is to make one unified wet sheet of dip. On larger miniatures you’ll need to do this fairly fast to be sure you have one wet sheet in a go. 5. White paint absorbs more dip than white primer. Looking at the grenade launcher guy, you can see the shell rotary chambers have a slight shade to them. The bluish-white shade is white paint applied before dip. So you can “preshade” areas of primer with some white paint and when you dip, there is a slight shade. This works well because the areas you want a slight shade is usually where you are touching up a color that overlapped. Like in this case, the blue of the receiver. I’ll look for more absorption/color theory as I go along but this was useful. 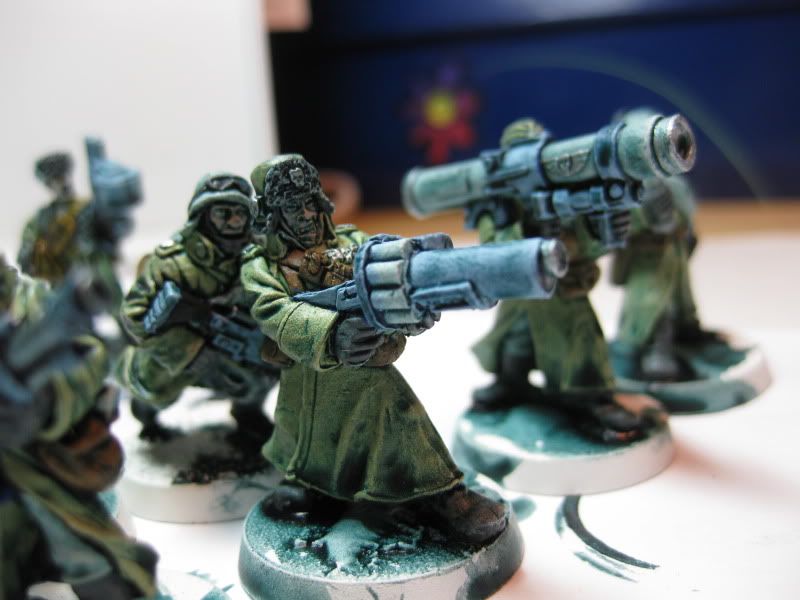 Squad pic: 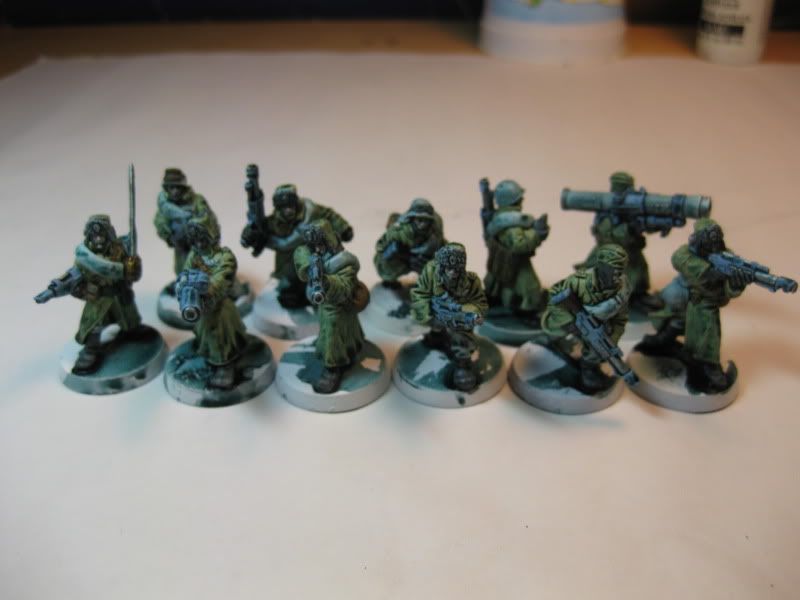 The most exciting thing for me with this is how easily the character of the faces really come out, and that is on minis that already have a few coats of paint on them and then primered over top of for this dip job. I noticed this guy had a huge blem on his face that you just can’t trim/sculpt out. So I just painted it like flesh and moved on. To me it looks like an mass of scar tissue, like he lost an eye. Pretty cool in a grizzled way. I already touched up the silver dot on his chin, BTW (see #2 above, macro shots.) 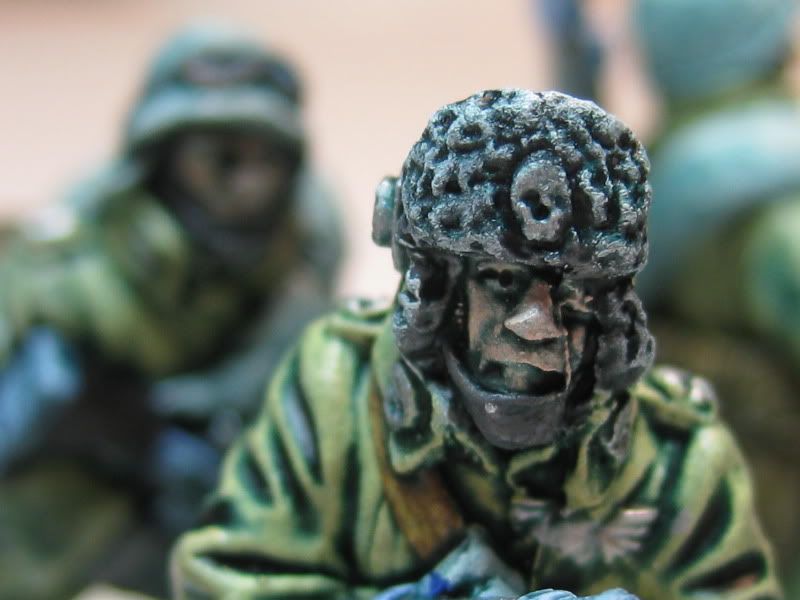 I love how the rocket launcher trooper came out. I’ve hated this model for years. Now I love him. Can’t wait for a squad of them. 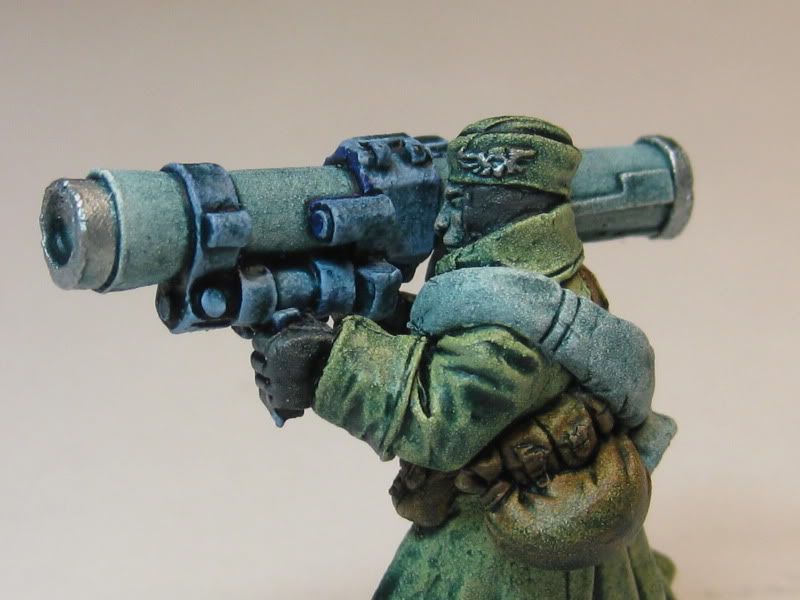 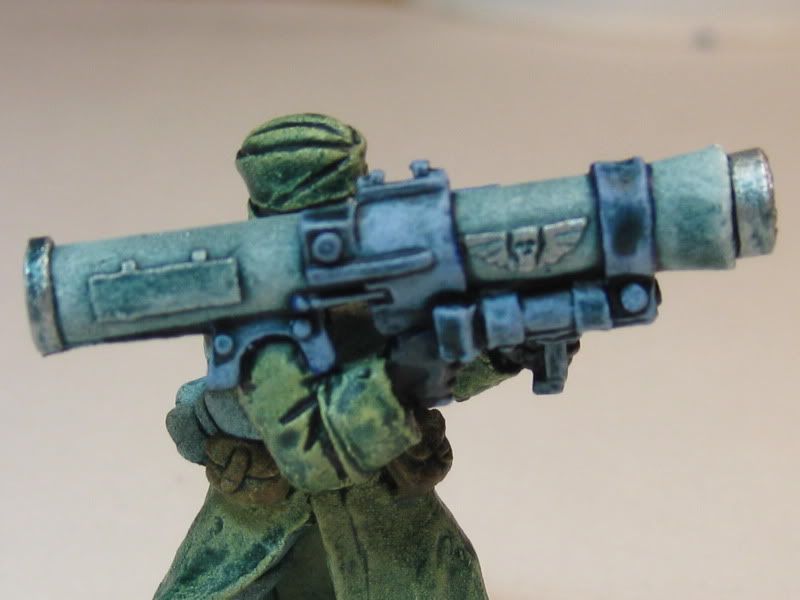 |
|
|
|
Post by Yeti's Yell on Oct 11, 2010 9:52:03 GMT -5
Hooked up the IG Primaris Psyker over the weekend. About 40 minutes of painting/deciding on colors. I changed a few things a few times. I’ll probably touch him up here or there (his left eye) and maybe make his pipes purple and add a light source to it, but he’s looking alright as-is, despite some sloppiness here and there. Can’t beat the speed of it all. Front: 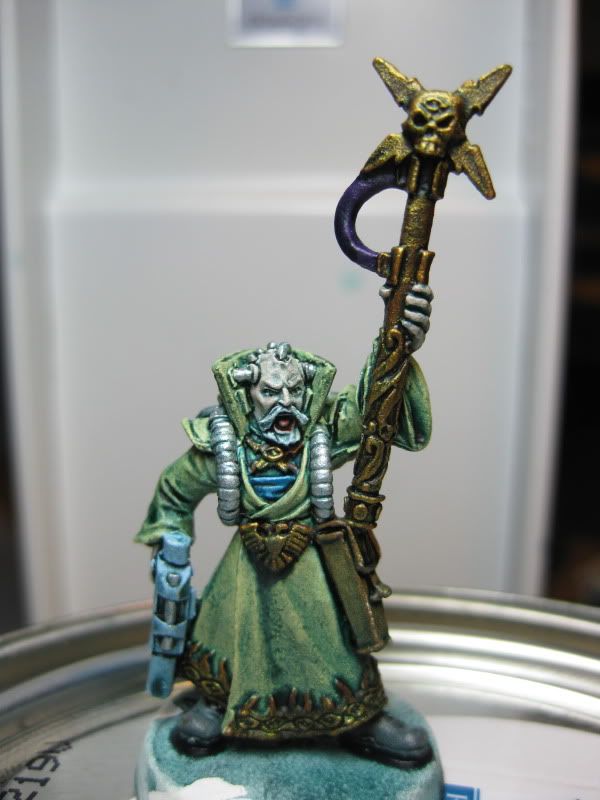 Back: 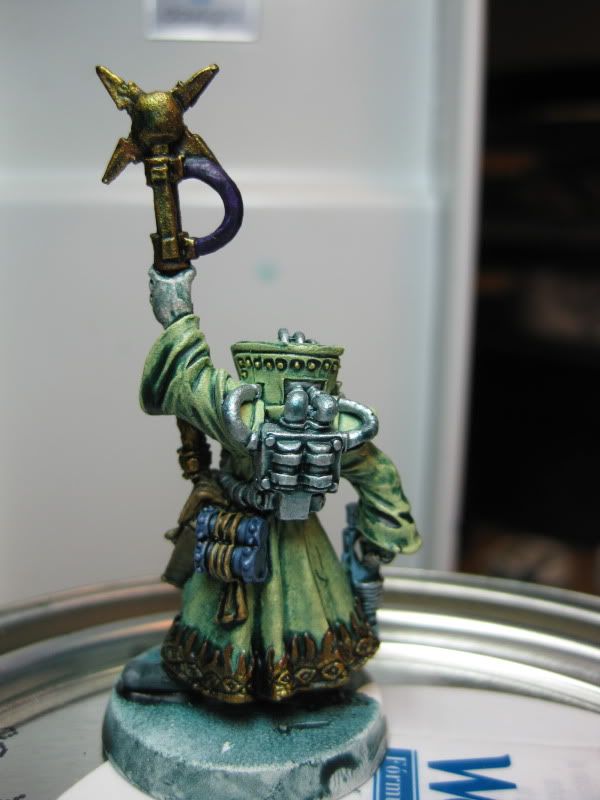 |
|
|
|
Post by ElegaicRequiem on Oct 11, 2010 13:10:02 GMT -5
I'm impressed. What polyurethane are you using?
|
|
|
|
Post by Yeti's Yell on Oct 11, 2010 13:39:09 GMT -5
I'm impressed. What polyurethane are you using? Minwax water-based Wood Stain, clear tint base, mixed to their book color Verdigris. I got it at Home Depot, the local chain DIY (not sure where you are located, Elegaicrequiem.) |
|
|
|
Post by Yeti's Yell on Oct 11, 2010 20:02:41 GMT -5
Here's a shot of my updated (but not based) Valhallans in my new snow terrain (not the old arctic/glacier white you saw earlier in this thread.) 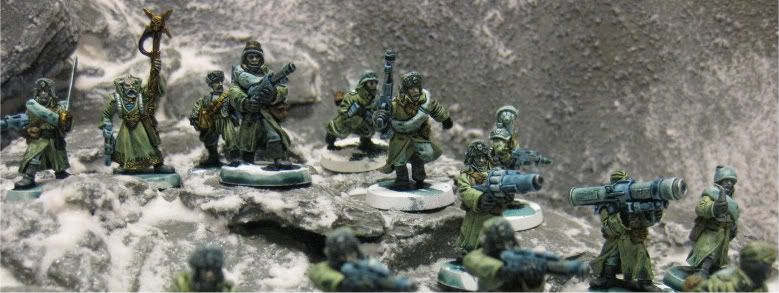 I'm considering basing these new IG in this new terrain, not the earlier white snow/light grey base. Opinions? |
|
|
|
Post by ElegaicRequiem on Oct 11, 2010 20:41:55 GMT -5
They definitely need a darker base - it will show off the shading variations better. I'd go with a look of snow having been dirtied by machinery and cinders.
|
|
|
|
Post by Rook on Oct 11, 2010 23:14:08 GMT -5
Wow, you truly have a grasp for the big picture. I'm impressed.
|
|
|
|
Post by dreadpirate on Oct 12, 2010 19:09:49 GMT -5
I kind of like the bases they way they are now.
I saw where you posted that the icy look was unintentional and that you haven't done anything to the bases at all, but I think the bases look cool. Maybe you could just add a dash of the "snow" flocking here and there to give them a little texture.
I really like your paint scheme. The blue tint really makes it seem like a winter army.
|
|
|
|
Post by Yeti's Yell on Oct 12, 2010 21:11:55 GMT -5
Thanks for the responses guys. I'm still torn on the basing but there is time to mull it all over. I'm not making any decisions until I hit 50 guys painted but please keep sharing your thoughts, I'm listening  So I now have 2 squads done plus some random guys. I have a 3rd squad on the table right now, about half way painted, and I'm pretty excited about them. I wanted to get a quick unit of melta/demo toting brawlers to the table, partly due to my Space Marine friend who likes 2x Drop Pod Dreds and partly due to my fandom of grizzled, dirty troopers who have survived at all cost, blankly regarding the fresh, incoming replacements with sleepy-eyed disdain while they take the new guy's ammo and wander back into no-man's land in search of more mushroom-cloud revenge. I wanted a good counter charge squad to try and dig out bogged units or demo charge some poor idiots who got too close. I wasn't ready to give up ten Valhalans to a creative whim so I scoured my collections for something to use first as a start and then the interwebs for some product I thought would tie it all together nicely. I had a bunch of very old Necromunda Delaques, who with their greatcoats are easy on the eyes as a start to some conversion. I also have had my eye on Pig Iron heads for some time for something like this so I ordered those from Neal at The War Store. Once they arrived I sawed off all the Delaque heads and attached Pig Irons. In all, I have 10 vets armed with shotguns and lasguns. I also added various Forge World and GW stowage as well as some Pig Iron backpacks/pouches. I think they look very much like grizzled Valhallans at home sapping through the sub-zero nights. I'll grab some more Delaques later to add some melta guns to the squad but for now this will get me started... Here is a WIP from the squad, a Valhallan Demolition Vet: 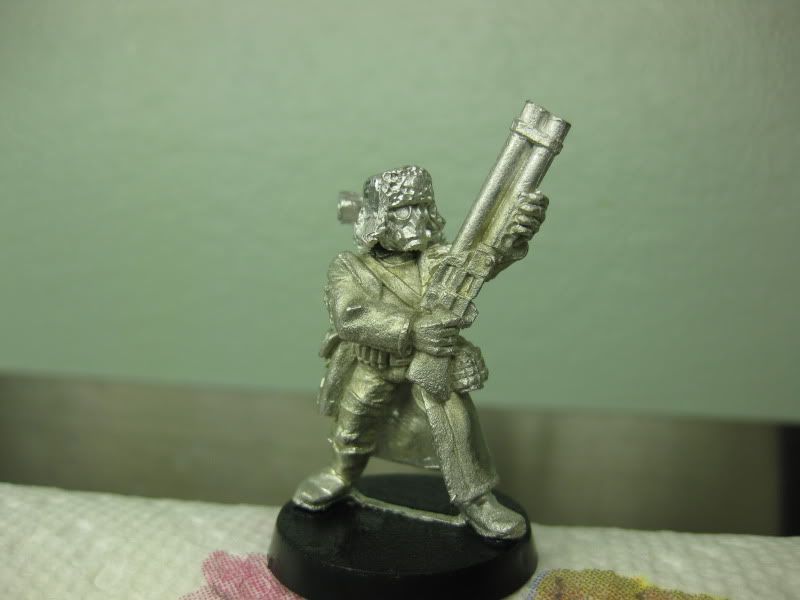 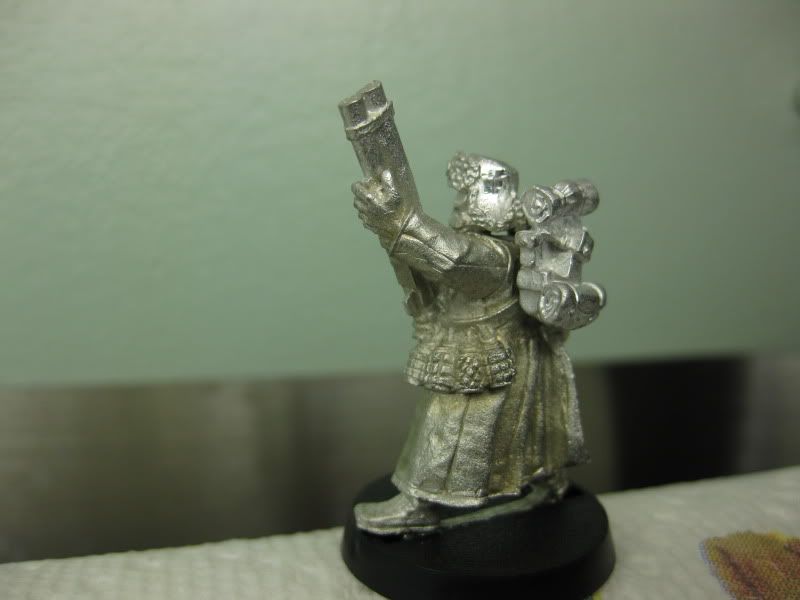 |
|
|
|
Post by Gabriel Lupus on Oct 14, 2010 5:09:58 GMT -5
*jaw drops open with pure admiration for these models*
I have to admit, I had my reservations when I saw the first model with the initial colours laid in, but then I saw the "finished" version... Wow...
And when they were all displayed together... well... gobsmacked comes to mind... can't wait to see more of these finished!
|
|
|
|
Post by fatuous on Oct 14, 2010 6:17:23 GMT -5
I'm stunned at quite how good these guys look!!!!!!!!!!!!
Very nice work!!
|
|
|
|
Post by Yeti's Yell on Oct 19, 2010 20:24:39 GMT -5
Hey guys, thanks for the feedback. Just a fast update. My hardened vet squad is almost ready for dipping. I’ll do a before dip and after dip group shot and post that up. I wanted to present an example of a newly based model so I updated some colors on one of my previously finished Sentinals and did the new style basing on it, rocky, snowy permafrost. I’m about 95% sure I’ll be doing the whole army like this. So, the original “arctic” sentinel: 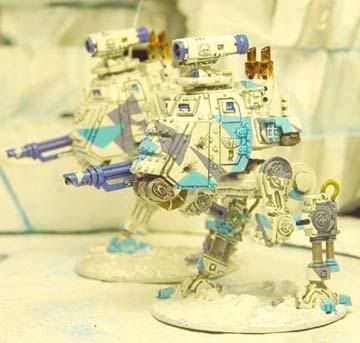 And the updated “permafrost” sentinel: 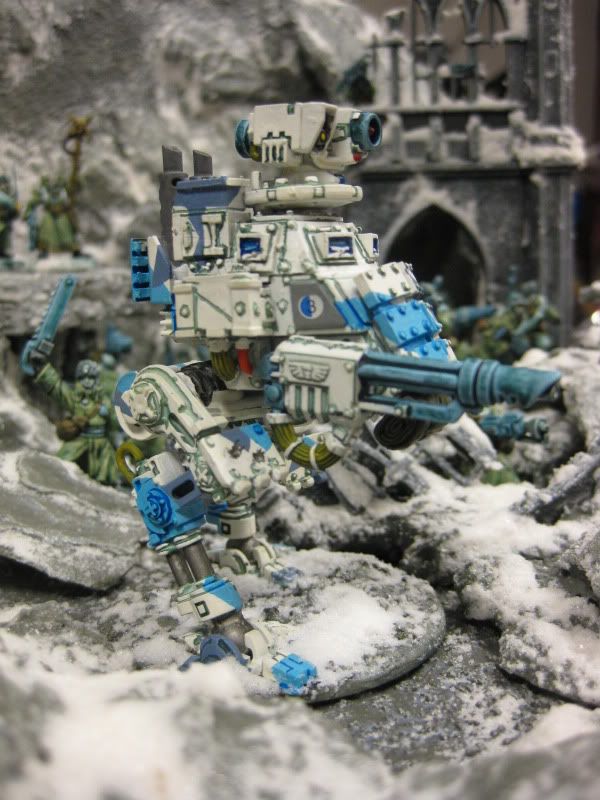 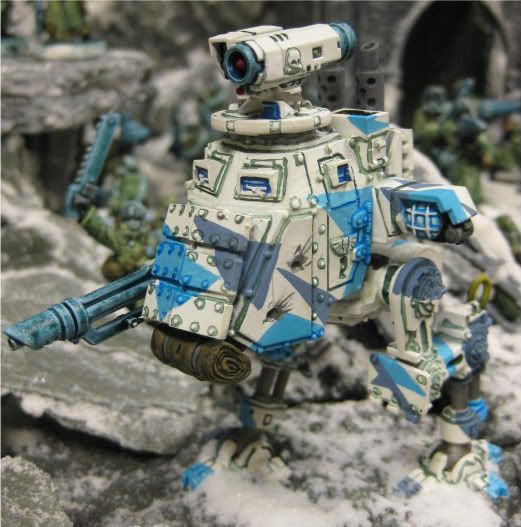 And from the average guardsmans perspective: 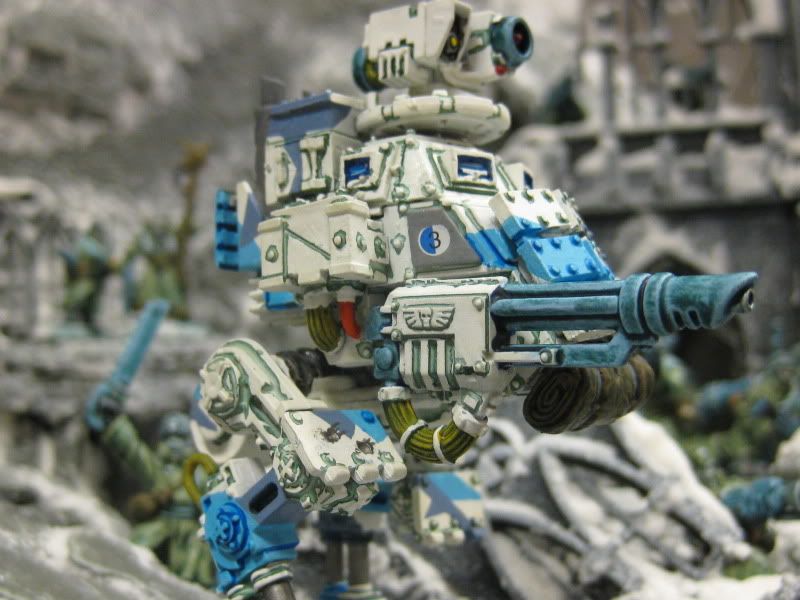 I think I need to update the windows to a more overcast reflection. At some point over the year I'll be painting 4 more sentinals so any feedback is appreciated! |
|
|
|
Post by Dedrier on Oct 19, 2010 20:32:55 GMT -5
Very nice, I really really like what you have done to your army. I can't wait to see what it looks like when you are all finished. Keep those updates coming.
|
|
|
|
Post by mccaptain on Oct 19, 2010 21:17:56 GMT -5
Beautiful army! The blue tint from the stain gives it an ice-reflection feel. I'm really impressed.
|
|
|
|
Post by Aeon on Oct 21, 2010 17:16:04 GMT -5
These ice warriors are quite good. I have always loved those figures. I'm just too poor to own them haha
|
|
|
|
Post by Yeti's Yell on Oct 21, 2010 17:34:57 GMT -5
These ice warriors are quite good. I have always loved those figures. I'm just too poor to own them haha Thanks Aeonian and everybody for the kind words. I've always loved these sculpts too, as clunky/old as they may be. I never had trouble collecting them becuase I took my time over 15 years ;D I think 100 of these will be a sight to see. And thank you Aeonian for your impending service! |
|
|
|
Post by Bobulus on Oct 22, 2010 0:42:21 GMT -5
I love the sentinels! I fact, love everything you have done! Keep going!
|
|
|
|
Post by Gabriel Lupus on Oct 22, 2010 5:59:30 GMT -5
I agree about the models themselves - they've always been a favourite of mine too. I think everyone has a special place in their heart/soul/whatever they have in place of those things  , for the simple fact that they're the "greatcoat" Guard - or at least the closest we have to greatcoat guard. Originally I was planning on having a single squad of them as veterans in my army, but things happened and the two veteran slots I was allowing in my list got filled... so this had lead me to considering a full army of them... They're not that much more than getting a normal squad really, and being as I'll already have a full sized Guard army, I can take it slow getting them (maybe not as slow as 15years though!) Looking forward to a pic of the whole lot soon yeti! |
|
|
|
Post by Yeti's Yell on Oct 22, 2010 18:09:54 GMT -5
Thanks Bobulous and G.L.! So up next: Critique Time So last night I finished a commissar. He has a converted bolt pistol with targeter and custom power sword. I was trying to figure out how to make commissars stand out and blend in at the same time. I went the typical "grey way" and it’s fine looking I suppose but to me seems too vibrant and not as sullen as the IG around him. I think the red is a bit too intense too so any opinions on how this commissar fits with the feel of those around him would be appreciated. For the record, I'm now thinking a darker grey (less blue) and terracotta red accents instead of these Blood Red accents... 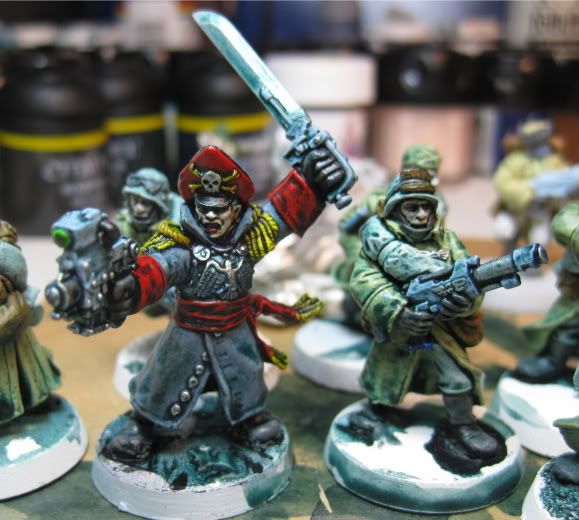 |
|