|
|
Post by Scarper on Oct 4, 2009 19:27:13 GMT -5
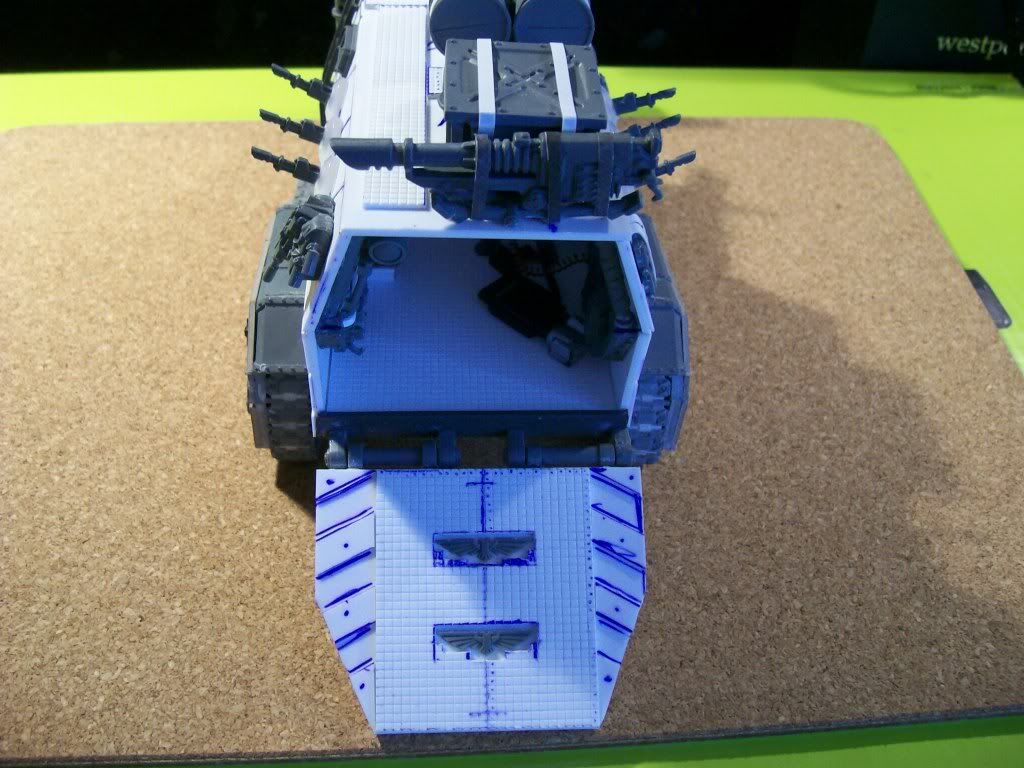
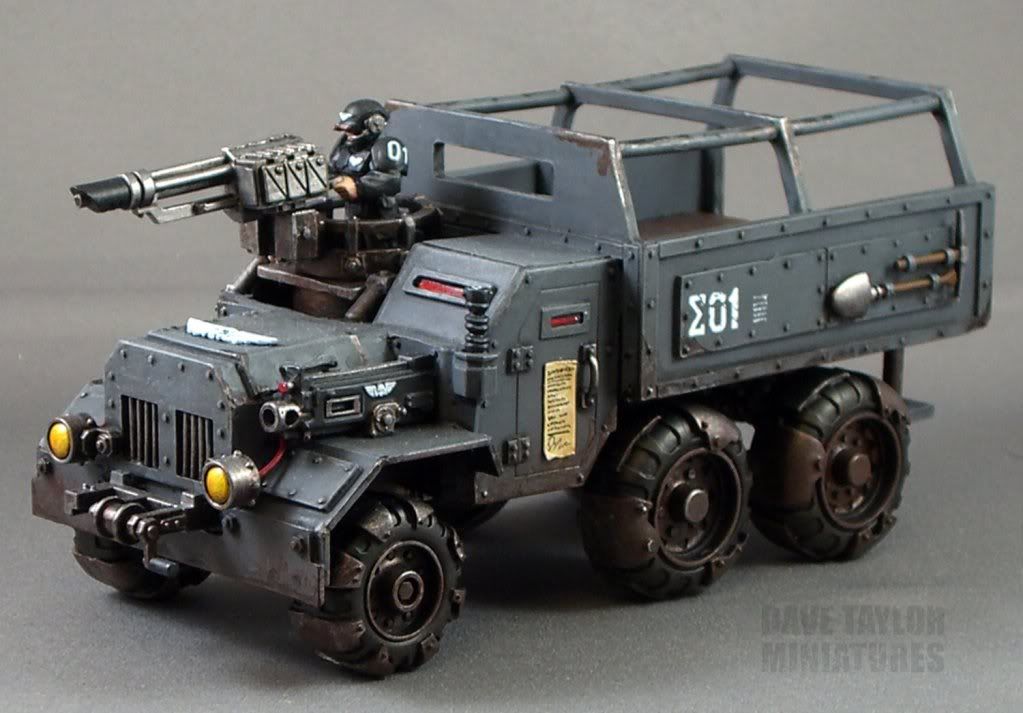 Anyone else wanting to build one of these babies? There's a link here if you're interested, but i was actually hoping I could sap some of your IGMB expertise. There are some plans behind the cut in PDF format, but the only scale on them is a 1" by 1" box that should ensure you print it at the right scale for cutting plasticard. (Hopefully that'll be clearer if you look at the PDF) Any chance someone could please help me out with a program I could use to print something out to specific dimensions? I'd be forever grateful  Cheers guys! |
|
Commissar Vintovka
Guardsman
 "F*ck this crap, I'm going home !!" - Commissar Vintovka, Vogen 11th Executioners
Posts: 59
|
Post by Commissar Vintovka on Oct 4, 2009 20:50:54 GMT -5
Wow, that's quite a beuty !! I've always wanted to make one of these "Sixty-Sixers", as they write about in the Imperial Guard book "Gunheads" Now I can finally do it ^^ |
|
|
|
Post by control on Oct 4, 2009 22:48:09 GMT -5
Thats amazing man!
|
|
|
|
Post by Sgt. Walters on Oct 4, 2009 23:43:01 GMT -5
I could actually look into that. That thing is such a beauty. I'll see if I can come up with something. |
|
|
|
Post by BobaHat on Oct 5, 2009 8:20:06 GMT -5
That is great! A much better conversion and paint job than I expected. I do however have to mention three bits that I don't like: 1) The wheels are way too orky in my opinion. A cleaner, more 'human' look to them would make it look more like a military truck and less like... well... and ork trukk! 2) The Heavy Bolter doesn't look right. It just seems to be sitting on the front of the truck, with nobody manning it or with any way of moving around. 3) It looks a bit too 'open topped' if you ask me. Perhaps it should at least have some armour on that crew compartment. But apart from those three things, this is definitely a thing of beauty! I feel all inspired to do something similar! Thanks for sharing! |
|
|
|
Post by Scarper on Oct 5, 2009 9:25:18 GMT -5
Oooh, sorry guys, just to make this clear, I didn't make this - if you follow the link, it's one of Dave Taylor's conversions, and I'm just trying to work out how to print out the PDF the right size! ;D Check out the rest of his stuff though, it's pretty awesome. Any chance anyone found anything for scaling the PDF?  |
|
|
|
Post by Sgt. Walters on Oct 5, 2009 10:41:18 GMT -5
Oooh, sorry guys, just to make this clear, I didn't make this - if you follow the link, it's one of Dave Taylor's conversions, and I'm just trying to work out how to print out the PDF the right size! ;D Check out the rest of his stuff though, it's pretty awesome. Any chance anyone found anything for scaling the PDF? Yeah, actually. There were those two .jpg files on the site that you linked, they are the right scale already. Just open them in your photoshop or whatever you use, push print, and scale to fit one normal vertical A4 sheet. At least I got it out the right size (Ok, it scaled them down 2%, but you make more difference on the size of the piece by cutting on the wrong side of the line, than you get with that). |
|
|
|
Post by Makarova (M.I.A) on Oct 5, 2009 10:45:24 GMT -5
Now that's a bit more impressive than my trucks...
|
|
|
|
Post by Ymmot (M.I.A) on Oct 5, 2009 13:01:57 GMT -5
Needs armored passenger compartment, otherwise perfect.
|
|
Deleted
Deleted Member
Posts: 0
|
Post by Deleted on Oct 5, 2009 13:15:30 GMT -5
very interesting, seems as though the aerial has either been not mounted ro has snapped off, think i can see the drilled hole for one. the wheels wouldnt be so bad if all of those steel plated were uniform and all the same, rather than looking like bits of random scrap.
|
|
|
|
Post by Ogryn Crazy! on Oct 5, 2009 14:14:37 GMT -5
Armoured or Tauplin back.
|
|
|
|
Post by ssgtdude (M.I.A) on Oct 5, 2009 14:18:50 GMT -5
A canvas top would be fairly easy to add. Just a bit of cloth soaked in thinned down PVA glue.
Add a bit of paint and volia a canvas cover
|
|
|
|
Post by cheminhaler on Oct 5, 2009 15:39:24 GMT -5
Thanks for the link. I have a spare Ork Trukk, now I know what to do with it!
|
|
|
|
Post by rich on Oct 5, 2009 16:20:15 GMT -5
|
|
|
|
Post by tankshock on Oct 5, 2009 19:57:36 GMT -5
I like it, but I would put the heavy bolter where the multi laser is and put the multi laser on top
|
|
|
|
Post by ssgtdude (M.I.A) on Oct 5, 2009 20:01:26 GMT -5
For rivets you can use straight pins.
|
|
|
|
Post by The Guardsmen on Oct 6, 2009 4:54:09 GMT -5
It needs more armor... other than tat it AWESOME!
|
|
|
|
Post by Cadian 117 on Oct 6, 2009 7:06:07 GMT -5
I like yours better, seems more like a vehcle the guard would use. Kinda like a Halftrack.
|
|
|
|
Post by solidgopher on Oct 6, 2009 13:44:30 GMT -5
Nice! the open topped look isn't bad for me, gives it a kinda dessert feel. a canvas back would be nice, but not armor. the half track is nice, but a little busy for my tastes, to many things glued on.
|
|
|
|
Post by Scarper on Oct 6, 2009 16:02:42 GMT -5
Cheers for all the input guys, especially Sgt. Walters - I had no idea they were already scaled! Turns out my printer was being super helpful and automatically resizing the PDFs without telling me why. Fixed now!
I'm going to be having a bash at this kit, but it's my first time working in plasticard - I'll post updates on this thread as i get to building this behemoth ;D
|
|
|
|
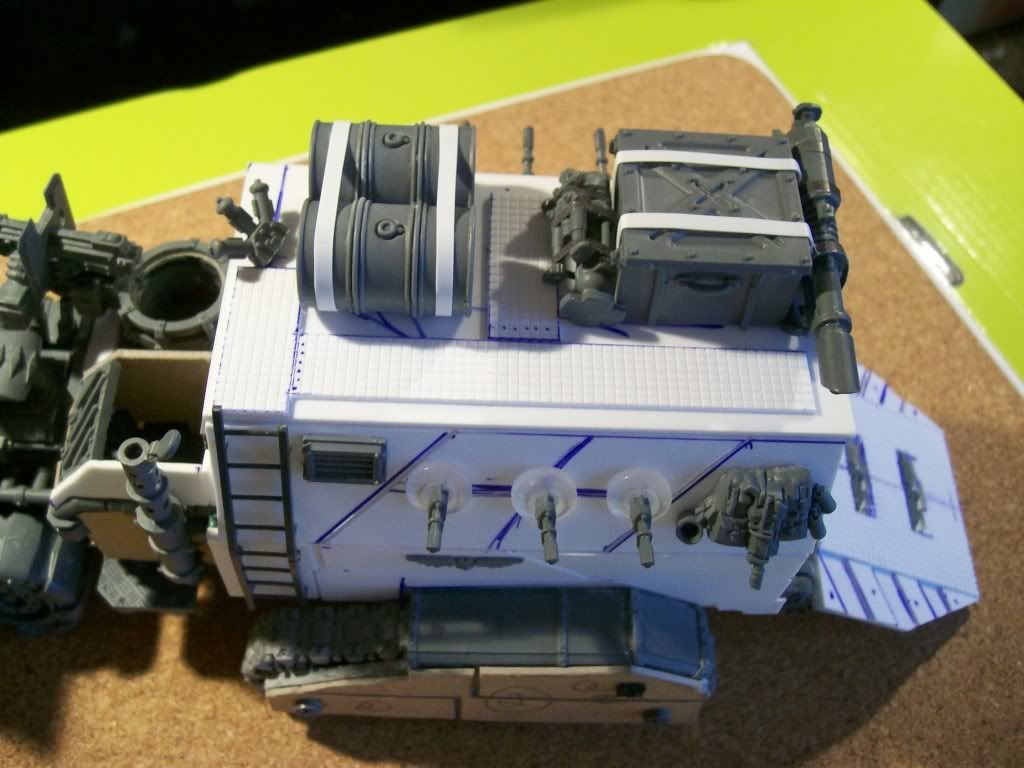
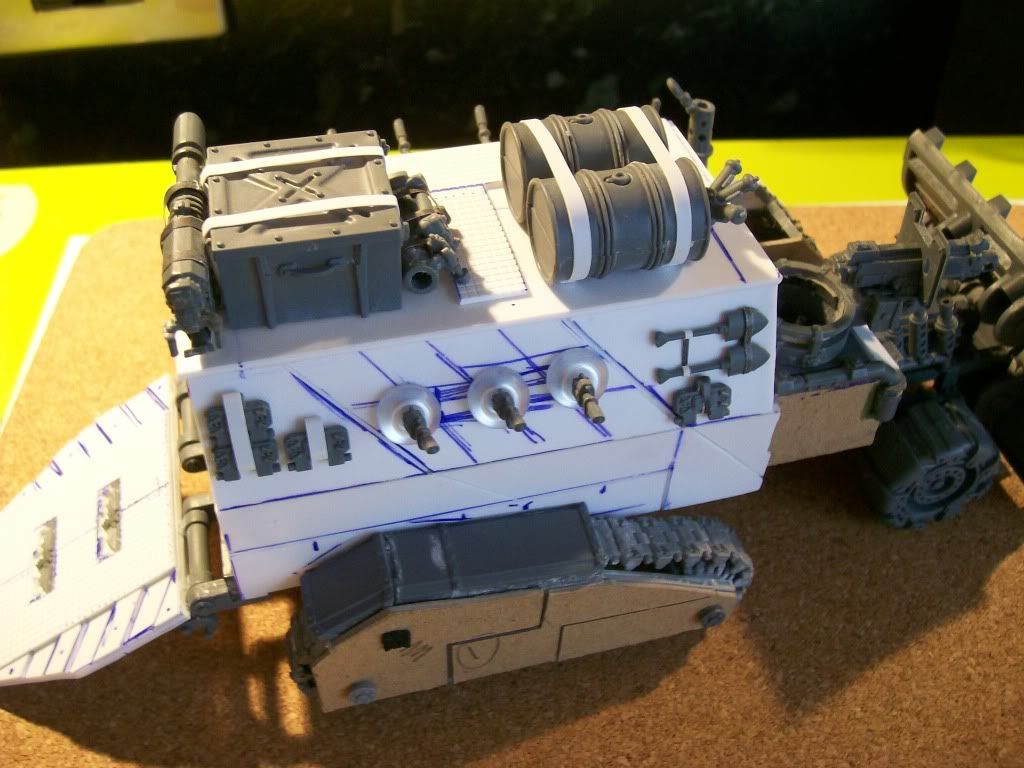
Post by Scarper on Oct 6, 2009 19:03:47 GMT -5
First bit done! How the hell can anyone work extensively in plasticard? Getting the shapes made takes forEVER! So much more respect for ReWolf and co now  Btw, I haven't actually just drenched this thing in glue - a lot of the plastic is double layered, and you can see the glue sandwiched between it through the clear card 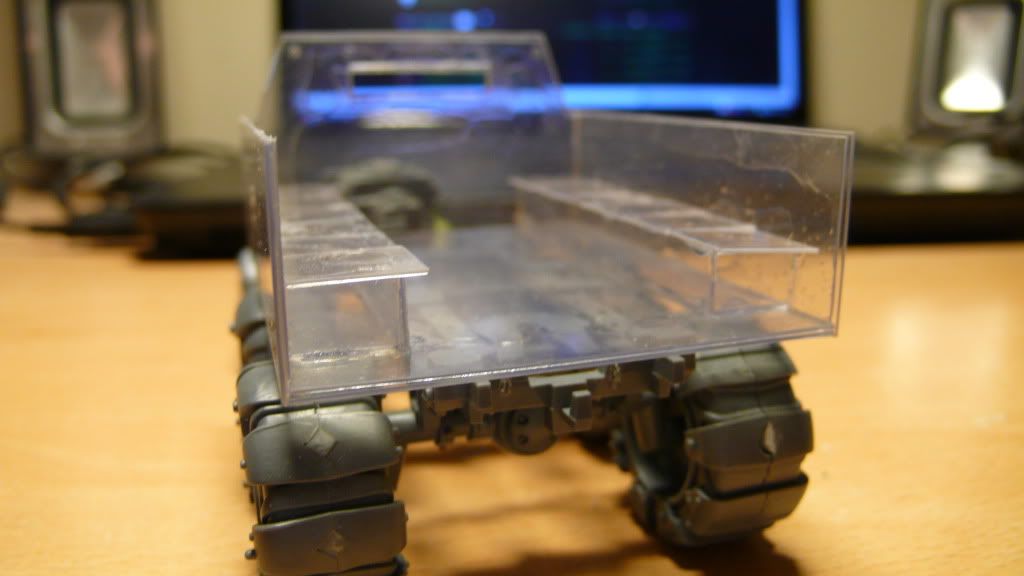 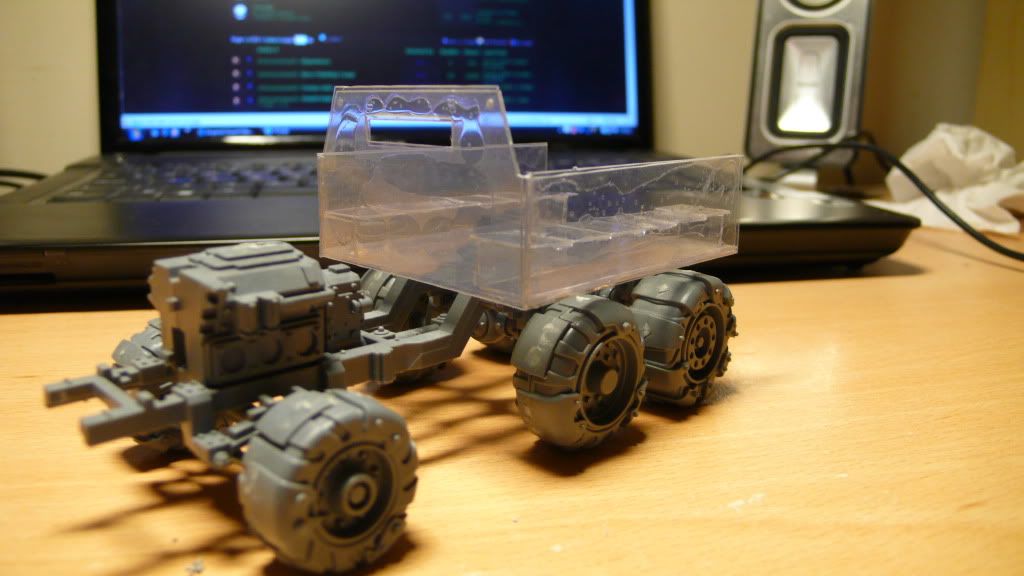 Anyhoo, I'll start building the cab tomorrow. Night guys! |
|
|
|
Post by solidgopher on Oct 7, 2009 2:25:55 GMT -5
Good start!
|
|
|
|
Post by commissarbob on Oct 7, 2009 6:36:02 GMT -5
For rivets, the process I use is long and painstaking, but the results are worth it. I do a lot of rivets on my WW1 themed guard so I have pretty well gotten it down to an art. Step 1, drill where you want the rivets with a fine bit just larger than an .040" plastic rod. I see that you have them marked out with dots, that is a good start. Next you insert the plastic rod into your fist hole, glue it into place (I use a brush on solvent glue rather than ye olde tube glue or super glue... Look for a product called Tenax). Once the glue has set a bit (wait 10 to 30 seconds withth e product I use) and trim off just above the surface. Repeat this process until all the holes are filled. Do not worry if you miss a hole or two, just add some rust streaking down where there is a rivet missing. It happens on occasion on real vehicles too.
Oh, and what scale did you need them? I have the appropriate software and can adjust them to whatever scale you would like as well as re-arrange the parts layout to fit whatever size stock you would need. Just PM me and let me know if you still want help.
|
|
|
|
Post by Scarper on Oct 7, 2009 15:47:31 GMT -5
Thanks for the tips, commissarbob! This thing is taking an age to do as is, so I might give that rivet technique a try - what's another hour worth anyway? Thanks so much for the offer with the resizing, but it turns out I was just having a 'technical fault' (i.e. being moronic), and I've actually got it sorted now! I'm working on some remnants tonight, but maybe a truck update tomorrow |
|
|
|
Post by commissarbob on Oct 7, 2009 17:18:19 GMT -5
An hour? You work fast! Most of my tanks have an excess of 500 rivets... Some exceed 1,000... Anyways, for those who want a halftrack, take a look at this Forgeworld kit at www.forgeworld.co.uk/ohalft.htm and apply the same conversion. I think the tracks would look excellent on it! |
|