|
|
Post by 3ff3ct on Feb 14, 2011 10:41:14 GMT -5
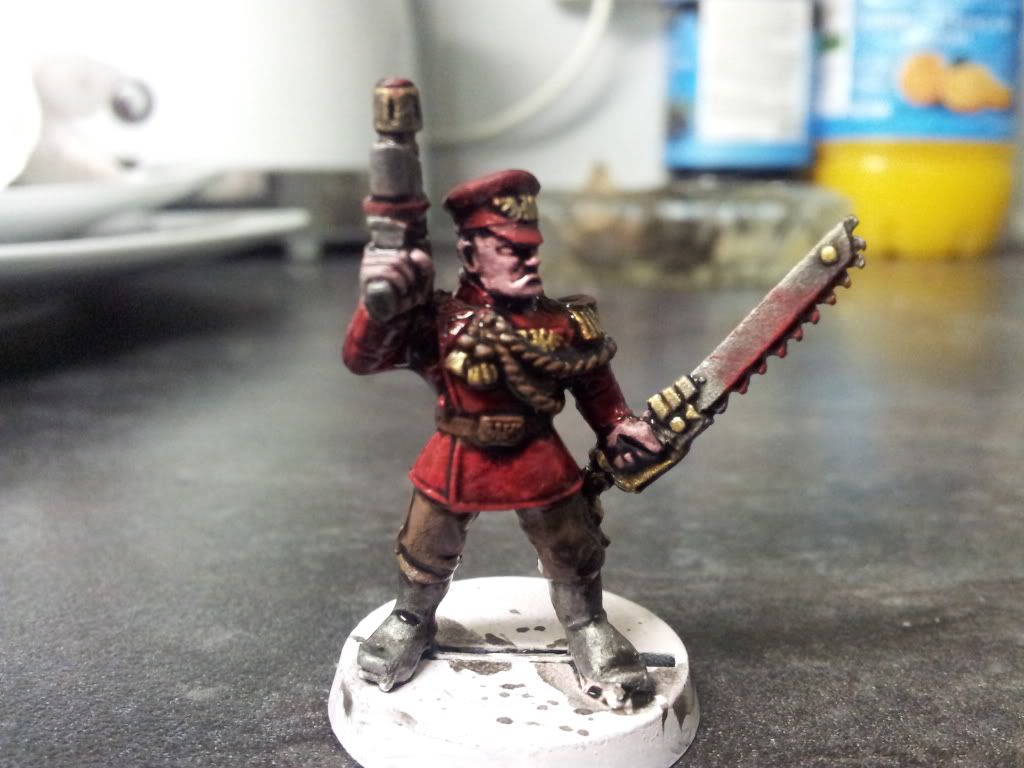
So lots of people can now upload pictures and post them thanks to the fabulous threads stickied at the top of this board, Picture Hosting ( commissar.proboards.com/index.cgi?board=picpost&action=display&thread=2536) and How To Post An Image ( commissar.proboards.com/index.cgi?board=picpost&action=display&thread=2549). However, not everyone is in the know about taking decent pictures. I intend to resolve this in there here thread. I'm not saying I am the Don of picture taking, that I am professional or that I am right. I am simply showing you how I do it. Feel free to add improvements to the thread if you've discovered a better way of doing it! So, what do you need? Have a look at the no expenses spared example below.  As you can see, no expense spared  Note where the light source is coming from (window) and which direction it is going. You could replace this with a desk lamp, although as a trained artist I prefer natural light to anything else. I'll add in now that it is a bad idea to use a flash, it will wash out the picture and make evrything white. I HATE flash. The camera in question is around 5 years old, and not great. However, it does have a Macro setting, which looks like a little flower (awww how cute). This is awesome for taking pictures of minis. Its always worth taking 3-5 pics of what youre photographing, and picking the best from those. Nothing sucks like uploading one blurry picture. Anyway, here's the picture I took using the setup shown.  Not bad, yet not great. There's lots of space that's not needed, and the image is a bit dark. This is were some (very inexpensive/free) post-production editing comes in. First of all, crop the image so your mini is in the middle of the shot. It's always a good idea to leave a bit of space around the focus of your picture.  In the next picture, you can see that I have cropped and brightened the image. Cropping tools are free on Photobucket, and I altered the brightness using the software I got with my digicam.  So there you go, jobs a good 'un! Alls thats left is to finish painting my mini....! Hope this has helped any photo novices  |
|
fianoglach
Guardsman
 Courage in our hearts, Commitment to our promise, Strength in our limbs
Posts: 84
|
Post by fianoglach on Feb 18, 2011 10:49:39 GMT -5
Thanks for the guide! Great glow effect on the base
|
|
|
|
Post by jayadan on Feb 19, 2011 17:10:21 GMT -5
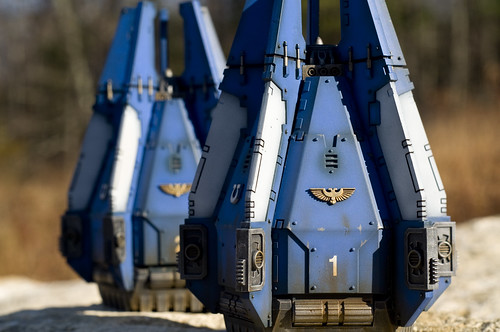
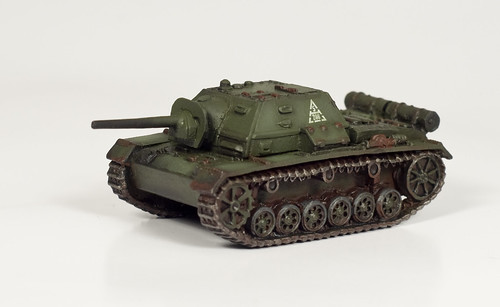
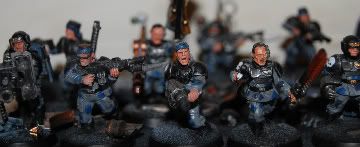
Natural light is fine, but trying to use the indirect light from a window like that means that your camera is going to have to open up the aperture and slow down the shutter speed in order to get the shot. This will mean that a hand-held shot will be blurry (so use a tripod) and your depth of field (the range of focus) will be extremely shallow. So if you must use natural light, do it outside and get the most benefit of that light. You might think that you can't get good shots in direct sunlight, but you can actually use something shiny to bounce the light onto your shot as I did in these photos:  Space Hulk Genestealers Space Hulk Genestealers by Jay Adan, on Flickr  Space Marine Terminator Sergeant - Space Hulk Space Marine Terminator Sergeant - Space Hulk by Jay Adan, on Flickr In both cases I bounced sunlight off of the back (metal portion) of a white board. It made for a really nice diffused lighting that was still bright enough to really light up the minis. But even direct sunlight can work well under the right conditions. This one was taken in direct sunlight but the light-colored rock below reflects enough light back on to the model to soften the shadows.  Ultramarines Drop Pods 1 and 2 Ultramarines Drop Pods 1 and 2 by Jay Adan, on Flickr Of course, the downside of using natural light is that you can't always count on it. It might be a slightly cloudy day meaning that your light is constantly changing... or it might be raining.. so it's always nice to have some lights on hand so you can shoot indoors.  Imperial Guard Veteran Imperial Guard Veteran by Jay Adan, on Flickr That was shot on my dining room table with a couple of desk lamps right up close to the models so that the background would fade to black.  Flames of War SU76 Flames of War SU76 by Jay Adan, on Flickr This was shot with a couple of cheap photo lights purchased from BHPhotoVideo.com with the model on the back side of a poster. |
|
|
|
Post by 3ff3ct on Feb 27, 2011 8:41:45 GMT -5
Cheers for adding the lighting bit, not something Ive used a lot of, it seems i have learnt from my own thread! ;D Nice one for stiky-ing it too mods, we love you  |
|
|
|
Post by Morat on Feb 27, 2011 11:01:02 GMT -5
OK grab a cup of strong recaff and matchsticks for your eyes because I'm going into dull technical stuff.
Having a basic understanding of the mechanics of digital photography is worth it in my book as it allows you to fiddle to get the results you want. Little compact cameras (or worse phone cameras) like to "help" you by hiding everything away and giving you just one button to press. This can make specialist photography like y'know, taking detailed pictures of fictional, plastic, army fighting men harder than it should be.
In photography you are exposing a sensitive surface (either film or a high tech digital sliver of magic) to light through a small hole and a series of pieces of glass to focus it. To make your photo bright enough you have to expose the surface to the light for a long enough period. This period oof time is pretty short in most modern cameras (or modern films). There is another variable though, and that is the size of the hole, and this has it's own part to play.
First let's look at exposure time, It's pretty obvious that you want your photos to be pretty bright, so in a perfect world, the longer the exposure the better the picture. Indeed you can take a pretty good picture by moonlight, assuming of course you're willing to open the shutter (the cover over the hole in the front of the camera) for perhaps a full minute or more. Of course if you're taking a shot by hand, you would have no chance of holding it steady for one minute. In fact if the shutter is open for more than a mere 100th of a second, and the shot is hand held, it'll wind up a horrible mess. Of course a tripod or a pile of books and perhaps some Blu-tak can allow you to overcome that. A handy tip with compact cameras is to use the time delay function. Line up your shot, with the camera fixed in position, then hit the shutter release and 10 seconds later the photo is taken without you needing to touch it (I find that the action of pressing the button on the camera can move the camera - even if it's held down - resulting in a blurry image).
So from what we've seen so far it looks as though the most sensible way to take pictures is to have the shutter open for as short a time as possible (reducing the risk from camera movement). Lights certainly help with this, as the brighter the lights on the subject the less time the camera needs to be open for. This brings us onto the second variable, the Aperture (The size of the hole in front of the camera).
The obvious answer would be to have the hole as big as possible to let in as much light as possible and allowing you to have the shutter open for the shortest possible time. However this is where we run into one of the biggest problems of miniature photography. It is called "Depth of Field".
If you look at a lot of pictures of small stuff (and a lot of bigger stuff too for that matter) you'll see that not everything is in focus at the same time. Often with figures in a squad only one guy is sharp while models closer and further away from the camera are blurry. The amount of stuff that can be in focus at once is called the Depth of Field. In miniature photography the depth of field can be only a few millimetres so if a face is in focus, the rest of the model might not be let alone the model's squad-mates. This is often not what you want (though it can look quite pretty), so what can be done. This finally is where we drag the Aperture back into the story.
The smaller the Aperture the deeper the Depth of Field, hence more of the image can be in focus at once. So this is why you don't really want the aperture as wide as possible despite it reducing the length of time the shutter needs to be open. Indeed when I take photos of figures I have the hole very small, and the exposure time very long (I usually open the shutter for 6-8 seconds (so that's 6 to 800 times longer than the time I recommended above to remove camera shake)).
That's all very well fo me and my fancy camera with it's ability to fiddle with all the settings to my heart's content (or provide thousands of new ways to take a bad picture if you prefer). What if you have a compact camera that doesn't allow you to tinker?
Well you need to fool it into doing what you want. The macro mode as already mentioned will make the camera use the smallest hole it thinks it can get away with to produce a decent shot, you can allso make the aperture smaller the more light you throw at it. Shooting outside on a cloudy day provides the optimal amount of diffuse light. In that environment you will likely be able to get away with hand held shots with a moderate Depth of Field. Inside, you'll need extra lights and the more the better (and the more directions the better), diffusing them through a bit of tissue can help too. If you are shooting inside with a compact, you will likely need to lock the camera down with something as camera shake will be a bigger problem.
Think that about covers the subject without dragging into too much camerabore jargon, but then I -am- a camera bore...
|
|
|
|
Post by jayadan on Feb 27, 2011 16:16:23 GMT -5
Depending on your camera it might even have some manual settings that you didn't even know about because they're buried in the menu settings. It's definitely worth digging into your camera's manual to find out what it can really do.
|
|
|
|
Post by jayadan on Feb 27, 2011 16:54:19 GMT -5
Speaking of camera settings...
White Balance!
Most cameras have a white balance setting in the menu. Small automatic cameras will generally have an auto setting that they use... automatically. What white balance does is compensates for the color of the light you are using when you take a photo.
For example, an old-school tungsten light is very orangy. A florescent will tend to be greenish. You might not notice this because your brain sort of adjusts the colors for you. You might notice if you look into a room lit by tungsten light to from one lit by fluorescents. The cameras will generally try to make the same adjustments your brain does but it's not always successful.
For a great example, compare the second and third photos in the OP with the final picture in that same post. Do you notice how blue everything is? The camera has not compensated for the color of the shaded sunlight. Cameras with white balance settings will generally have a setting for these basic lighting situations: Tungsten, Florescent, Daylight, Shade, Clouds, Flash.
Even if you don't have those options you can use a program like Picasa (free from Google) to adjust the coloration after the fact. If you have Photoshop then you have even more control over this but, ironically, the increased control can make it more difficult to get a good final result if you're new to the program.
|
|
|
|
Post by DadCRO on Oct 6, 2011 19:46:39 GMT -5
You are excused for that horrendous double-post.  |
|
|
|
Post by 3ff3ct on Oct 7, 2011 2:24:15 GMT -5
And the 'cheap and easy Noobs Guide to Pictures' becomes increasingly larger and confusing....  |
|
|
|
Post by DadCRO on Oct 9, 2011 16:45:55 GMT -5
And the 'cheap and easy Noobs Guide to Pictures' becomes increasingly larger and confusing....  +1 I just skip the 'technical stuff'. |
|
|
|
Post by 3ff3ct on Oct 19, 2011 20:43:39 GMT -5
Oh I'm not 'dissing' whats been said, its good stuff  Just to clarify. I think i'll be sticking to my cheap-o A4 paper and free sunlight ;D |
|
|
|
Post by DadCRO on Oct 26, 2011 20:57:24 GMT -5
And so you take the square root of the hypotenuse of the flash lens and add that the the circumference of the circular lens and then multiply that to the third power of light speed (which you will need for your $500 lamps to be able to see your model from every angle).
|
|
danesk
Captain
   Tread softly, and keep the finger on the trigger
Posts: 207
|
Post by danesk on Apr 7, 2013 0:45:43 GMT -5
I have to add to this.
When taking pictures don't be afraid to use the best camera you can find! If you have a friend or relative who ownes a Leika, Nikon, canon and so on system-camera, it's a deathsin to use anything else!
Also, when buying cameras, take your time! Compare prices and mess with the salesmen in the stores. They have the knowledge (some of them) and the expensive products. If you have a budget for a camera on 600 dollars you are doing your life's worst mistake if you buy a compact. As others have said before, you loose the control over the picture plus that no compact is as durable as a system-camera.
Example: my Nikon D60 rolled down a mountain, when I retrieved it the only thing that had happened was that it had been turned on.
For last, objectives. If you buy an expensive camera you'll probably want to get more equipment to it. I say, do it! But don't rush! The objective that comes with the camera will suffice.
|
|
|
|
Post by 3ff3ct on Apr 7, 2013 2:08:19 GMT -5
True words. a crap camera will certainly take crap pictures. And mobile phone pictures are certainly down there in the bottom of the pile. I recently dropped my compact/point-and-shoot, it now needsto take a trip to the repair shop  |
|
|
|
Post by Paradill on Apr 7, 2013 3:24:14 GMT -5
My phone camera is awesome, you're all liars  My iPad camera is better still. I steal my fathers cameras (he's a professional sports photographer by trade) when I want people to actually see what I've painted in any sort of detail. |
|
|
|
Post by Adkenpachi on Apr 7, 2013 4:18:59 GMT -5
My phones 10mp HD...
|
|
danesk
Captain
   Tread softly, and keep the finger on the trigger
Posts: 207
|
Post by danesk on Apr 7, 2013 4:29:13 GMT -5
Ok, time to clarify one thing: the number of megapixels is secondary to the rest of the product. I've a phone with 11mp, but my hp-compact is taking better pics with 8 mp.
And I dare say that's there no phone out in the market with a camera that is good enough to take pics on minis with.
|
|


 My iPad camera is better still. I steal my fathers cameras (he's a professional sports photographer by trade) when I want people to actually see what I've painted in any sort of detail.