|
|
Post by majorspeirs on Jan 31, 2012 6:46:05 GMT -5
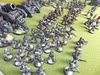
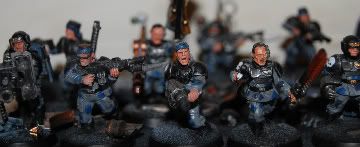
Greetings all and welcome to my second comprehensive tournament report. After having a blast at the 1.5k Melbourne in Flames (MIF) last year, I enrolled in the 1.2k Arcanacon (Arc) this year. It was a two day tournament with six games and 150 players. It was played in 35 degree (Celsius) heat in the two un-ventilated gyms of the Collingwood College in Melbourne (so… much… sweat…). I drank around 15 litres of water over the two days. Out of the 150 players I placed 97 (I’ve never professed to being a great player  ). I had a win, a draw and four losses, though I was cheated out of a win with the draw, and two of the losses were down to the wire (the other two were definitive failures). I’m not too concerned about high placing and such, as I’m new to the world of competitive gaming (after 10 years of friendly games) – I play the game for fun. Secondly, due to the calibre of the other players (some overly competitive, but most competent) I doubt I will ever get much higher than mid-range. My opponents were one Marine army, one Eldar, two Blood Angles and two Guard. Anyway, to start proceedings this is the list that I took: CCS w/ Meltagun and Lascannon (My commander is called Major “Savvy” Savoy Watson) Veterans w/ Shotguns, 3x Flamer, Power Fist and Demolitions (in Vendetta) Veterans w/ 3x Meltagun (in Valkyrie) Platoon:PCS w/ 4x Grenade Launcher 2x Infantry Squad w/ 2x Autocannon and Commissar Heavy Weapon Squad w/ 3x Autocannon Valkyrie w/ Multilaser and Multiple Rocket Pods Vendetta w/ 3x Twin-linked Lascannon Leman Russ w/ Heavy Flamer Basilisk w/ Heavy Flamer Griffon w/ Heavy Flamer Total: 1200 I tried to produce a reasonably balanced list that should be able to deal with most situations. Overall I think it handled itself well. I do think I could have done with a little more plasma, or something else hard-hitting. This is my force marshalled for battle:  Below you will find a full battle report and pictures of each of the games that I played at Arcanacon. I didn’t take notes, so I am going from memory and the pictures I took. I apologise to my opponents if there are some inaccuracies, though I’ll do the best I can. I also apologise to you the reader, because the pictures are rather poor, as the lighting in the venue was atrocious. Furthermore, my writing is not the best – this has been written on the train as I’ve been travelling to work, and only roughly proof-read, so I’m sorry if things don’t make sense or flow, or if there are grammatical issues. Anyway, that is enough preamble – TO WAR!!!! |
|
|
|
Post by majorspeirs on Jan 31, 2012 6:54:48 GMT -5
Day One Game OneDue to the whims of fate my first game was against a standard Marine army, dressed as Custodians. The mission was basically kill points with a bonus objective. The opposing army comprised of a Terminator Librarian and 5 regular Terminators, two Tactical Squads (one Combat Squad-ed with a Rhino), a Vindicator, and Dreadnaught, two Multimelta Attack Bikes and a Techpriest with a Thunderfire Cannon.  Deployment: Deployment:My opponent won the roll off and chose to go first. He deployed his Techpriest in the ruin on the far right (all directions will be given from my side of the board) and the Attack Bikes to the right of the bunker in the middle. Also in the middle but to the left of the bunker he deployed his Dreadnaught, Terminators, full Tactical Squad with Missile Launcher and Combat Squad with Flamer in the Rhino. To the far left was the Combat Squad with the Lascannon. I decided to hold back my fliers, but deployed everything else. My Basilisk deployed behind a rock on my far left. In the middle left my CCS deployed on a building with the Autocannons to their left and the Russ and Blobbed squad to their right. Just a bit further down my Griffon was deployed behind a large rock. Turn One:I tried to steal the initiative, but rolled a five. My opponent began by turbo boosting the Attack Bike squadron straight forward to be mostly obscured from my models by a boulder. The Terminators and Dreadnaught advanced six inches and the Rhino shuffled forward behind them. Shooting shook my Russ, and the Thunderfire Cannon killed 3-4 Guardsmen in the Blob squad.  The shaken Russ advanced six inches forward. Through shooting the Autocannons I wrecking the Rhino, and killed three of the occupants with a slightly scattered Basilisk shell. I missed the Vindicator with the Griffon and the CCS similarly rolled a 2.  Turn Two: Turn Two:My opponent again advanced his Terminators and Dreadnaught whilst the Attack Bikes shot 12 inches towards the Griffon. Everything else remained in position. The Thunderfire Cannon proceeded to cause something in the order of 9-10 casualties on the infantry squad, whilst the Vindicator missed my Russ but finished off the poor infantry. Fire from the Terminators (Cyclone Missiles) and the Dreadnaught managed to knock the cannon off the Basilisk, and the Attack Bikes blew the poor Griffon to pieces. The Russ was again shaken.    My Valkyrie arrived this turn, but not the Vendetta. Rolling a 3-4, the Valk came in on the left edge and moved into position to shoot the 10-man Tactical Squad towards the centre. The Melta Vets leapt out to blow the Lascannon Combat Squad on that flank to hell, and the Russ retreated out of charge range of the Terminators. Shooting didn’t quite go as planned. The Valkyrie killed two Tactical Marines in the middle squad, whilst the Autocannons and CCS failed to do anything. I finished up with the Veterans because I figured they would give me some solace, but apparently not, as they failed to kill a single out-of-cover-Marine with Meltaguns and Lasguns.  Turn 3: Turn 3:This turned was opened by the combat squad squaring off against the Veterans, while the Terminators, Dreadnaught and Vindicator consolidated on the central objective. The attack bikes zoomed in to shoot at the side armour of the Russ. The middle tactical squad missed the Valkyrie with its Missile Launcher, whilst the combat squad softened up Veterans with Bolt Pistols, killing 3 or so. The Thunderfire Cannon blasted away at the CCS, but only took a wound each off Savoy and the Lascannon team. The Vindicator then proceeded to kill an Autocannon team and the Attack Bikes exploded my poor Russ. The veterans were assaulted by the Combat Squad, killing four more of their number.   This turn the Vendetta arrived on the right flank. I had a predicament: it would take two turns to reach the centre to contest the objective – I could either turbo-boost now and shoot next turn, or shoot this turn then turbo-boost to contest. My logic was that I may as well try to take out the Techpriest with his Thunderfire Cannon as I flew past. This failed horribly though as I missed with two Lascannons and he saved against the third. My CCS exploded the Vindicator with a well-placed Lascannon bolt. The Valkyrie let rip at the concentration of Terminators in the middle (nicely huddled), though the first template half scattered and the other missed all together. The Melta Vets were wiped out by the Combat Squad, again causing no casualties in return.  Turn 4/5: Turn 4/5:The last two turns are a little hazy for me. I can’t remember the exact events, however I do know that both my fliers were shot down and the Basilisk hull finally wrecked. The Flamer Vets suffered about 7-8 wounds from the exploding Vendetta, but I strangely saved most of them. The game ended with the Veterans pinned on the Vendetta base before being wiped out. I can’t remember whether Major Savoy and last two Autocannon teams made it to the end or not (no photos!!), but regardless the game was a rout.   
|
|
|
|
Post by dcrabb on Jan 31, 2012 10:18:12 GMT -5
Thanks for the battle report, sorry your opponent was a jerk.
I love the look of your Leman Russ. It looks like a kit bash of a Tiger I turret, old style Predator/Rhino hull, and Chimera sides. I am a big fan of German WWII tanks and was thinking of using a Tiger I turret. Is yours from a 1/48 scale kit? I would love to know.
Thanks,
Doug
|
|
|
|
Post by majorspeirs on Feb 1, 2012 5:20:12 GMT -5
Thanks dcrabb - the only kit that was used to create the Tiger Russ was track wheels and Chinera track units. The rest was made from scratch using large amounts of plasticard. I used a jar lid as the basis of the turret. I tried to make the model more of a representation of a Tiger rather than a direct replica. Round Two – Blue EldarMy second opponent played a Jetbike Eldar army, which was exceptionally very well modelled and painted. His army consisted of Yriel and a Guardian Squad in a Wave Serpent, an Autarch accompanying a five man Shinning Spear squad, two 5-6 man Jetbike squads, a Fire Prism and a Shadow Weaver.  Deployment DeploymentThe game was basically a straight forward spearhead objective snatch with a twist – random asteroids landed all game. You got to choose an enemy unit at the start of your opponent’s shooting phase to be hit by an asteroid, then roll on two tables to see the affect. The first table ranged from “no asteroid” to a “Str 7 AP3 asteroid”. The second table determined whether it was a single hit, a small or a large blast marker. For memory I think my opponent won the roll off and gave me first turn. I placed my objective around the back third of my quarter so I could best defend it whilst remaining in cover (probably should have castled, but I don’t like doing that), whilst the opposition placed his in the back of his quarter in some ruins (about 12 inches from the corner). I assumed he would reserve everything, but figured if he did I would have a chance to re-manoeuvre, so I deployed facing his quarter. My Valk was far forward in the centre and the Vendetta far forward on my board edge. The PCS was far forward on the right also. The Russ was back a bit from the centre on the right, whilst the infantry blob deployed forward in and around the central ruins to have a reasonable field of fire. The CCS and Autocannons deployed around the objective in some craters, whilst the Griffon deployed directly behind them (far enough forward to splat on-coming bikers) and the Basilisk deployed on the hill in the corner to maximise range (but also to ensure a good LOS). Turn 1/2 As I suspected, my opponent held everything in reserve. This meant my scout move, turn one and turn two were spent manoeuvring to face the long table edge. The end result was that the Russ swung towards the opposite board edge slightly, while the Griffon pulled back a little. The PCS advanced into the adjacent table quarter. My Vendetta ended up to the right of ruins on the other side of the board, whilst the Valk was further to the left of them (see photo below). My opponent fired an asteroid at my PCS in turn 1, killing 3, and the infantry blob turn 2, killing 1-2. My opponent’s whole army arrived at the back half of turn two. On my far right corner he deployed one Jetbike Squad and Yriel’s Wave Serpent. On my far left corner he deployed the other Jetbikes along with the Shadow Weaver and the Fire Prism. In the centre he deployed the Shining Spears and Autarch in a line-abreast, gunning straight for the infantry squad, formation. I fired my asteroid at the Jetbikes on the far left, managing to kill one. His Shadow Weaver fired at the infantry, killing 3-4, and the Fire Prism immobilised the Vendetta, though luckily it was facing the opposite edge of the board.    Turn 3 Turn 3I started this turn by moving my Valk onto the objective on the left so the Melta Vets could blow up the Shadow Weaver and the Valk could kill some Jetbikes. The Flamer Vets decided to stay in their immobilised Vendetta. I started proceedings by trying to use my orders to ignore some Jetbike cover saves with the Autocannons (before remembering they have a 3+ armour save anyway). The combined fire of my right flank from the Griffon, Autocannons, Infantry Blob and Russ managed to kill four of the five Jetbikes on that flank and a single Shining Spear in the middle. The Basilisk launched a round to the opposite corner, but failed to hit the Fire Prism. The immobile Vendetta also fired on the Fire Prism, scoring a weapon destroyed result. At this point I reminded my opponent to fire his asteroid, which he fired at the Melta Vets who were about to shoot at the Shadow Weaver. It killed three, forcing them to flee out of range of the Shadow Weaver. A little disheartened, I fired the Valkyrie at the Jetbikes in the corner, but didn’t kill any.   My opponent now moved the Jetbikes on the left flank onto the objective under the right wing of the Valk, whilst the now prism-less Fire Prism flew towards my Melta Vets to chase them off the board. The Shining Spears lined up my poor Infantry Blob in the middle. The lone Jetbike on the right hid behind a bunker whilst the Wave Serpent advanced 12 inches, before firing its Missile Launcher at the Griffon, shaking it. The Shadow Weaver fired on the Autocannons, causing a wound (I can’t remember if one was insta-killed or not). The Shining Spears shot at the Blob Squad to soften it up before assaulting. On the left flank both the Fire Prism’s shuriken catapults and those of the Jetbikes fired at the veterans, killing another three (taking them to below half strength).The odds weren’t stacked in my favour for the infantry blob in the middle when the Shining Spears came streaming in. Between the dangerous terrain tests from the Shadow Weaver when they were forced to pile in, and all of the assault wounds, they were completely wiped out before they had a chance to retaliate. Turn 4 Luckily (as you shall see) the Melta Vets only fled three inches. I hate to admit it, but I was rapt that my blob squad hadn’t held on as the Shining Spears rolled low for their consolidation, leaving them bunched where the infantry had been. It was now that I pulled the wing off the Vendetta to measure the maximum possible disembarkation away from its side door for the Flamer Vets, moving them into position to hit the Shining Spears. The shaken Griffon reversed 12 inches back towards my board edge, whilst the Basilisk lined up the Wave Serpent. The Valkyrie pulled back out of the ruins to avoid rear armour shots from the Jetbikes, whilst the Lieutenant and GL guardsmen of the PCS ran towards it. The Shooting phase began with the Flamer Vets, CCS, Autocannons and Russ opening up on the Shining Spears, killing all except a regular Shinning Spear and the Autarch, who failed their leadership test and fled about 5 inches – I was disappointed because I wanted to assault them with the Flamer Vets. I lined up the Basilisk at the Wave Serpent, but it scattered eight inches and landed right on top of the lonesome Jetbike behind the bunker, killing the little bugger. Back on the left flank only one of the retreating Melta Vets was in range of the Fire Prism. It just so happened that this was the Veteran with the bright orange armour and hands (who I have dubbed “Mr Twistie-Fingers”). Well, Mr Twistie Fingers calmly levelled his Meltagun (as he ran in terror for his life), and blew up the Fire Prism in a dazzling ball of flame! This was not Mr Twistie-Fingers only appearance at Arcanacon.    My opponent’s Shinning Spear and Autarch fell back further, though only about eight inches. The Wave Serpent darted up and unloaded Yriel and the Guardian Squad, ready to maul my CCS. The Shadow Weaver fired on the Flamer Vets, killing five. The Jetbikes on the left objective fired at the two PCS members, causing four wounds. I went to ground, and the Lieutenant rolled two fives, whilst the GL guy rolled two sixes (much to my surprise). I was further surprised when the combined torrent of fire from the Wave Serpent and Yriel’s Guardian Squad only killed the Meltagunner, standard Veteran and put a wound on Savoy when they shot at the CCS (Yay! BS3 working FOR me for a change!). The fleeing Autarch used his Fusion Gun to (quite easily) wreck the Russ.   Turn 5 Turn 5The Melta Vets fled a hearty 10 inches towards the board edge, well out of range of anything, so I just took them off. I trundled forward my Griffon a few inches and the Basilisk a full six inches towards the Guardians. The Flamer Vets moved towards the right to bolster that flank (left would have been better), not taking any casualties to the dangerous terrain tests from the Shadow Weaver. The Valk again lined up the Jetbikes on that objective, whilst the GL guy cowered in the mud. My opponent’s asteroid scattered off target this turn. I now used this opportunity to forsake my orders and let rip with the Heavy Flamers from my artillery. The result wasn’t pretty, as only Yriel and a single Guardian were left standing. The Basilisk clipped the rear armour of the Wave Serpent and was lucky enough to blow it up. The Autocannons and CCS Lascannon finished the job, killing Yriel and that last Guardian. The Valkyrie managed to kill another Jetbike on the left, and the Vendetta fired at the fleeing Autarch and Spear and fried them.  My opponent kept the last three Jetbikes on the left objective, shooting them at and killing the GL Guardsmen from the PCS. The Shadow Weaver fired at my CCS on the objective, killing the Lascannon team and pinning Savoy. I rolled a three and the game continued. Turn 6This turn the Flamer Vets changed direction back towards the left flank, though after last turn’s move the other way, they wouldn’t be able to reach the objective. I placed the Valk in position to contest the left hand objective. My opponent’s asteroid hit my Autocannons but they made their cover saves. The Valk lined up the Jetbikes and managed to kill one more – leaving two left alive. The Basilisk launched a template onto the Shadow Weaver, knocking off its main gun. My opponent turbo-boosted his now gun-less Shadow Weaver halfway across the board towards my objective. This turn I rolled a six and the game continued on. Turn 7This turn I launched everything I had at the two Jetbikers on the opposing objective and the Shadow Weaver, including the Basilisk, Griffon, Autocannons and Valkyrie. I killed one Jetbike, but was unable to take out its compatriot. Similarly I wasn’t able to bring down the Shadow Weaver. The veterans assaulted the Weaver - I rolling two sixes, penetrated, and rolled a “wrecked” result, but my opponent made his turbo-boost save. It was only later that I it occurred to me this save could only be taken against a shooting attack. Unfortunately this meant the game ended as a draw, as my opponent then turbo-boosted the Shadow Weaver to contest my home objective. No matter though, as the game was still a good one. |
|
|
|
Post by dcrabb on Feb 1, 2012 10:10:50 GMT -5
Keep the Batreps coming. They are great, too bad your opponent wasn't a decent sport and allow you your asteriod rolls, especially since you allowed him to do his (maybe he didn't get his Vegemite that morning). It is sad to say but tourneys can bring the worst out in folks. I wonder how things would change if they made the Sportsmanship prize bigger than the 1st place one. Hmmm.
The look of your army is fantastic. I love the German 88 feel of your "bassie" and the Tiger I look of the russ. The turret is really a lid and not an actual bit from a kit? That is awesome! The "chin" gun on the Vendetta is a nice touch too. Consider some ideas copied and used here in the States. Good on ya mate!
|
|
|
|
Post by Cosmic on Feb 1, 2012 10:14:49 GMT -5
I've really enjoyed reading these . I've never played a proper game and as such I usually steer clear from the battle reports but this one caught my eye. I've learned quite a lot and I'm impressed with your games. I too feel sorry for you with your opponents they sound like right a*******s |
|
|
|
Post by egon on Feb 1, 2012 10:22:57 GMT -5
Nice reports and bad luck that you didn't play against the best of opponents. To be fair though, you could have just asked if you could use the asteroid when you forgot about it.
I wouldn't have minded allowing that if it doesn't happen too often, everyone forgets stuff every once in a while.
Looking forwards to the next part.
|
|
|
|
Post by majorspeirs on Feb 2, 2012 14:29:18 GMT -5
@ egon I didn't ask because at the time I felt that I shouldn't have had to. In hindsight though this was the wrong thing to do. I should have asked, and I should have treated this guy the same as he treated me.
Also, just to put the situation into perspective, Arcanacon places equal weighting on the scoring of Sportsmanship as it does Battle Scores. This is the breakdown:
Comp Score: 30 points
Painting: 30 Points
Battle Scores: 120 Points
Sportsmanship: 120 points
I appologise that the third game is late - it was against a Guard opponent, and is taking a while to write up.
|
|
|
|
Post by majorspeirs on Feb 3, 2012 6:31:49 GMT -5
The third game from the first day was against Guard, which pleased me, as Guard games are usually well matched and bloody games. Game 3 This game was to be a pitched battle, two-objective mission, but there was a twist. Four warp portals were spread around the board. If infantry wanted to move into them they would roll on a table and either come out of a random portal, be able to choose a portal, or potentially roll on the deep strike mishap table. Most people I talked to simply ignored the portals in their games. This was my opponent’s army (which was markedly similar to mine): CCS w/ 2x Plasma and Medic 10x Storm Troopers w/ Melta, Plasma and Chimera w/ Multilaser and Heavy Bolter Veterans w/ 2x Plasma and Chimera w/ Multilaser and Heavy Bolter Platoon:PCS w/ Autocannon Infantry Squad w/ Lascannon Infantry Squad w/ Autocannon Hellhound w/ Heavy Bolter Scout Sentinel w/ Autocannon Russ w/ Heavy Bolter Exterminator w/ 3x Heavy Bolter Deplowment:I won the roll off and chose to go first (thinking, “Yay! I get to alpha-strike something for once!” (it doesn’t happen very often)), and placed my objective on my left flank at the edge of a building. My opponent placed his on the very top floor of a building on the opposite corner (it was a banner bearer, so if you see a banner in the photos, that was the objective). I placed my Basilisk behind the building on my far left to guard that narrow corridor (which was largely hidden from other angles). My Griffon was deployed in the opposite side behind a building. The blob was on my objective, with the Russ sitting in their midst. To their right, on the first floor of the building, the CCS set up with a good field of vision for shooting and orders. The Autocannons set up in the alley to the right of the CCS. The Vendetta deployed on the far right ready to dart forward, whilst the Valkyrie set up in the centre. My PCS were left on the edge of the board in ramshackle order where they had been unpacked as, put simply, I forgot they were there. My opponent deployed his platoon on his objective on the far right (remember, most directions are from my perspective), basically the 25 men were distributed over the three floors of the building. The Exterminator was to their left in the gap between two buildings and the CCS on the first floor of the next building along. The Sentinel was somewhere around there as well. Opposite my objective I was facing the standard Russ, Hellhound and the Chimera Vets. Further along the Storm Troopers deployed in their Chimera , ready to come roaring down the corridor on the far left flank. I won the roll to scout and flew my Valk (with Melta Vets) to 12 inches from the Hellhound, whilst the Vendetta moved hard up the right flank. The opposing sentinel walked out to get a bead on the fliers whilst the Stormies advanced 12 inches down the left flank. I was rubbing my hands together gearing up for the alpha-strike I was so excited about, and it was at this point that my opponent stole the initiative with the roll of a six. Turn 1My opponent began by moving his Chimera Vets toward the Valk and the Stormie Chimera another six inches down the left flank. Since the Valk and Chimera Vets were in the way, the Hellhound moved hard right to clear a building block to get a clear run forward next turn. At this point I braced for the worst – knowing full well what the weapons at this guy’s disposal are capable of. My trepidation was misplaced, as I watched what unfolded on the opposite side of the table: the heart-wrenching mediocrity of a dud Imperial Guard shooting phase. This is an occupational hazard for playing Guard, as I know full well from experience. My opponent systematically ran through each of his units either failing to hit, failing to wound/penetrate, or having me make my saving throws. The Exterminator wounded the Autocannons, but they made their cover save. The entire firepower of the Platoon and Sentinel failed to scratch the Vendetta. The CCS couldn’t draw line of sight to anything. The Plasma Vets failed to blow up the Valk. The combined fire of the Stormie Chimera and Russ managed to kill a total of three Guardsmen in the blob squad.   I began my turn by lining up the Stormie Chimera with the Basilisk. The PCS moved to their left to support the Basilisk. The Vendetta had very limited firing options, and the Veterans wouldn’t have been able to effectively get at the platoon, so it turbo boosted again into the rear right corner of the board. The Valk shuffled to its right and unloaded the Melta Vets to tackle the Hellhound. I opened up proceedings by ordering the Autocannons to Bring Down the Plasma Vet Chimera – which they admirably wrecked. The CCS ordered itself to fire on the Sentinel, shaking it. The Melta Vets then successfully destroyed the Hellhound, with two of their number being consumed by the ensuing explosion. The Valkyrie launched a multitude of rockets at the Plamsa Vets, killing four of them. Firing directly, the Basilisk missed the Stormie’s Chimera. The blob shot at something, but I don’t think they managed to achieve anything. Likewise the Griffon scattered off-target (twice) in its attempt to splat the enemy Guardsmen Squad on the top floor of the objective building. Finally the Russ opened up at the Stormie Chimera, managing to shake it.    Turn 2 Turn 2My opponent moved his Plasma Vets closer to the Valk to again try and take it out. The shaken Stormie Chimera advanced around 9 inches to the edge of the building between the Basilisk and Blob Squad and backed it into the gap, ready to disgorge his Stormies at my Russ or infantry next turn. The CCS also repositioned slightly so its plasma gunners weren’t behind walls. The Scout Sentinel retreated a full six inches from the Melta Vets. The shooting phase began when the Plasma Vets again tried to take out the Valkyrie, and failed (my opponent was using orders, I just can’t remember all of them). The enemy Russ fired at my own, but in such a way to kill the infantry around it as well, but it only managed to kill a Guardsman or two. The Platoon again fired on the Vendetta, with the assistance of the Exterminator, but failed to cause any damage. I began my turn by re-embarking the Melta Vets into the Valk and jetting it 24 inches between two buildings in the opposing deployment zone. Since it was unable to see the Stormie Chimera properly the Basilisk moved six inches left to the board edge and lined up a clean shot at the side armour of the enemy Russ. I moved my own Russ forward six inches so that my blob could move closer to the Stormie Chimera (I planned to blow it up with the CCS or Russ (preferably the CCS) and then plaster the little buggers inside with the infantry (and hopefully the Russ as well)). Finally the Flamer Vets disembarked from the Vendetta and positioned themselves to wreak maximum havoc on the enemy Platoon. I began with orders, firing the Autocannons at the Sentinel (immobilising it), and the CCS at the Chimera (knocking off its Multilaser). The PCS launched some krak grenades into the rear armour of the Chimera, and the Russ fired too, but I was unable to wreck the damn thing. The Basilisk then managed to take off the opposing Russ’ Battle Cannon with a well placed side-armour shot. The Vendetta shot at the side armour of the Exterminator, only managing to shake it. I let-loose with the Flamer Vets on to the platoon squads in the building. The result was absolute carnage. I was not sure how the squads were distributed within the floors, but between the flamers and shotguns (I held off with the Demo Charge), I cleared the bottom floor entirely, plus 2-3 Guardsmen on the floor above as well. I’d essentially managed to wipe out the PCS and most of an infantry squad. Finally my Griffon managed to kill two guardsmen on the top floor on the building and another three on the floor below, pinning that squad. All that was now left of the platoon was six or so Guardsmen on the top floor and a single heavy weapon team on the first floor. The Flamer Vets were now well out of assault range.  Turn 3 Turn 3My opponent disembarked the Stormies and moved them to engage my Russ. The Exterminator sped forward 10 or so inches away from the Flamer Vets, whilst the Plasma Vets raced forward into the Warp Portal in front of my lines. They disappeared and through good rolling re-emerged where my opponent wanted - out of the portal in front of his own Russ, relatively protected from incoming fire. The CCS fired through the building at the Valk, but was unable to damage it. The Heavy Weapon team fired at the Vendetta, shaking the flier. The Stormies now fired at my Russ, managing to immobilise it. At this point they charged into assault against it, latching their krak grenades all over the rear armour, wrecking the tank.  I began my third turn by rolling for difficult terrain for the Flamer Vets, managing to move all of them onto the first floor of the objective building on the right. The blobbed squad and the Basilisk stayed put, readying to unleash upon the now exposed storm troopers and the damaged Russ respectively. The Valk flew 12 inches over the building with the enemy CCS and disgorged its Veterans right next to the Exterminator. The Vendetta moved 18 inches back towards my side of the board to line up better shooting for subsequent turns. I ordered my Blob to First-Rank Fire on the Stormies, but alas, they rolled a double six (I would have been happy for the Commissar to shoot a Sergeant - I wouldn’t have cared…). Now without any strictures I did things in the sequence of my choosing. The Melta Vets fired at the Exterminator, blowing it to pieces – three of which embedded themselves in the Veterans. The Flamer Vets fired at and killed the Heavy Weapon Team. Meanwhile the Griffon managed to scatter a shot on top of the Vendetta, thankfully not rolling very high for AP. The Valk fired a Rocket Pod and Multilaser at the CCS, killing one. Between the Autocannons and my own CCS’s Lascannon, I managed to immobilise the Sentinel. I let rip with the Blob Squad, managing a sterling 6-7 casualties on the Stormies. The PCS then lobbed some Krak Grenades and fired a Laspistol round, finishing them off. The Basilisk finished the turn by failing to hit the opposing Russ.   Turn 4 Turn 4My opponent shuffled his CCS to the far right of the first floor of their building, and sent his Plasma Vets back into their portal, only to have them come out in front of my CCS (where they had gone in). The Stormie Chimera now decided that it was made of manlier-stuff, and tank-shocked the Blob Squad, although they happily passed their leadership test. My opponent fired his CCS at the Flamer Veterans, killing two of them, whilst the infantry squad managed to scrape a third kill. This was enough, as they decided to high-tail to out of there. They rolled a three and a one for their fall back move, and basically moved from the first floor of the building to the ground floor. The Plasma Vets and the Leman Russ (Heavy Bolter) fired at the Blob Squad, killing one or two. The sentinel fired at the Valkyrie, but missed with both its Autocannon shots. I now swung the Vendetta across my lines to fire at the Sentinel, and with the Flamer Vets continued their very slow retreat (another whole two inches), I realised the Melta Vets were the only way I could claim that right objective, so chucked them back in the Valk (again) and turbo-boosted it next to the objective on the top floor of the building, to contest it at the very least. My CCS decided to climb down from their first floor position in an attempt to deal with the Plasma Vets in front. They however rolled two inches, so didn’t get very far. The Autocannons advanced six inches forward to try and open up better shooting opportunities next turn. The CCS and PCS both fired at the Plasma Veterans, killing one of their number. The blob squad fired at the Chimera, knocking off its Heavy Bolter. The Autocannon teams ran further out into the open, whilst the Vendetta knocked the gun off the Sentinel. As they retreated the Flamer Vets fired at the squad on the top of the building, as did the Griffon, killing all bar the Heavy Weapon Team. The Basilisk again failed to kill the enemy Russ, and the Vendetta wasn’t able to finish off the Sentinel.   Turn 5 Turn 5My opponent again tank shocked the Blob Squad with the Chimera, but they stoically remained in position. The Plasma Vets moved six inches towards the Blob, whilst the Russ moved forward. The CCS managed to inflict another wound on the Flamer Vets, whilst the Heavy Weapon Team on the objective kept its head down. The Russ and the Plasma Vets killed off another Guardsman from the Blob. This turn the Flamer Vets again retreated a measly 5 inches, whilst the CCS picked up their game and got out of the building, ready to assault the Plasma Vets. The combined fire of the Autocannons, Blob Squad and the PCS failed to damage the pesky Chimera. The Basilisk again missed the Russ, whilst the Griffon killed off the last members of the Platoon holding the objective. The Vendetta stunned the Scout Sentinel. The fleeing Flamer Vets managed to kill more of the enemy CCS, leaving two alive. My own CCS killed a Plasma Vet with either a Meltagun or a Laspistol, before charging into combat, wiping them out, only to lose one wound on the Lascannon team. They consolidated a full six inches forward.   Turn 6 Turn 6My opponent advanced his Russ forward as far as he could, and tank shocked with the Chimera further into the Blob Squad (who made their leadership test). The enemy CCS fired at the Flamer Vets again, but didn’t cause any wounds. The Flamer Vets fled back another few inches. The CCS advanced towards the Russ and blew it up with their Meltagun, while the Griffon missed the enemy CCS. The Autocannons wrecked the sentinel, while the Vendetta killed a member of the enemy CCS. The Blob this turn immobilised the Chimera. The Basilisk finished by firing at the last member of the enemy CCS, but it scattered onto my Flamer Vets, killing all bar the Veteran Sergeant (who went to ground and was clever enough to roll a six).  Turn 7 Turn 7My opponent fired his last CCS member’s Plasmagunner at the Vendetta, but failed to achieve anything. The Vendetta retaliated by blowing him away. My CCS finished the game by wrecking the storm trooper Chimera with a well-placed Meltagun shot (which thankfully didn’t explode, as my blob squad was massed around it). This was my first and only win of the tournament. |
|
|
|
Post by Bentath on Feb 3, 2012 14:10:14 GMT -5
Your after action reports have been good reads and could give some tips for fighting armies that I haven't faced yet. Keep them coming.
|
|
|
|
Post by majorspeirs on Feb 4, 2012 1:53:58 GMT -5
Day TwoGame FourThe fourth round of the tournament began at 9am on the Sunday morning, by which time it was already 32-33 degrees. The table was split into thirds length-ways, with an objective in the centre of each. Deployment was from the short table edges, and outflanking was not allowed. The objectives were claimed if the scoring unit was within scoring range at the end of the turn, and would remain claimed if it moved away at the next round. This time I was facing Lamenters. His army included a Librarian, a 10 man Assault Squad, a full squad of Death Company in a Storm Raven, a Tactical Squad in a Drop Pod and a Multimelta Land Speeder. My opponent deployed his Storm Raven behind a big rock (it was a very big rock), the Land Speeder behind a smaller rock, and kept everything else in reserve to deep strike. I deployed my Blob in the terrain near the objective in my third, supported by the CCS and the Griffon. The Russ deployed on the left with the CCS, and the Autocannons deployed on the right, in front of the Basilisk. The PCS plonked themselves on the rocky outcrop in the middle as a forward distraction/bait/response unit. Turn 1The Land Speeder turbo-boosted 24 inches and hid behind another rock on the left flank, heading towards my Russ. The Storm Raven advanced 12 inches and fired its Lascannon and some Blood-Something Missiles at the Russ, shaking it. The Drop Pod came down on my left flank and the Tactical Squad (not combat-squading) fired at and wiped out the CCS. My turn consisted of launching almost everything I had at the Storm Raven and Tactical Squad. I knocked the Lascannons off the Storm Raven and killed six of the ten Tactical Marines – my firepower wasn’t sufficient to take out the remainder. The Griffon however fired on the Land Speeder, lobbing a shell behind the rock, and blew it up in a puff of smoke.  Turn 2: Turn 2:The Assault Squad came down this turn. It combat-squaded, with five landing in front of the Autocannons and the other five plus the Librarian landing on the objective at the opposite side of the board. The Storm Raven advanced and disembarked the Death Company, while the four remaining Tactical Marines advanced on my blob squad. The Assault Marines fired on the Autocannons, killing a single team. The Storm Raven fired some shots at the Griffon, shaking it. The Death Company launched into assault against the PCS, tearing them to tiny tiny shreds, while the Tactical Marines leapt into the fray with the Blob squad, killing a handful whilst only losing one of their number.   I rolled for my reserves, but lamentably (haha) neither of my fliers decided to arrive, as they seem to have slept in. The only movement I had to do was to use my shaken Griffon to tank-shock the Drop Pod (why not?), achieving a stunned result. I no longer had anybody capable to giving out orders, so I shot the Russ first, scattered a shot near (but not near enough) the Death Company. The Autocannons fired at the Storm Raven but were unable to make their presence felt. The Basilisk killed four of the five Assault Marines in front of it (there always has to be one one…). The Blob continued to fail to kill the Tactical Marines, while taking more casualties. Turn 3The Death Company, in their raging state, marched towards their nearest enemy – the already beleaguered Blob squad. The Storm Raven advanced towards the Autocannons, while the Assault Squad Sergeant with his Power Fist leapt over them to the side of the Basilisk (I had been about to move it a couple of inches last turn, but unfortunately I had thought, “naa, it can see find here”). The Storm Raven killed another Autocannon team, while the Assault Marine Sergeant failed to scratch the Basilisk with a round from its Bolt Pistol. The Death Company butchered the Blob squad, killing them all. The Assault Marine Sergeant then charged and exploded the Basilisk and, much to my delight, was killed in the blast.  My turn began with my Vendetta and Valkyrie enjoying a late breakfast after their previous sleep-in, so once more my skies were empty. The Russ repositioned to have a clear shot at the Death Company, and the Griffon backed away from the Drop Pod, lining up its Heavy Flamer onto the bunched up Death Company. The single Autocannon team fired on the Storm Raven and managed to blow off its Multimelta. The Russ and the Griffon were rather unimpressive, as they succeeded in killing a two marines between them, one each from the Death Company and the Tactical Squads.   Turn 4 Turn 4My opponent succeeded in killing the final brave Autocannon with the Storm Raven Hurricane Bolters. My Griffon was also in an unenviable position, as the rampant Death Company pounced all over it, causing it to explode in a shower of shrapnel (none of which killed any of the assailants).  Fate wasn’t willing to intervene on my behalf, as when I stared down at the dice for reserve rolls I had a pair of snake-eyes staring right back – it would seem that after their sleep in and late breakfast, they had figured it was time to sneak in an early lunch. As a result, things were looking a little bleak at this point, as the only unit I had at my disposal was the Russ. It was however able to line up a nice shot against the Death Company, but due scatter and cover was only able to kill 1-2 or their number.  Turn 5 Turn 5Without a choice, the Death Company went storming towards the Russ, however they rolled poorly for difficult retain, and did not storm far. The Storm Raven turned its attention back to the Russ, but was unable to get through its side armour with its Blood-something-or-other missiles. After their sleep in, late breakfast and early lunch, the Valkyrie and Vendetta finally decided now was a good time to turn up (being turn 5 - they had no choice), and came tearing onto the board. The Valkyrie turbo-boosted take it towards the central objective. The Vendetta came in six inches and deposited the Flamer Vets to (try to) take out the Death Company. The Russ now swung its turret around and lined up a shot at the Assault Squad and Librarian on the far objective (normally I’m pretty cavalier with templates, taking all sorts of risky shots, but I wimped out of shooting at the Death Company this time, not wanting to hit my Veterans or Vendetta - I should have manned-up, it probably would have helped in hindsight). The Veterans unleashed hell on the Death Company, firing Flamers, Shotguns, a Demo Charge and a Laspistol. To my disappointment however they only managed to reduce their target to four members (now would have been the queue for a risky Battle Cannon shot…). The Russ (i.e., “I”) had different ideas, however it scattered poorly and only took out a single member of the far ranging Assault Squad. The Vendetta fired on the Storm Raven, but was unable to take it out. Turn 6My opponent now reshuffled the Assault Marines so that they were (even) more carefully spaced. The Storm Raven plastered the Vendetta with its last Blood-Something Missile, and the Death Company charged into assault with the Veterans. To my surprise they rolled terribly and were only able to take down six of the Vets. The four remaining vets decided it was high time for some tea and biscuits and successfully broke off from the combat, fleeing towards my board edge.  My Veterans kept fleeing straight off the board. The Russ again took a shot at the Assault Squad, and while the Valkyrie moved on to the central objective, it unsuccessfully fired upon the Death Company. It was about now that the game ended. In short, this game was a somewhere in the realms of a white-wash. That said it was an enjoyable game. My opponent deserves a lot of credit because whilst he was systematically wiping the floor with me, he was friendly and gracious in victory.
|
|
|
|
Post by majorspeirs on Feb 6, 2012 4:20:37 GMT -5
Game 5For my fifth round I again drew a Blood Angles army, though it was completely different to the last one (which was nice). This time it was a Dante/Sanguinary Guard list. It comprised of Dante (surprise surprise), a Librarian and a Priest (FNP) with Jump Packs, two units of Sang Guard, a squad of 10 Assault Marines and a Land Speeder with a Heavy Flamer (which he later described to me as the “sacrificial lamb”). This was a great game against a great opponent (he got me “star player” vote). The board was the best that I played on over the weekend - it had bunkers, a swampy creek and an awesome tower. It was made by a group called “Blue Forge”, which can be found on ebay (I was a little disappointed to miss out of the tower in one of the weekend raffles, even though I have nowhere to store it). The mission was played as Pitched Battle with DoW deployment, with two objectives that scattered around the board 2+D6 inches at the start of each player turn. My opponent won the roll and elected to go second. I opted to move my army on during first turn, holding the Vendetta in reserve to outflank. My plan was to shoot my opponent off his objective and to hold mine. As the objectives were mobile, and my opponent’s army so fast, I planned to focus on shooting for most of the game to keep my lines intact, then worry about the objectives towards the end; otherwise I could have been picked apart (more) easily. My objective was in front of a bunker near a swampy area, whilst my opponent’s was on his board edge in the dead-centre. My opponent elected his Dante/Librarian/Priest Sang Guard unit to deep strike, while the rest would come on from his board edge. The Assault Squad rolled a six for the ability that gives them furious charge and fearless. Turn 1/2My army moved on, with the Russ in my right corner and the CCS next to them. The blob moved on to their left, whilst the PCS deployed on the far side of the Bunker. My lines then consisted of the Griffon, Autocannons and then the Basilisk on the far end before the swamp. The Valk flew forward on the left to turbo-boost, though I brought it back behind the Blob on the second turn (again turbo-boosting). The Vendetta arrived turn two from the left flank, and I moved it up on my side of the tower. The PCS traipsed forward a small way.  My opponent’s reserves came right on cue, with everything but the un-accompanied Sang Guard arriving. The Assault Squad combat-squad-ed, with the boring unit sitting on the objective and the Power Fist/Meltagun/Flamer unit flying forward on my right flank, hidden behind the bunker along with the Land Speeder. The Dante Sang Guard unit landed right next to the Griffon. The interesting Assault Squad ran a little further behind the Bunker, while the Sang Guard immobilised and weapon-destroyed the Griffon.    Turn 3 Turn 3From this turn on my objective decided that it really liked the Assault Squad, and as if drawn by a magnet, constantly move in their direction for the rest of the game. The Autocannons had nothing to shoot at, so I moved them forward. The PCS also advanced (away from the Sang Guard, but still in LoS), while the Basilisk swivelled to fire indirectly on the Assault Squad behind the bunker. I then very carefully organised my units to fire on the Sang Guard and Dante. I first disembarked and moved the Melta Vets as far towards them as possible, before moving the Valk out of the way. The Platoon Blob then advanced hard in behind the Veterans to bring as many Lasguns to bear as possible. The Vendetta also swivelled to fire all its armaments. The Russ tried to advance forward, but got two inches before getting bogged in the swamp (rolled a one and got immobilised). I began my shooting phase with orders; First-Rank-Firing the Blob Squad at the Sang-Guard. To my disappointment I was unable to inflict a single casualty. I then opened up with the CCS, Melta Vets, PCS (firing Frag grenates), Valkyrie and finally the Vendetta. When the dust settled all of the Sanguinary Guard and the Librarian had fallen, but Dante and that annoying FNP Priest were still standing defiant, though Dante had taken a wound. I wasn’t sure whether this constituted a good round of shooting against Sang Guard or not, and though I had achieved something I did recognise that the next turn could probably bring a lot of hurt from those two remaining models. I then fired a Battle Cannon pie plate at the Assault Marines on the objective, missing. The Basilisk also lobbed shell onto the Assault Marines hiding behind the bunker, killing two after it scattered.   The second Sang Guard unit didn’t show, and the Priest and a very angry Dante decided that they would take their frustrations out on the Blob Squad. The Land Speeder turbo-boosted across my lines 24 inches to land near the PCS, whilst the three Assault Marines jumped over the bunker into the swamp for cover. Dante and the Priest waded into the blob squad, killing something in the order of 6-7 Guardsmen. I retaliated by allocating three quarters of my attacks to the Priest, taking him out. Thankfully the Commissar was there to shoot a cowardly sergeant who proposed that it might be a prudent decision to flee in terror from the mighty Dante. Turn 4I began my turn by hastily re-embarking my Melta Vets into the (relative) safety of their Valkyrie. I also brought the Vendetta forward to fire on the Land Speeder, with the PCS continuing down the central line of the swamp. I fired my CCS, Russ and Valkyrie at the three Assault Marines, but was unable to cause any wounds. The Autocannons brought down the Land Speeder, whilst the Vendetta and PCS fired at the Assault Squad on the objective, killing one of them. Dante continued to munch through the Guardsmen, cutting down another four, however much to my surprise they managed to cause a second wound on the monster. Encouraged by this the remaining sergeant didn’t suggest fleeing from combat this round.  The second Sang Guard unit did arrive this turn, charging in a line-abreast formation. The three Assault Marines leapt forward, intent to killing off the CCS, which between their flamer and assault they had little difficulty doing. Dante sliced another four or so Guardsmen down, and to my amazement those brave little Guardsmen rolled another two fives to wound Dante again twice – I held my breath as my opponent rolled both dice, but both saved (a shame, as that would have been a great story to tell).   Turn Five Turn FiveTime was starting to get a little tight (20 minute warning), because he were having such a great time and talking about anything and everything during the game. I turbo-boosted the Vendetta forward, wishing I had done so the previous turn. The Melta Vets again disembarked from the Valk, lining up the three Assault Marines who had taken out the CCS. The PCS advanced further down the swamp. I opened up with the Melta Vets, killing the two Assault Marines with the special weapons. I then launched all my remaining firepower at the Sang Guard or Assault Marines on the objective (depending on range), killing another Assault Marine. The Veterans launched into assault against the Assault Marine Sergeant, clawing him to pieces before he was able to splat any with his power fist. Dante killed another 5 Guardsmen, but I was unable to inflict any more wounds – only the Commissar and a Sergeant were alive by now. Dante decided that the Vendetta was a more pressing target, and disengaged from combat using Hit-and-Run, though he rolled a laughable three inches on three dice.   Dante and the Sang Guard advanced to intercept the Vendetta, which Dante blew up with his Inferno Pistol. We now only had about five minutes left to play (i.e. not enough time for another turn), so I decided to call the game here. The end result was my opponent held his objective, whilst I was about half an inch shy of holding mine with the Melta Vets. My opponent insisted that we should call it a draw, but I wouldn’t allow it –had won fair and square.  Coming up, the last game of the weekend: An epic struggle of wills, when the incompetent yet wily Major “Savvy” Savoy Watson of the Osarian 10th is pitted against the legendary tactical genius of the one and only, Lord Castellan Ursarkar E. Creed!
|
|
|
|
Post by majorspeirs on Feb 8, 2012 4:10:10 GMT -5
Game 6I was both pleased and disappointed when I drew my last game against Guard; pleased because Guard vs Guard usually made for hard-fought, to-the-wire games; disappointed because I’d been hoping for a nice quick game to finish the weekend, and Guard vs Guard games tend to take an exorbitant amount of time. The mission was Annihilation with Pitched Battle deployment. There was a central objective that was worth another three KPs if the HQ of your army held it at the end of the game. My opposing army was a stunningly painted Elysian army. I’d spotted and admired this army during the army parade, so I was rapt to be playing against it. CCS w/ 3x Meltagun and CREEEEED!! Chimera w/ Multilaser, Heavy Flamer and Heavy Stubber Platoon:PCS w/ 4x Flamer 2x Infantry Squad (combined – no upgrades) Veterans w/ 3x Meltagun, Shotguns and Demolitions Veterans w/ 3x Meltagun, Shotguns and Demolitions Vendetta w/ 3x Lascannon Vendetta w/ 3x Lascannon Hellhound Squadron (scouting due to Creed’s “Tactical Genious”): - Hellhound w/ Heavy Bolter - Banewolf w/ Multimelta Straight away I saw that our lists were remarkably similar in construction. This said though they were still markedly different – my opponents was faster and harder hitting, however mine had more capable and heavy duty firepower. We were also lucky enough to play on one of the best-modelled tables at the venue. The battle was to be set in a valley (OF DEATH!!!!... sorry...) with a marshy river running through it. There was an intact bridge and a destroyed bridge, and a road that crossed the river over a series of culverts. There was leafy vegetation and rocky outcrops dotting the sides of the river and valley. It was a pretty epic setting for what was set to be a cracking game. DeploymentI won the roll-off for deployment, and my opponent laughed and said, “I guess you get to alpha strike first then”. Since neither side of the board offered much in the way or tactical advantage, I chose the side that was closer to the door (it was still stinking hot). I deployed my Russ in the middle of the road. To its right I deployed the CCS, and to their right the Blob Squad at the entrance to the ruined bridge. I then deployed the Griffon and Autocannons, with the PCS in from of the Autocannons. At the end of the line, with a good field of vision, I placed the Basilisk. The Vendetta was deployed on the far right, in front of the Basilisk. I placed the Valkyrie out of my lines on the left flank, hovering over the entrance to the intact bridge.  My opponent deployed his Hound Squadron on the road directly opposite my Russ and Blob Squad, with Creed in his Chimera just to their left (from my side). The Vanilla Blob Squad and the Flamer PCS deployed behind them, spread out. The two enemy Vendettas deployed on my left flank; one directly opposite my Valk on the bridge, the other further out into the wilderness. I won the roll off for scout moves and allowed my opponent to go first (being kill points, I figured I was better off not dispersing my units too much, especially as I had the advantage of range). The Hound Squadron advanced full bore across the board, whilst the two Vendettas criss-crossed so that they could both turbo-boost; the one on the bridge ended in the swamp on the left, whilst the one in the swamp on the left ended on the bridge. For my own scout move the Valk stayed put, as its target was now 12 inches away, whilst the Vendetta gunned 24 inches down the right board edge.  I was now eager to let rip with everything I had, however my cunning opponent stole the initiative (CREEED!!!). I thought, “Oh dear, this could be messy”. Turn 1The game began with the Hounds advancing 12 inches up my side of the valley in single file – the Bane Wolf in front and the Hellhound bringing up the rear. After much indecision the Vendettas ended up shuffling laterally – the one on the bridge ended up where the Hounds had just been, in the centre of the board, whilst the one in the wilderness (which was initially on the bridge) ended up back on the bridge to engage the Valkyrie. Creed’s Chimera advanced a short distance into the plant growth in front. The Vendetta on the bridge unleashed upon the Valkyrie, blowing it out of the sky. Six of my Veterans were killed in the explosion, leaving only a regular Vet and three Meltagunners in the wreckage (luckily not pinned). The other Vendetta fired upon my Basilisk, only managing to shake it. In the centre the Banewolf and the Hellhound elected to fire on the Russ, though through creative placement of the flame and poison templates were able to kill off three Guardsmen from the blob and everybody but Major Savoy from the CCS (he suffered a wound to boot). Unfortunately the Banewolf’s Multimelta blew the Russ out of existence.  I began my turn by advancing the now de-Valked Melta Vets as far as I could towards the Vendetta in front. My own Vendetta advanced another six inches down the board and swivelled to fire on the central enemy Vendetta. The PCS advanced forward, but everything else remained put. I opened my shooting phase by ordering the Blob Squad to Bring Down either or both of the Hounds, however they were too distracted by the gouts of fire and corrosive fluid arcing in their general direction, and weren’t able to make their shots count. The Autocannons then fired at the Vendetta in the middle of the board with enough accuracy to immobilise it. I went to fire my own Vendetta at the same target, but my opponent pointed out that I had a clear rear-armour shot on his Hounds. I thanked him very much for being gentlemanly enough to tell me as I had not realised, then proceeded to blow up the Hellhound and stun the Banewolf (downgraded to a “shaken” because it was still technically squadroned). The Griffon launched a shell at Creed’s Chimera but was unable to wreck it. The four remaining Melta Vets lined up the Vendetta, two of which were in 2D6 range and one not. From the flurry of Melta-shots, it was the one which was out of 2D6 range which blew it out of the sky in a blazing ball of flame – it turned out that this Meltagun was manned by none-other than Mr Twistie-Fingers! Ha ha! The carnage was worse than when my Valk blew, as eight of the ten Veterans were immolated in the blast. The Sergeant and the Demo Charge guy were the only survivors, and they were plucky enough not to be pinned.   Turn 2 Turn 2At the start of turn two both out armies had taken a whacking, but were still very functional. Creed’s Chimera gunned its engines and went roaring over the foliage in front of it. The Vanilla-Blog dispersed to minimise the effect my Flamer-Vets would have on them if I assaulted, and the Flamer PCS moved so that if I took one unit out, the other would jump me. The shaken Banewolf sped forward up the road and reversed hard to the left, away from my infantry. The immobilised Vendetta again fired at the Basilisk, but was either unable to hit or penetrate its forward armour. The two surviving Veterans from the wrecked Vendetta moved to tackle the four remaining remnants of my own Veteran squad from the Valkyrie. The 2:1 odds were levelled by a shotgun and an immaculately placed Demolition Charge. The demo charge caused three wounds (there is always one one!), and the shotgun one. The dice for the flak armour save from the shotgun was cocked in a crevice, so I re-rolled it and to my surprise it came up as a six: Mr Twistie Fingers lives!! To top this off he even passed his morale check!   The first thing I did was move Mr Twistie-Fingers back six inches off the bridge to get a shot at the now nearby Banewolf. The PCS advanced a little further forward, and the Vendetta shuffled six inches towards the enemy (it was still a way off) so that it could fire all its armaments. I began by firing the blob squad at the two veterans on the bridge, but despite the massed Lasgun and Autocannon fire only the demo-less Demo Charge guy died as they had gone to ground. The Autocannons and Basilisk fired on the Vendetta in the middle, but were unable to take it out. The Griffon and the PCS in turn fired on Creed’s Chimera, but were only able to shake it. My Vendetta also fired on the enemy Vendetta, knocking off a Lascannon (“Which one?”, “I dunno… ahh… that one!” *picks random Lascannon*). I almost forgot about Mr Twistie-Fingers, as he was hidden from sight by a droopy plant! He was just within six inches of the Banewolf’s rear armour, charged up his Meltagun, and just before he fired he tripped over a small pebble and missed the target completely. Turn 3With the Veterans pinned, my opponent again re-positioned his infantry blob and PCS. Creed’s Chimera moved forwards onto the central objective. Creed ordered the Vet Sergeant cowering on the bridge to man-up, so he got up and advanced further along the bridge. The Vendetta again drew bead on the Basilisk, and unfortunately this time it was more successful as it blew it up. The Banewolf had raced forward 12 inches and brought its poison cannon to bear on the blob squad, killing another swathe of Guardsmen My turn consisted of holding most of my units in position. The Vendetta again only shuffled six inches to the left – I was reluctant to deploy the Flamer Vets because if they weren’t jumped by the enemy blob or PCS, then the Melta-Vets in the immobilised Vendetta certainly would. My own PCS again trudged forward, but not far due to difficult terrain. Mr Twistie-Fingers picked himself up off the ground to take another shot at the Banewolf. I started proceedings by ordering the blob squad to take down the Wolf, but they failed to penetrate. Mr Twistie Fingers (out of 2D6 range now) again levelled his Meltagun at the rear armour of the beast and he hit!! He then rolled a 2 on the damange table (+1 for being AP1) and knocking of the Poison cannon. The Autocannons fired on the Vendetta, managing to wreck it, forcing the Melta-Vets to deploy. I then directed the Griffon at the Chimera, but the shot scattered wide. My own Vendetta had better luck though, landing two shots into the rear armour, causing it to explode, killing two of Creed’s retinue and pinning them on the objective. Turn 4My opponent advanced his lone Vet Sergeant across the bridge towards Mr Twistie-Fingers. The Melta-Vets come out of the wreck of their Vendetta and clambered up the slope towards my own Vendetta, whilst the blob and PCS readied to fire on the Flamer-Vets. The Banewolf charged six inches forward into my blob squad, but luckily they passed their morale check. The Multimelta fried one of their number for good measure. The Veteran Sergeant pumped off two shotgun rounds at Mr Twistie-Fingers. One wounded, but I rolled a five to pass his armour save. The Melta Vets let loose at my Vendetta, blowing it out of the sky. The Flamer Vets were lucky, as only three of their number were killed in the explosion (there was a convenient rocky outcrop that we moved to where the Vendetta had been). Luckily the enemy PCS was out of range and the blob squad was only able to fire off 4-5 Lasguns, which didn’t cause any casualties.  The pressure was on now - both our armies were taking a beating, and time was running out. I had to take Creed off the objective or else I wouldn’t have a chance of victory. Savoy got off his butt and started running towards the objective in the centre (unaccompanied, which probably wasn’t wise). After running he was only three or so inches away from Creed’s unit. The blob squad was out of coherency so they were forced to move; I brought them further forward on the bridge so that I would be able to fire down into the valley on anything that was trying to reach the centre. The PCS swung around the piers of the broken bridge and marched towards the objective in the centre. Both they, the Autocannons and the Platoon Blob fired on Creed and his Veterans, but were unable to drop one any of them. The Griffon also fired on this target, and was able to kill another. Mr Twistie-Fingers charged once more towards the Banewolf, and with dazzling accuracy (on this third attempt) he landed his shot, exploding his target in rippling ball of fire! Mr Twistie-Fingers had bagged his third kill of the weekend!! The Flamer Vets had three potential targets to take out: the blob squad (which was a bit far away), the enemy 4x Flamer PCS and the Melta Vets. I settled on the Melta Vets and hurled all manner of templates, blasts and shotgun rounds in their direction, wiping them out. Turn 5Creed and his last Meltagunner clambered to their feet and brushed the dust off their fatigues. The enemy PCS and blob closed in on the Flamer Vets and unleashed a torrent of promethium and las-rounds, utterly destroying them all. Creed’s Meltagunner crouched down and levelled a shot at Major Savoy’s face. The ensuring blast of heat burnt Savoy’s moustache completely off, and he was forced to retire from the field of battle until it regrew (a commander is only as good as his moustache after all). Mr Twistie-Finger’s reign of (slow) terror was cut short when that pesky veteran sergeant knocked him out with two well placed shotgun rounds.   If things were tight before, they were getting really tight now. I advanced the PCS on Creed and his squad again, and levelled everything else I had at him. Between the combined firepower of the Platoon Blob, the Autocannons and the Griffon, I was able to accomplish nothing. The PCS was another matter however, as one of its four Krak Grenades blew Creed’s Meltagunner to hell. With time running out the PCS charged into the fray with the illustrious Lord Castellan, and despite losing two of their own, they were able to take him out. At this point we rolled a dice to see if they game would end, and it came up a two. The game was over. We tallied up the damage, and we appeared to have achieved the same amount of kill points. I’d seen my opponent’s list earlier and noticed that he has specified that the Hound squadron were two killpoints. I double checked his tally and pointed that the squadron was only one KP. The end result was that Creed’s Elysians had carried the day by the narrowest of margins – one KP. This was by far the best game of the tournament. My opponent was great fun to play against and we both had a good time. During each game of the weekend I had drunk 2-3 bottles of water (it was 35 degrees (outside, it was hotter inside, and there was no ventilation)), but as a testament to how engrossing this last game was, even though I had put my bottle on the table, I hadn’t drunk a drop for the entire two-and-a-bit hours. If you made it to the bottom of this, thank you for making the effort – I have spent many hours putting these together, and I hope you like the end result.
|
|
|
|
Post by Bentath on Feb 8, 2012 14:30:06 GMT -5
This has been a great thread to read. Very well laid out with good pictures. Thank you for posting it.
|
|
|
|
Post by Shostak(AWOL) on Feb 11, 2012 9:30:53 GMT -5
Great job sir, I very much enjoyed reading these.
|
|
|
|
Post by DadCRO on Feb 11, 2012 12:19:55 GMT -5
Yes, great read! I'd never have enough time to put this together.
|
|
|
|
Post by Paimon on Feb 24, 2012 0:34:59 GMT -5
That was a good read, thanks.
|
|
|
|
Post by upguardsandatem on Mar 10, 2012 9:08:12 GMT -5
Many thanks for taking the time and effort to write these reports, very enjoyable!
|
|
|
|
Post by majorspeirs on Jul 30, 2012 6:52:50 GMT -5
After glancing at these write-ups I’ve realised two things. Firstly, there are all kinds of grammatical and logical errors. Secondly, that I have been a whiney git regarding my first few opponents. As a result I have edited each of my reports to try and improve their overall quality and make them more pleasant to read. I hope this doesn’t cause any problems with thread cohesion.
Also to note, if people don't have time to read this whole thing, I suggest reading the last two games, as they were the best for the weekend.
|
|
|
|
Post by Major Downer on Aug 4, 2012 9:24:59 GMT -5
Major after sitting here for an hour reading your reports, Makes me want to get off my asss and learn 6th edition already. I like the fact you add pictures into it so we can get a better look. Keep them coming, really enjoyed it. Major Downer |
|


 ). I had a win, a draw and four losses, though I was cheated out of a win with the draw, and two of the losses were down to the wire (the other two were definitive failures). I’m not too concerned about high placing and such, as I’m new to the world of competitive gaming (after 10 years of friendly games) – I play the game for fun. Secondly, due to the calibre of the other players (some overly competitive, but most competent) I doubt I will ever get much higher than mid-range.