Post by Vice-Shogun Himura on Jul 23, 2012 9:08:56 GMT -5
I originally made this tutorial for the Boot Camp Contest.

OK tools you will need:
Super Glue
Clippers
Files
Craft knife
Super Glue Accelerator
Drill bits
Pin vice
Supplies
magnets [1mm and 2 mm shown]
Bits to be magnetized
guard body

So here are the bits I going to magnetize both left and right side, pretty standard fare right? They are from the Cadian Imperial Guard box from GW.
For the magnets you can pick them off E-Bay or some model shops care them, they come in a number of sizes, I like 1mm and 2 mm for this task.

OK so normally I been using 2mm magnets I grabbed of E-bay may months ago, but I need other magnets for a project that had me grab an assorted set. so I had a couple 1mm laying around. So here is the Map piece arm. I drill into the arm using a bit just bigger than my magnet, i drill it just deep enough for the magnet to sit flush, this is key. Test fit often, you find that the more you do it the easier it is to get roughly to where you want it, to be.

You find the Pin vice to be very helpful with control and speed, they one thing I hate is that my pin vice doesn't take the final bit for 2mm bits which means I have to twist it by hand, you may want gloves if you do that as it can peal skin of your thumb as you twist the drill bit.
For the next step you want some Accelerator for super glue, I never understood why GW doesn't sell this but most hobby shops have some with other companies super glue.

Here you see to pictures of the final product, the joint magnet allows the wrist to be turned anyway you want it.


So here you can see the drilled out shoulder of the map arm. Ugly, good thing you filling with nice shiny magnet.

I personally always do the body of the guard magnets first. You find this easier than the shoulders for sure, drill out the shoulder and glue in the magnets with super glue. once you have one in you find the next one will almost stay in on it own but glue it is anyways.

For the next step I put a magnet on the guardsman shoulder as the body magnet I colour side facing away from the guardsman black with a sharpie, this give me a way to tell which pole is of the magnet. I look at it as haven't the two sides match when everything is glued together.

Here a better shot where you can see the black, I recommend not handling the sharpie covered magnet for at least a minute.
Now in my case I glue the black side down in the shoulder piece and I get a magnetized arm. Keep it flush in body and shoulder and no one should even notice it, save for the figures possibility.

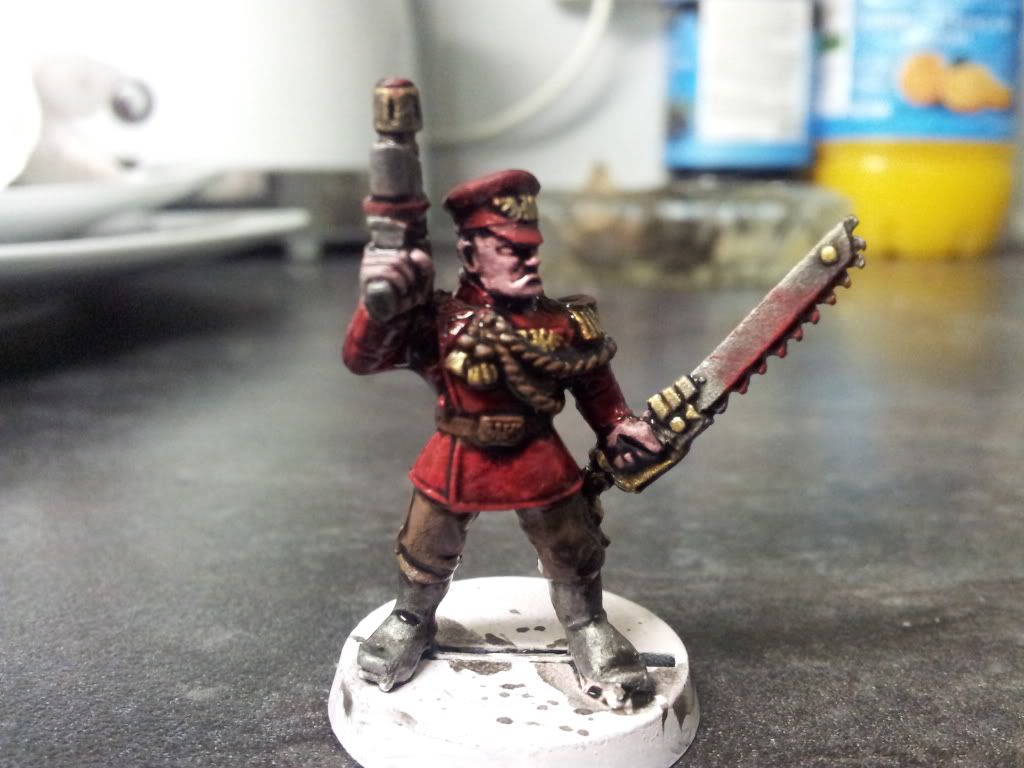
Here we are our Company Commander has ready all the options he could ever want. All at his command when he needs them.
There more than versatility thought for magnets, are you starting a new army [Guard of course] and don't have a colour scheme picked out going to use your models for a couple games first magnetize those hard to reach pieces when glued.

Put a magnet in and remove it when you need it.

See!
Of course the most fun is when you can do this!

Double power fists for the win!
I hope this has been useful to you.
OK tools you will need:
Super Glue
Clippers
Files
Craft knife
Super Glue Accelerator
Drill bits
Pin vice
Supplies
magnets [1mm and 2 mm shown]
Bits to be magnetized
guard body
So here are the bits I going to magnetize both left and right side, pretty standard fare right? They are from the Cadian Imperial Guard box from GW.
For the magnets you can pick them off E-Bay or some model shops care them, they come in a number of sizes, I like 1mm and 2 mm for this task.
OK so normally I been using 2mm magnets I grabbed of E-bay may months ago, but I need other magnets for a project that had me grab an assorted set. so I had a couple 1mm laying around. So here is the Map piece arm. I drill into the arm using a bit just bigger than my magnet, i drill it just deep enough for the magnet to sit flush, this is key. Test fit often, you find that the more you do it the easier it is to get roughly to where you want it, to be.
You find the Pin vice to be very helpful with control and speed, they one thing I hate is that my pin vice doesn't take the final bit for 2mm bits which means I have to twist it by hand, you may want gloves if you do that as it can peal skin of your thumb as you twist the drill bit.
For the next step you want some Accelerator for super glue, I never understood why GW doesn't sell this but most hobby shops have some with other companies super glue.
Here you see to pictures of the final product, the joint magnet allows the wrist to be turned anyway you want it.
So here you can see the drilled out shoulder of the map arm. Ugly, good thing you filling with nice shiny magnet.
I personally always do the body of the guard magnets first. You find this easier than the shoulders for sure, drill out the shoulder and glue in the magnets with super glue. once you have one in you find the next one will almost stay in on it own but glue it is anyways.
For the next step I put a magnet on the guardsman shoulder as the body magnet I colour side facing away from the guardsman black with a sharpie, this give me a way to tell which pole is of the magnet. I look at it as haven't the two sides match when everything is glued together.
Here a better shot where you can see the black, I recommend not handling the sharpie covered magnet for at least a minute.
Now in my case I glue the black side down in the shoulder piece and I get a magnetized arm. Keep it flush in body and shoulder and no one should even notice it, save for the figures possibility.
Here we are our Company Commander has ready all the options he could ever want. All at his command when he needs them.
There more than versatility thought for magnets, are you starting a new army [Guard of course] and don't have a colour scheme picked out going to use your models for a couple games first magnetize those hard to reach pieces when glued.
Put a magnet in and remove it when you need it.
See!
Of course the most fun is when you can do this!
Double power fists for the win!
I hope this has been useful to you.