|
|
Post by treadiculous on May 8, 2013 18:21:19 GMT -5
This tutorial is for a specific young blood just starting 40k... I've got the old paint set so I'm not too sure what the new names are... The following paints were used: Black, Silver, Goblin Green, Devlan Mud, Red, Devlan Mud. ( there is a conversion chart on line here: www.games-workshop.com/MEDIA_CustomProductCatalog/m2320032a_Citadel_Conversion_Chart ) Starting with a black under coat  Add a dry brush (a dry brush is a brush that has had most of the paint wiped of so it is 'dry; and then you apply the paint so it sticks to the raised surfaces only) 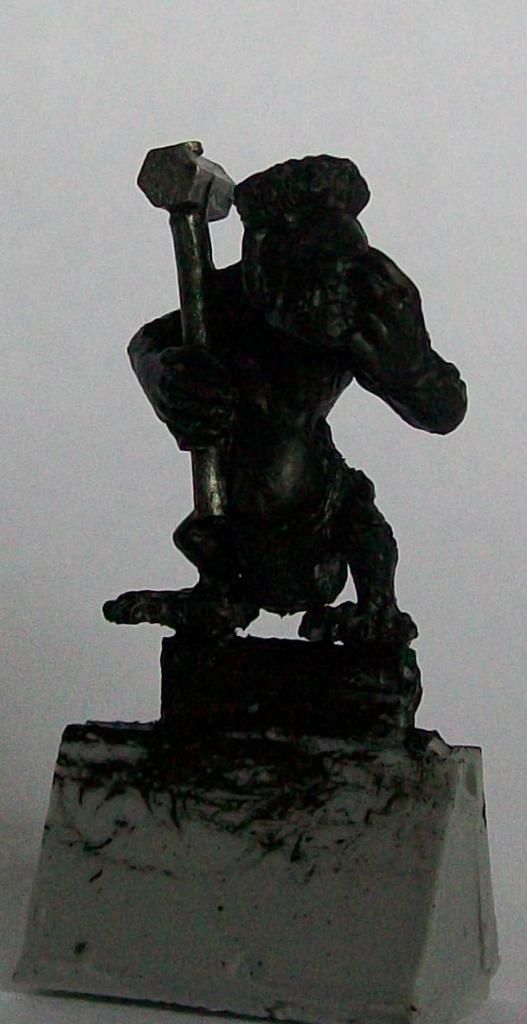 Add a wet / dry brush of green (by wet / dry I mean using the brush to pant over areas but not fill the deep cracks - so they remain black) 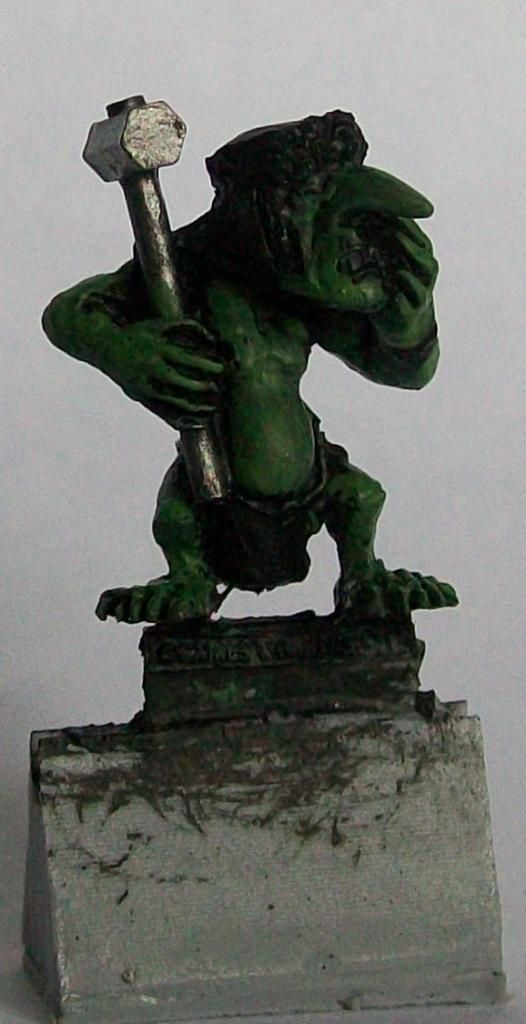 Add a wash of Devlan Mud - he's still shiney because I took the photo while the wash was still wet. (A wash is a much thinner type of paint, it will run into gaps and crevices and leave raised surfaces with a thinner coat making it great for shading) 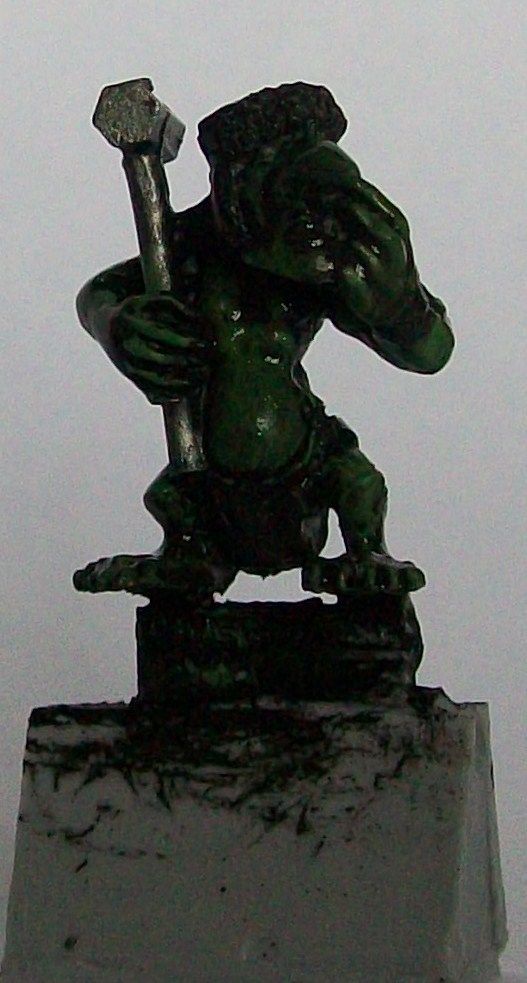 Then I added red to the cloth areas (hat and loin cloth) 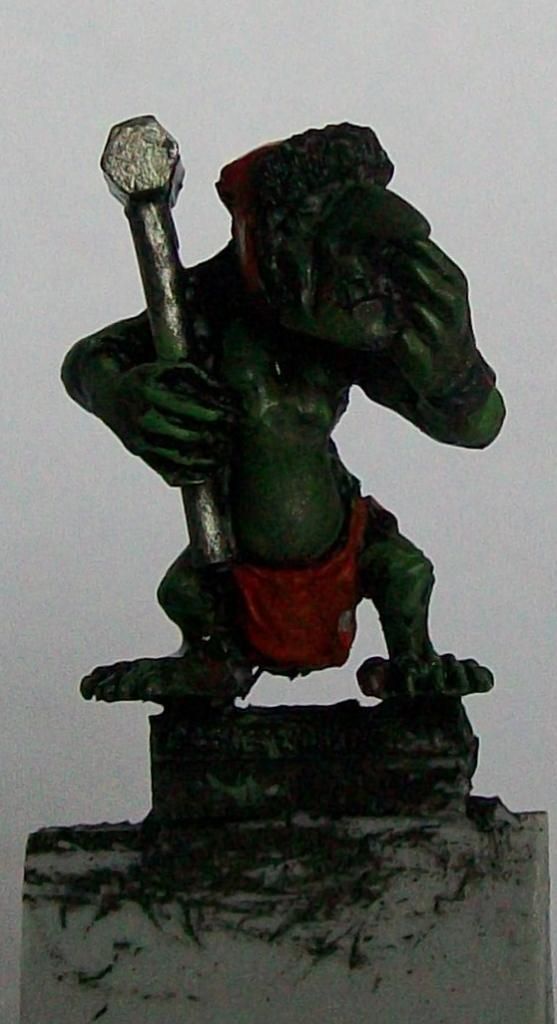 The red I gave a wash with devlan mud 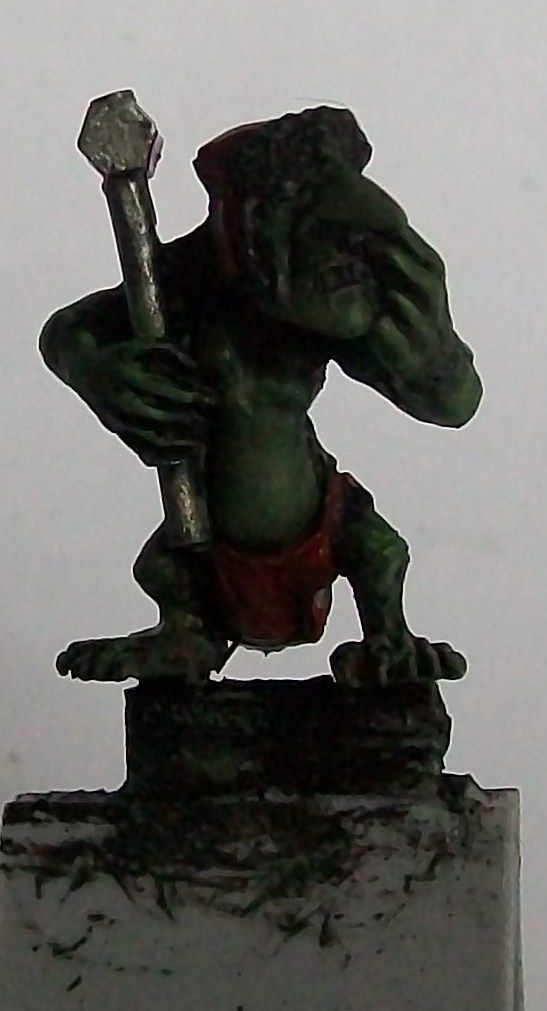 Finally.. the finished product... well, I gave the green a very light drybrush to bring out the highlights such as the nose and the fingers up it. 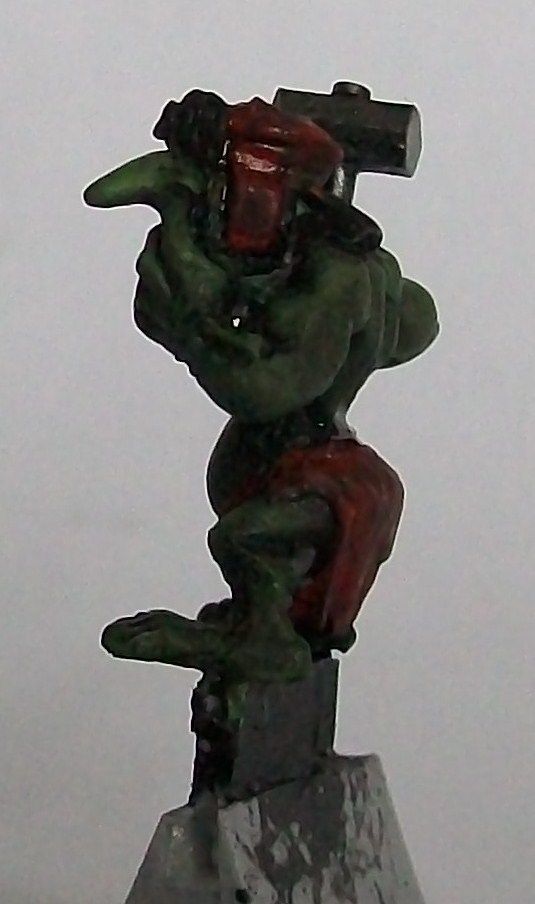 Not the best job in the world - but a good idea. |
|
|
|
Post by emptyhat on May 8, 2013 19:27:53 GMT -5
Looks simple and fast, which is good for grots, and he has a grimy look at the end. The obvious thing to do once the unit/army is finished is to go back and work on the eyes, teeth, finger nails and hat fur. Which could be done pretty quickly and easily, even for a large group, and will really add to the model.
|
|


