|
|
Post by ssgtdude (M.I.A) on Dec 23, 2007 23:44:32 GMT -5
On a different board I have been asked to do a tutorial on how I paint my GW tanks. Since I have a couple of Bane Blades to paint I figured why not. So, in keeping with the spirit of creating the tutorial I would also go ahead and add it into our community as well. Everyone loves seeing new methods of painting and since i will be using paint in a can (paint bombs) it should only take me a couple days of work. What I am going to be demonstrating is a technique I learned about in reading through some fan mags a few years ago. I found that the technique works wonders when doing a tank camo. As I said before some people have wanted to know how I do it and asked that I go ahead and make the tutorial for them. The process is fairly simple a matter of laying the first color down that you are going to use and then to mask off areas with clay before spraying the next color down and then more clay before the next color. Once the clay is removed you have a nice pattern that doesn't have the sharp crisp lines that masking tape tends to leave. So.. Enough talk and on with how I go about all this. What I normally do when I am starting a job like this is search for what sort of patterns I am going to use. Since this is going to be a woodland pattern I opted for a three color pattern. The three colors I'll be using are a tan, OD green, and a dark Brown. Below you will see some of the "inspirational" photo's that I found to help me on my task. 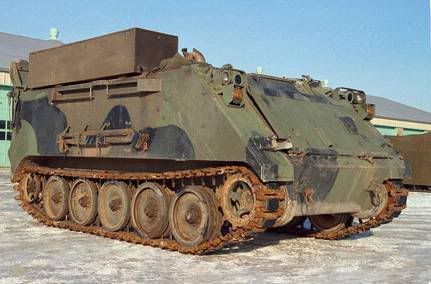 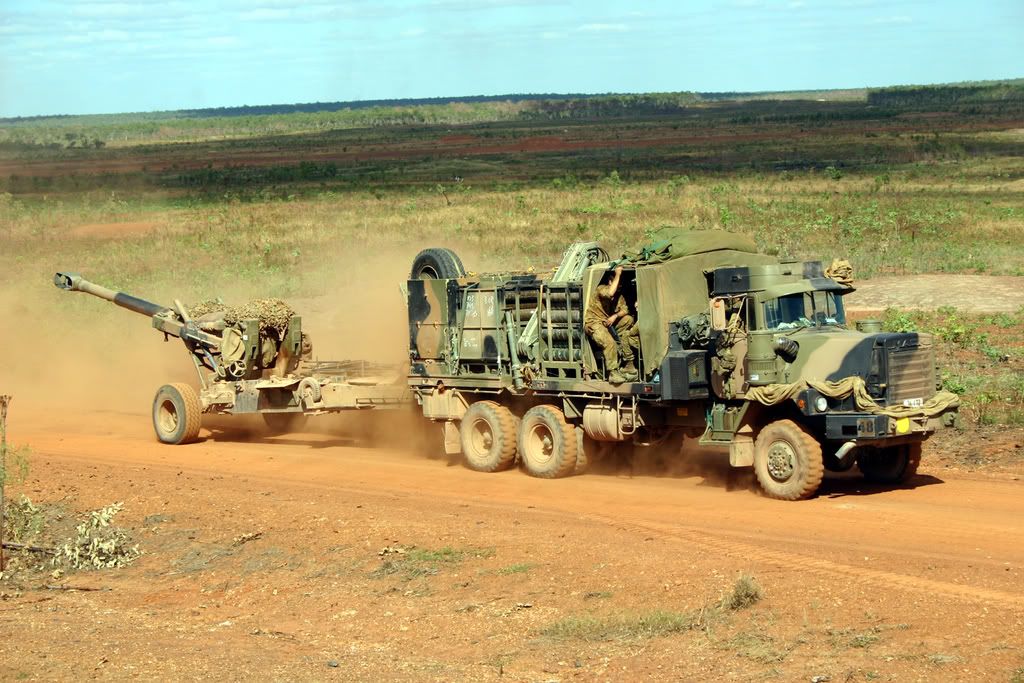 Ok, not a tank, but still it provides a great deal of inspiration.  |
|
|
|
Post by Mabus on Dec 24, 2007 11:28:24 GMT -5
Um.............yeah, very, um............inspirational. Nah, I'm kidding good work there ssgtdude, a big help to those who are new to painting tanks.
|
|
|
|
Post by Commissar on Dec 24, 2007 11:33:24 GMT -5
Nice picture...hehehe.
Very inspirational!
|
|
|
|
Post by ssgtdude (M.I.A) on Dec 24, 2007 23:23:16 GMT -5
They Clay I am using will be the same clay that you would get at any craft store. Non-toxic play clay. Same type of clay folks would use to build up molds for casting. I use this because it is non drying and doesn't have the sulfur in it which could interact with the paints. After priming I will be using the Rust Oleum paint bombs. I will be starting the tutorial after laying down the base coat over the primer, and everything has been cleaned up nicely. No sense in showing folks how to prime since that would be such a redundant feat considering most folks prime already. Distraction?? No honest, she is inspirational. Purely my muse for this project... Would you believe I thought the camo pattern was interesting? Ok, real story. The tank I will be painting is sexy in and of itself and thought that she would fit nicely in with the tutorial. No?? Ok, I know that most of us are pervs and a sexy blond would illicit greater response to the thread. Supplies List Tank Clay (1 lb is enough for most jobs) Paint Rust Oleum Camo (Tan, OD Green, Dark Brown) Sculpting tools Paint booth (cold outside right now it's winter) Respirator Alcohol Q-tips Masking tape While the paint is dry after 15 minutes it is best to wait at least 5 hours before the next layer to give it a chance to begin curing. Over night is best. The tank I will be painting has already been named and I will be doing a hand painted graphic on the side. So you will get to see that too as I work on it. With that being said.... Today The base coat of tan was laid out and allowed to dry and begin curing. After that I applied the first layer of clay to mask off the areas that will remain tan. Then I laid down the OD green. The pics make it easier to understand. 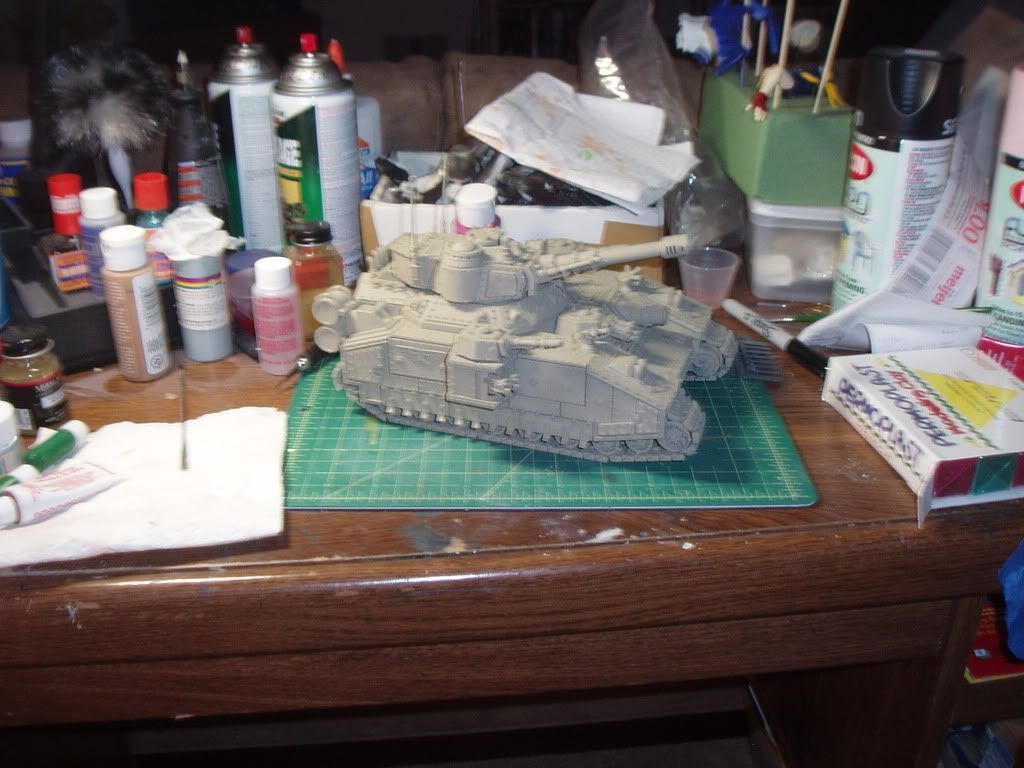 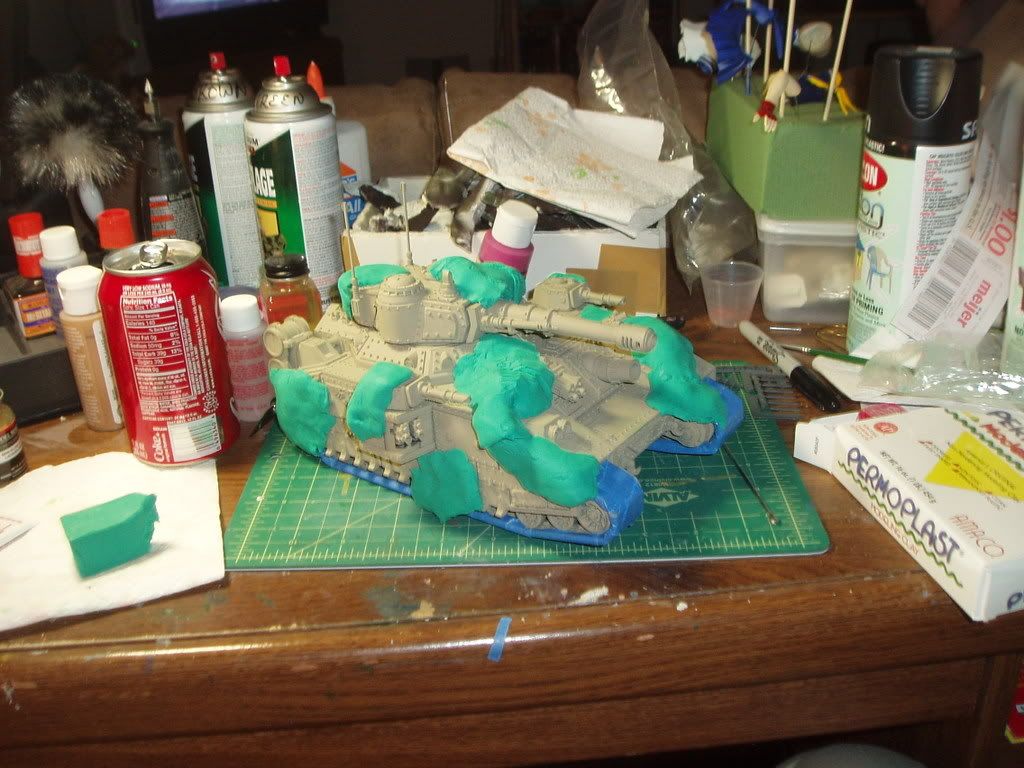 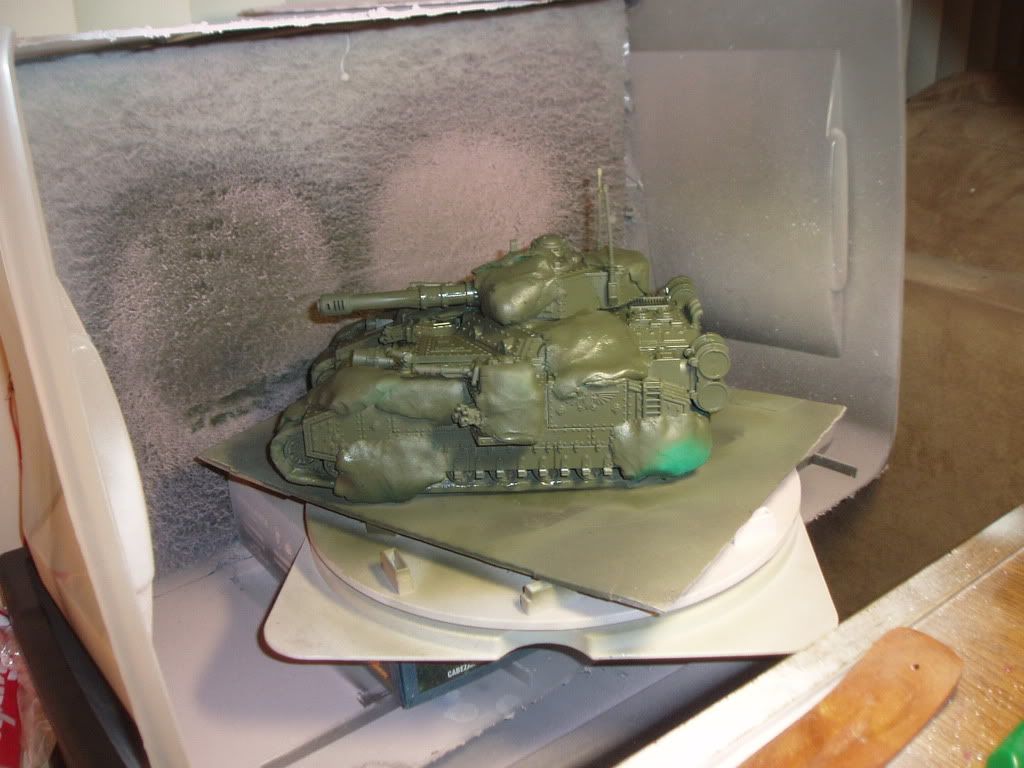 I'll let this sit over night to cure and apply the next coat of paint. Which will be the brown. Then it is a matter of peeling the clay off the model and exposing the pattern below. From there I will paint the tracks, the graphic on the side and do some weathering. Let's cross our fingers. |
|
|
|
Post by ssgtdude (M.I.A) on Dec 25, 2007 2:58:05 GMT -5
Ok well I let the paint dry and cure for a while and then added another layer of clay. For the tutorial I used green and red clay to show the different stages. Usually I use a white clay for all of this. Here is what I have so far. I like the woodland look of camo so I am placing the clay in blotches. To cover things easier I am making flat bubbles and sealing the edges against another block of clay. This will keep over spray out from under the clay. It also keeps the clay from sticking to the harder to clean areas (gun barrels, etc...) Second layer of clay going on. 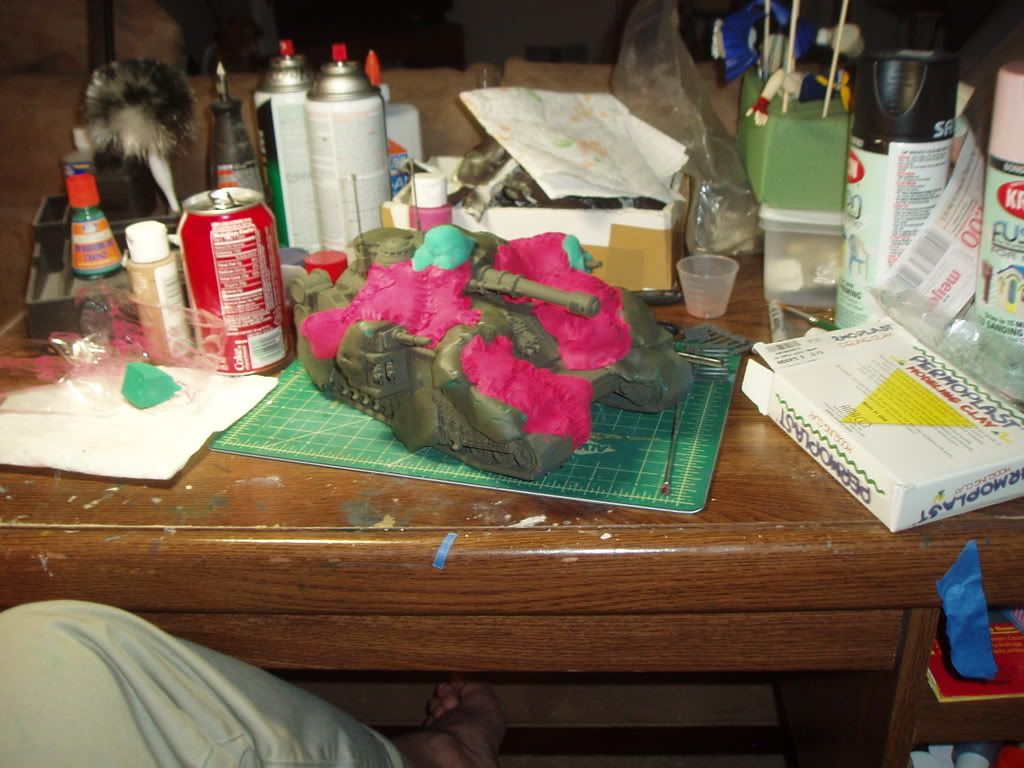 Brown paint applied 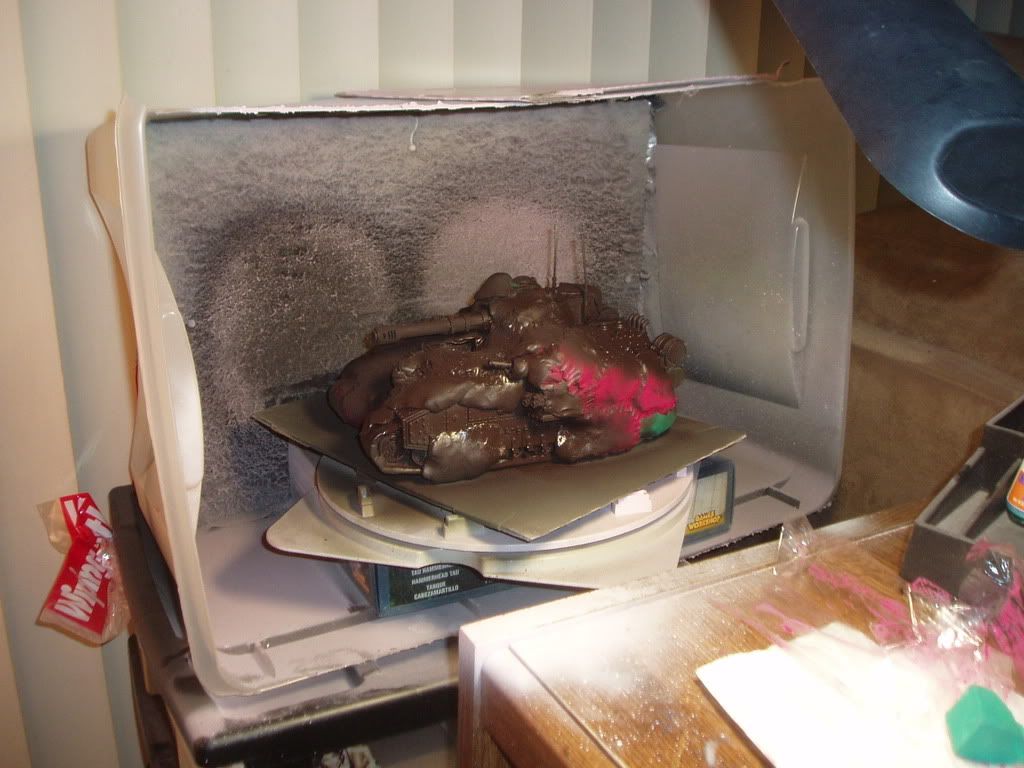 The reveal  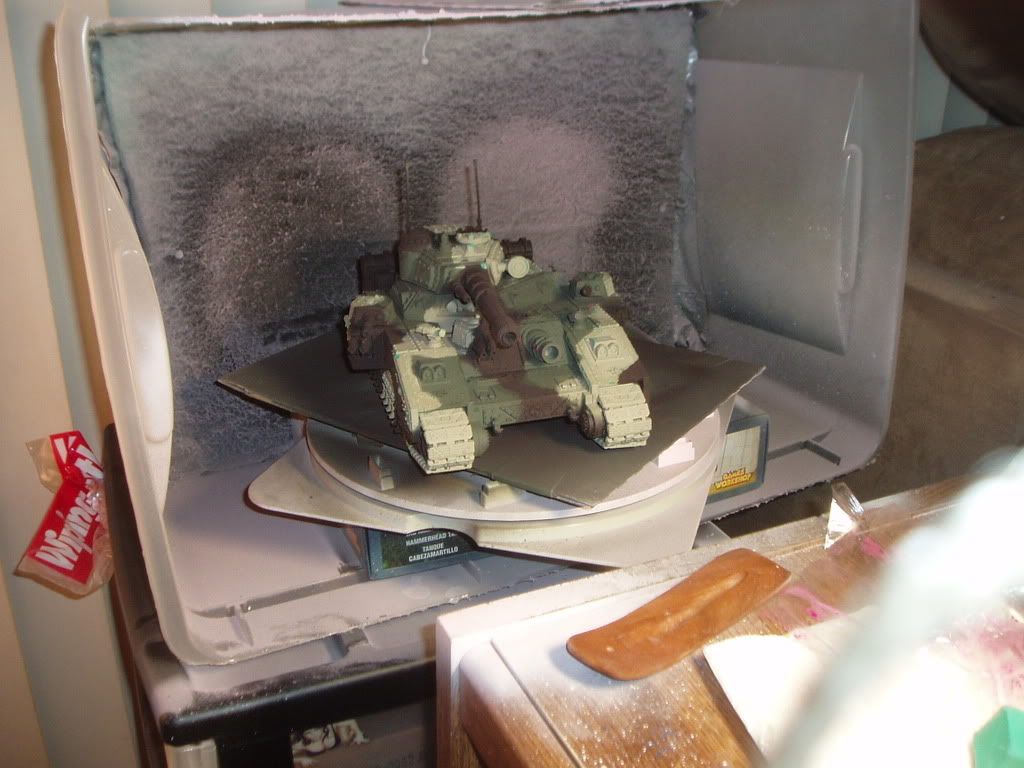 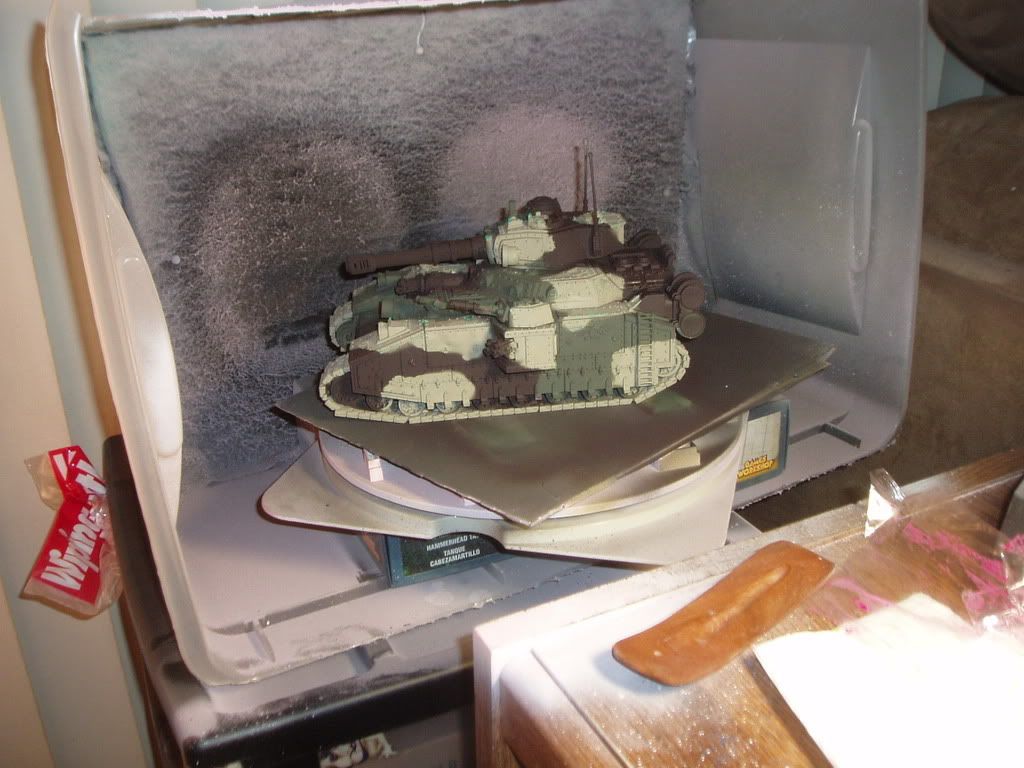 Now, I know it looks like a lot of tan on the tank, but a lot of that has to do with the treads not being painted yet. Even though I tend to prime in black I find it is easier to do paint the treads by hand afterwards so I tend to base coat them as well. I'll post more pics later. |
|
Deleted
Deleted Member
Posts: 0
|
Post by Deleted on Dec 25, 2007 3:18:29 GMT -5
Looking great mate, this kind of spraying/airbrushing realy do wonders on tanks and the like. Looking forward to see the finished result!
|
|
|
|
Post by ssgtdude (M.I.A) on Dec 25, 2007 13:10:54 GMT -5
Well after getting a bit of sleep I woke up and decided to start painting a bit more. Now since this tank is called "The Novi Ringer" and will have a graphic on the side I painted the tracks and started the basic graphic design free hand on the side of the tank. At this point now that I am free hand painting I am going to have to be careful otherwise it is a trip to the strip bath since if I make a mistake at this point that can not be corrected I have to start over. Being a fan of the WWII nose art I will be painting this particular graphic in the same style. Base graphic started. 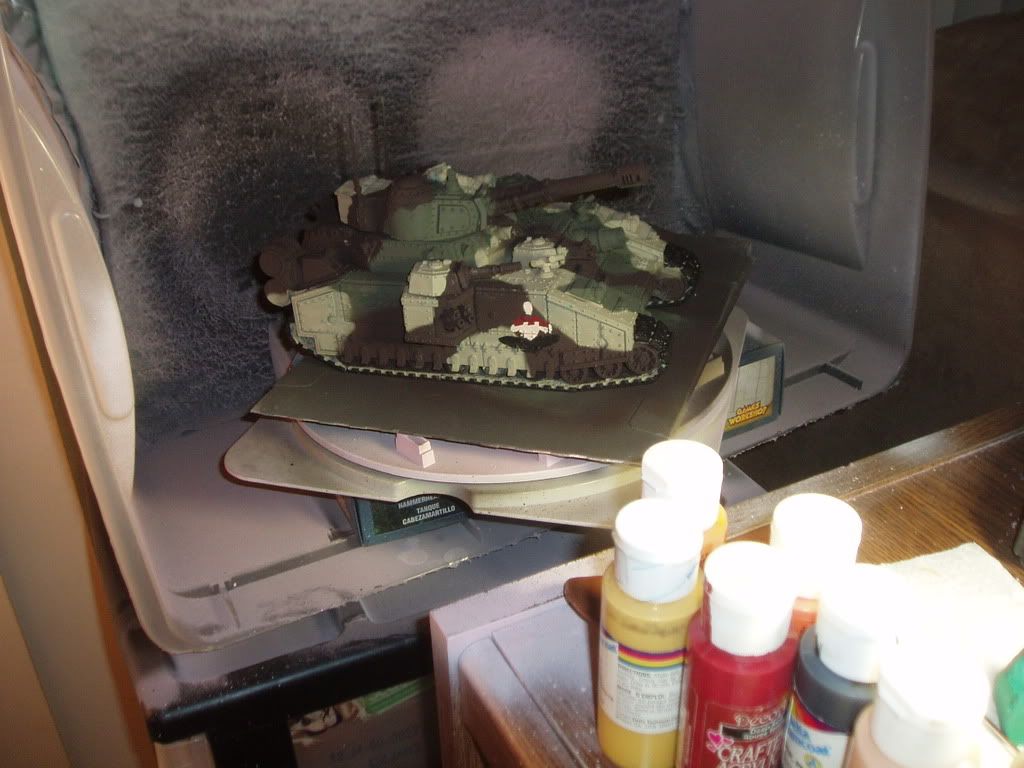 |
|
|
|
Post by ssgtdude (M.I.A) on Dec 26, 2007 22:46:00 GMT -5
More work on the graphic having been done. Tribute to the red shirt. 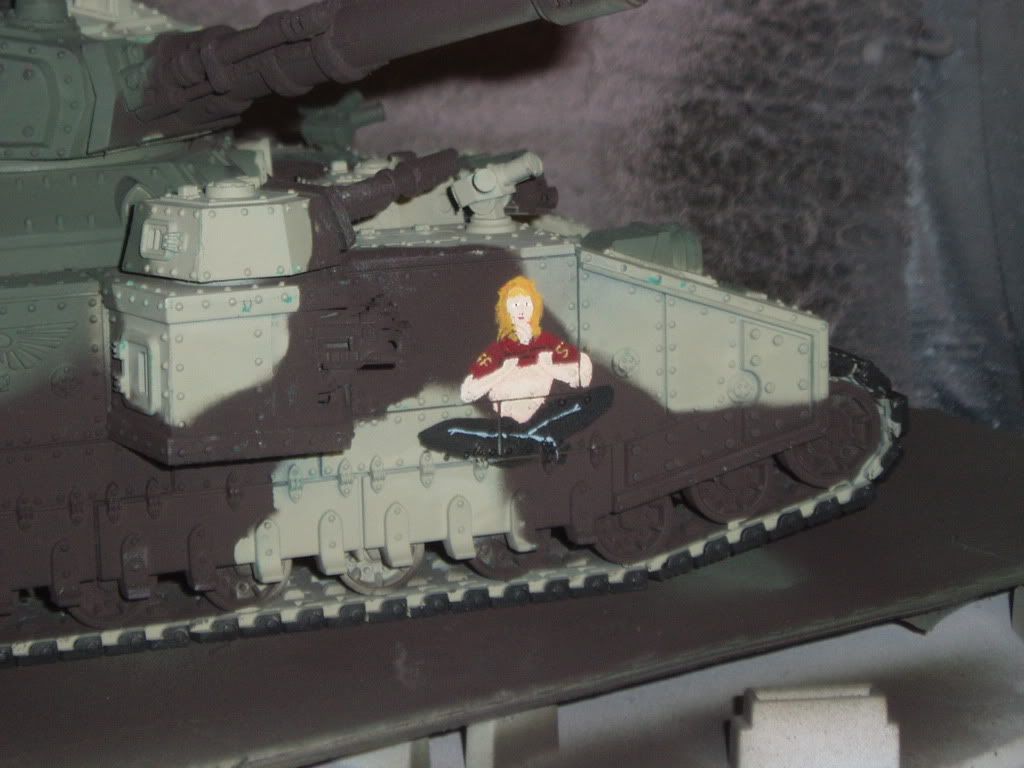 |
|
Deleted
Deleted Member
Posts: 0
|
Post by Deleted on Dec 28, 2007 17:07:49 GMT -5
Nice quick technique! At first I thought you were trying to do a nurgle tank, until I saw that you took all the clay off!
|
|
|
|
Post by ssgtdude (M.I.A) on Dec 30, 2007 12:02:59 GMT -5
Well I have done a bit more with the tank. I know It has been a bit slow, but now I am hand painting so it takes a bit longer. So far I've gotten the glass work finished, the imperial eagles are done ,almost completed the unit insignia and the graphic is just about completed.  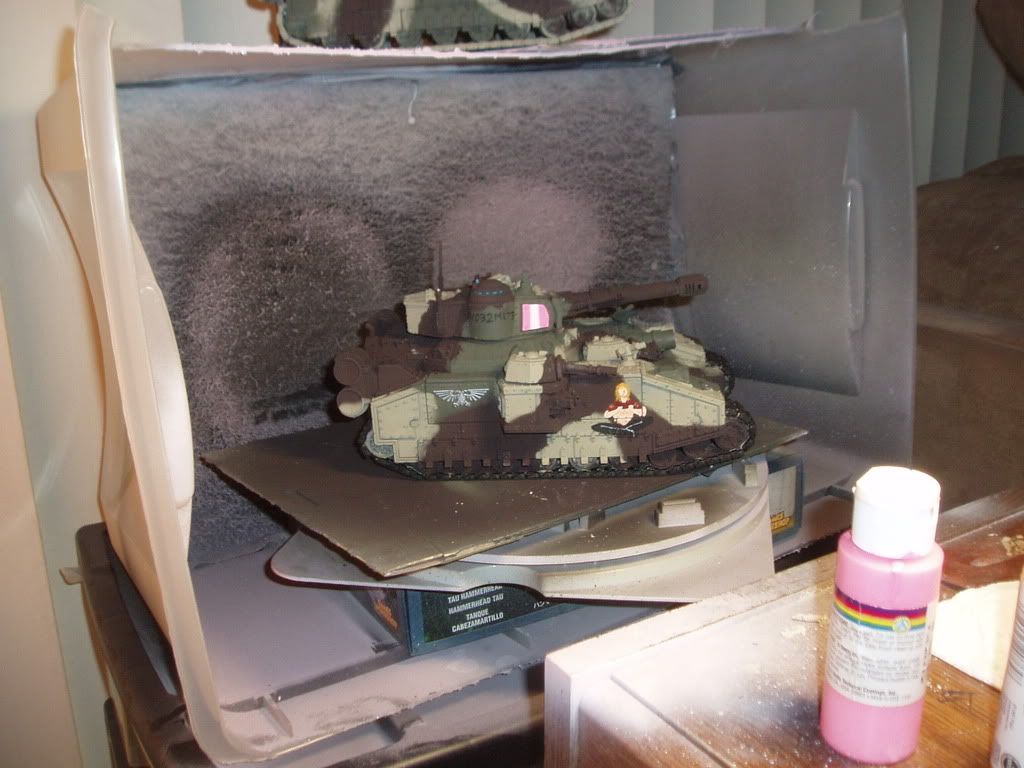 |
|
Deleted
Deleted Member
Posts: 0
|
Post by Deleted on Jan 1, 2008 9:13:51 GMT -5
Airbrushing is a fast and timesaving and easy way to get a good camo. (With easy I mean easier than handpainting.) However, I get the feeling when looking at these pictures that they look a bit to plastic with airbrushing. Am I right?
|
|
|
|
Post by syphon on Jan 1, 2008 13:52:44 GMT -5
That is actually quite a smart way to get that camo done. Kudos!
|
|
|
|
Post by ssgtdude (M.I.A) on Jan 5, 2008 2:25:10 GMT -5
Airbrushing is a fast and timesaving and easy way to get a good camo. (With easy I mean easier than handpainting.) However, I get the feeling when looking at these pictures that they look a bit to plastic with airbrushing. Am I right? Actually, once you weather them and after they have been fully painted. This method of using the paint bombs (Didn't use the airbrush for these) you get a nice looking tank. I'll be finishing up the tank this weekend so that you can see the final results. Of course, I am going to be putting together a new paint booth this weekend as well. |
|
|
|
Post by ssgtdude (M.I.A) on Jan 11, 2008 21:59:21 GMT -5
Well, I wasn't able to finish over the holiday like I planned. She is finished now. So as soon as I seal her up I'll post pics.
|
|
|
|
Post by ssgtdude (M.I.A) on Jan 28, 2008 23:39:49 GMT -5
Paint booth almost complete, Have to put the fans on the back, and build the plenum, but other than that I'll be back in business soon.
Here is where I am with the tank. She is the one in the middle. Have to finish off my Basilisk company shortly as well. All but two are now pink, have to give them a second coat and then the tiger striping, weathering, and cute sayings on the side as well as paint their names on the barrels. Not too much work to do, but It comes out to be a boat load of tanks on the field when I am done.
9 Bassies, a Chimera, Hellhound, Leman Russ, 2 Bane Blades, a Hell Hammer, 2 immolators, Sentinel, Shadow Sword, and a partridge in a pear tree....
|
|
Deleted
Deleted Member
Posts: 0
|
Post by Deleted on Apr 4, 2008 1:02:41 GMT -5
Looks good mate you might want to highlight it so it will stand out more.
|
|
Deleted
Deleted Member
Posts: 0
|
Post by Deleted on Apr 5, 2008 22:43:22 GMT -5
It's camo, man. I dont' think it's SUPPOSED to stand out.
|
|
|
|
Post by ssgtdude (M.I.A) on Apr 6, 2008 0:15:16 GMT -5
Here I thought the pink unit designation made it stand out quite nicely. They do look rather nice on the battle field though. In fact they sorta stick out like sore thumbs when sitting next to the pink parking lot of tanks next to them
|
|
angelusmortis
Captain
   Courage is resistance to fear, mastery of fear - not absence of fear. -Mark Twain
Posts: 210
|
Post by angelusmortis on Apr 7, 2008 9:12:10 GMT -5
Very nice ssgtdude. I was wanting a camo scheme for my DKoK tanks but have been hesitating getting started painting as I was afraid I would mess it up. I went to K-Mart and bought four packs of Play-dough in resealable packages for $.87 a piece. It took one pack to do a single Demolisher, a single pack to do a towed Medusa, and three packs to do a Gorgon. It worked better than I could of hoped. I went with the two toned grey pattern in IA:5 and its looking awesome. Way better than I could of hoped if left to my own resources. Your technique is both simple to apply and very, very good looking (near professional if I may say so myself). Thanks for the tip, it is going to be put to good use in my case. Oh, and by the way, all of the play-dough is reusable. Apply it once, peel off an mash it up, then put it on another. Make sure you wait till the paint is dried first though  . P.S.- Once I get this list painted up, I would love to get together with you at Pandemonium for a game so you can see how they came out. I figure I should be done in a couple months so I am aiming at June-ish. Let me know if your interested and we can coordinate. |
|
|
|
Post by ssgtdude (M.I.A) on Apr 7, 2008 21:13:54 GMT -5
Sounds great, but unfortunately Friday is my last day in town. I am Moving to the big cheese state. On this past Friday I turned in my resignation and will be starting my new position on monday of next week. This week is being devoted to getting everything settled at the office and turning over how things are done and training people to do my job. So, far they have got 6 people lined up for me to train my job to.
They are doing a little get together at the GW store in Novi. I threw the gauntlet down and all comers can take my 8K on in a apoc battle. Suppose to start about 4pm.
|
|
angelusmortis
Captain
   Courage is resistance to fear, mastery of fear - not absence of fear. -Mark Twain
Posts: 210
|
Post by angelusmortis on Apr 8, 2008 5:14:00 GMT -5
Bah, ok cool. Well, you will have to wait a week or two for pics as I loaned friend of mine my camera. She went on a pilgrimage to Israel and wont be back for a week or two. I'll post some once shes back though.
|
|
Deleted
Deleted Member
Posts: 0
|
Post by Deleted on Apr 15, 2008 12:40:05 GMT -5
Great guide! ;D
It should be really helpful if i ever manage to buy a Baneblade.
Oh and i love the 'inspirational' pics!
|
|
|
|
Post by ssgtdude (M.I.A) on Apr 16, 2008 11:24:52 GMT -5
Chaplainmikey,
The same concept applies to the smaller tanks as well. I use the same process for all my tank painting. It takes an average of two days to paint 6 tanks this way (including detailing the glass, treads, etc...). The only difference is that instead of three colors I will use two.
The number of tanks you can paint using this method in a short period of time is astounding. Most of the time is spent letting the paint cure before your next color is applied.
|
|