

Post by dangerrod on Jul 22, 2012 10:03:45 GMT -5
1500Pts Imperial Guard Vs. Tyranids
Well yesterday I and a friend had our first game of 6th Edition, 1500Pts nothing too big!
What I can say from our first game is that the game has evolved into a more logical game (although some people will still find a way to break wound allocation and such…) the pregame and setup took us ages along with selecting Warlord traits (both of which we never used in the game) and Psychic powers
The Mission, Map, & Battlefield
We rolled off for Mission, Purge the Alien (how fitting) which is basically the old Annihilation
The map selected was Vanguard where the table is divided diagonally with deployment areas in the corners
The battlefield was a mix of two large forest areas (both mysterious) and three large ruined buildings along with a number of impact craters some line of site blocking clumps of trees and area terrain. At this point I had placed my Aegis Defence Line in my corner in a half-moon shape along with the Quad gun.
Imperial Guard List
HQ
CCS
X3 Snipers
Primaris Psyker
w/ Psychic Scream and Dominate
Elites
Psyker Battle Squad
X4 additional Sanctioned Psykers
Chimera
Troops
x20 Guardsmen Blob Squad
Commissar
X2 Missile Launcher Teams
Vet Squad 1
X3 Plasma Gunners
X1 Missile Launcher Team
Forward Sentries
Vet Squad 2
X3 Plasma Gunners
Chimera
HWT
X3 Missile Launchers
Fast Attack
Hellhound
w/ Searchlight
Heavy Support
Executioner
HB Sponsons
Manticore
Fortifications
Aegis Defence Line
w/ quad Gun
The Plan
Well I think it’s pretty obvious, turtle in one corner and unleash hell! The Hellhound to scoot up and harass his forward units (He hates them!) Psyker Battle Squad to drop WR on his Zoans and deny him his Psychic attacks. Vet Squad 1 to act as a front line unit and aiming to draw his fire giving the units behind the chance to punish his MC and large units. The rest of the army to pound away as hard as possible to break his army from distance, I did not want him up in my face! Vet Squad 2 to hang back in reserve and come in late to attack his flank
The Tyranids
Not sure what all his upgrades were
HQ
The Swarmlord
w/ Endurance, Iron Arm, Smite and Warp Speed Psychic powers
Tyrant Guard
Tyranid Prime
X2 Bone Swords
Regeneration
Elites
Hive Guard
X2
Hive Guard
X2
Zoanthropes
X2
X1 w/ Objuration Mechinicum, Shockwave
X1 w/ Crush, Objuration Mechanicum
Troops
Tyranid Warrior Brood
X3 w/ Deathspitters
X1 w/ Venom Cannons
Hormagaunts Brood
X10 Adrenal Glands
Termagaunts Brood
X11
Devourers
Heavy Support
Carnifex Brood
X2 Carnifex
w/ T/L Devourers
Brain Leech Worms
Adrenal Glands
Thoughts
As soon as I saw this list I was concerned about the Swarmlord, having never faced him before and not wanting to find out how bad he really is I labelled him target number one. The only problem was that he had the Tyrant Guard and the Tyranid Prime all mixed in together and that’s a lot of high toughness and plenty of wounds to get thru first. The Carnifex’s were next on my list followed closely by the Zoans, both can be absolutely devastating close up and nightmares to kill. Tyranid warriors and Hive Guards were next as the HG open Chimeras and even a LR if not dealt with and Warriors would tear thru any guardsmen
Deployment
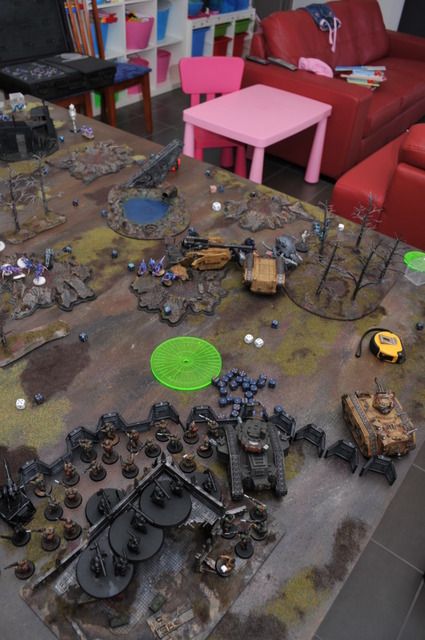
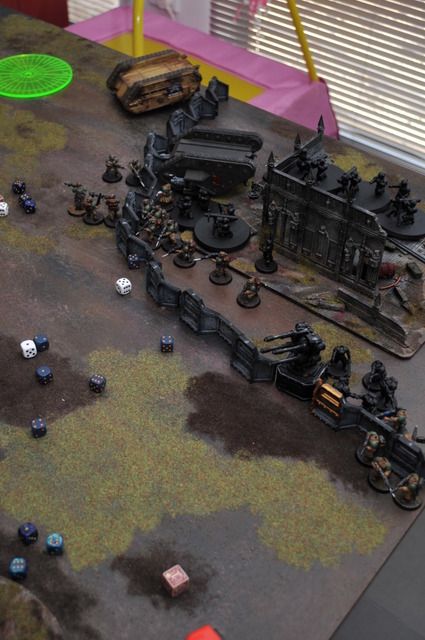
The 20 Man Blob Squad in the middlehiding behind the Aegis Defence Line with its ML Teams at the back. The PCS on its/my left flank with the Platoon Commander manning the Quad Gun. The HWT team found space on the upper levels of the ruins to get a commanding view of the battlefield. The CCS with its snipers was just below and close enough to issue orders. Just to its right giving them cover was the Executioner. The Manticore was to the extreme rear and completely hidden from view. The Hellhound was on the right flank as far forward as possible with the Psyker Battle Squad behind it. Vet Squad 1 was around 15”to the front of my lines hidden nicely in a forest. Vet Squad 2in their Chimera were held back in reserve. The Primaris Psyker was in with the blob squad to keep him alive (Look out Sir!)
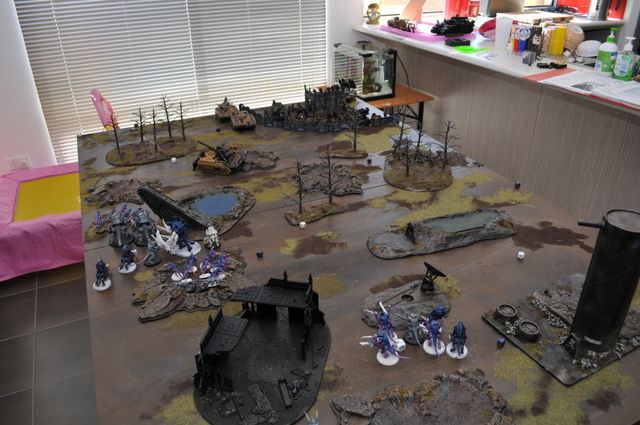
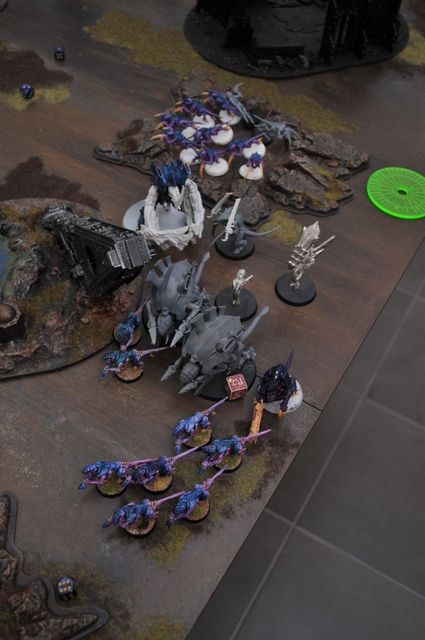
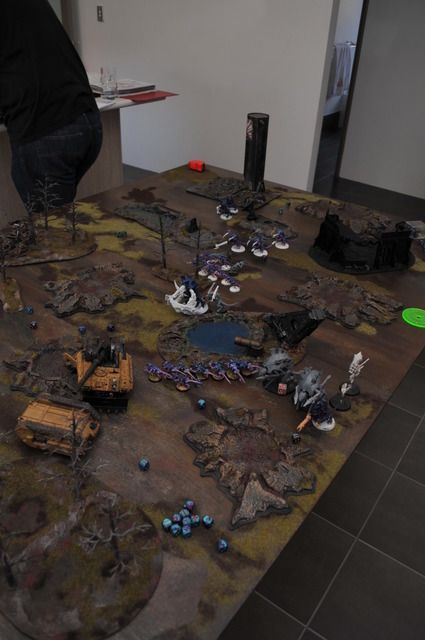
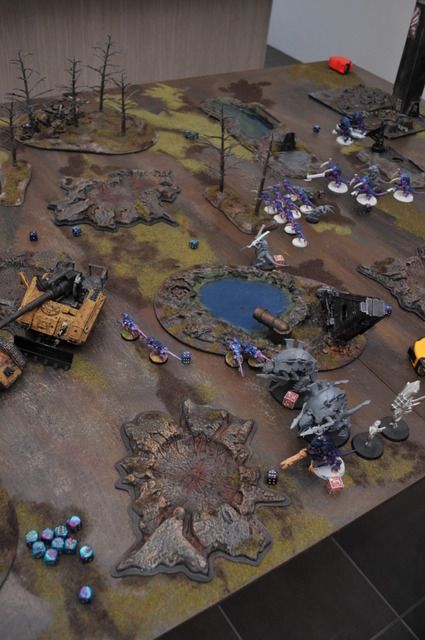
Nids deployed in two groups one with the two Carnifex’s, Zoans, HG’s and Termaguants with the Swarmlord behind with his Tyrant Guard and TP then the Hormagaunts. The second group was further back in his deployment area with the Warriors and the remaining HG. The forward group were just in view of most of my army
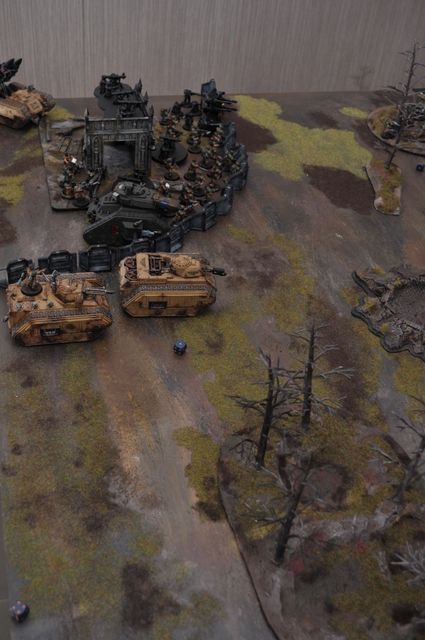
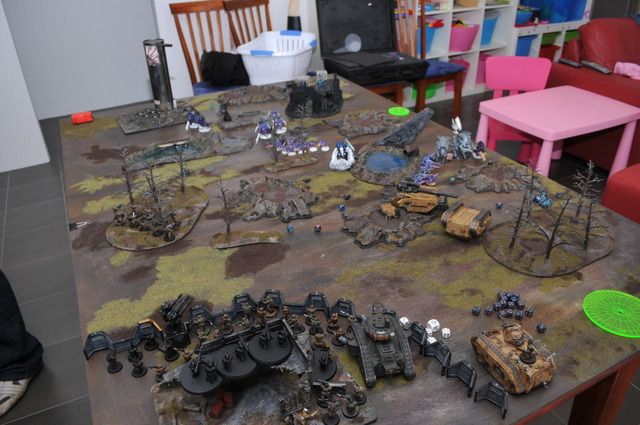
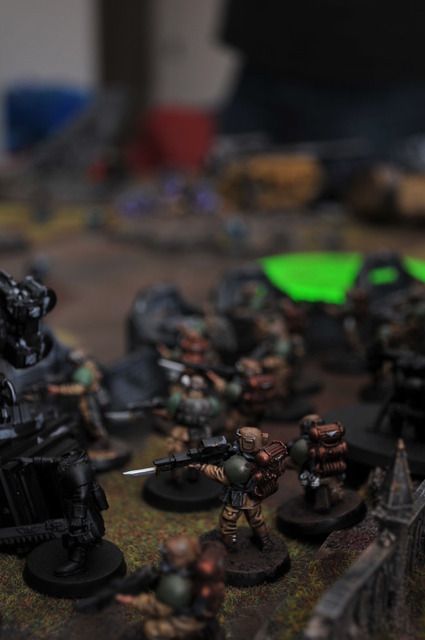
Imperial Guard deployment
Tyranid deployment
TURN ONE
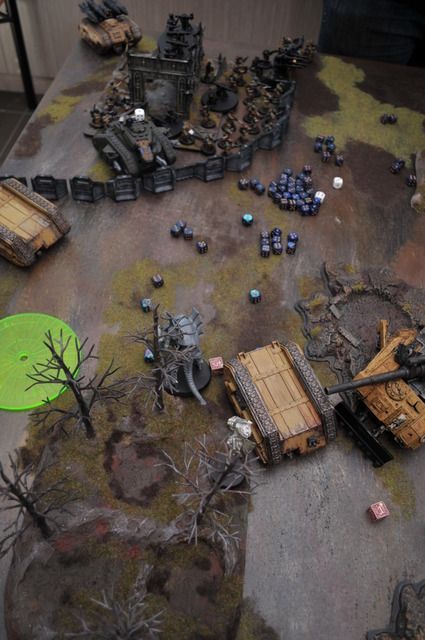
Night fighting! Imperial Guard main force holds still but the Hellhound moves forward to be within range of the Carnifex group and opens fire killing four Termagaunts and promptly illuminates the Carnifex allowing the Manticore to fire a salvo (1 Missile) at the group wounding the Carnifex and killing a HG. The Executioner and HWT open up on the Tyrant Guard and blow it away. PBS fail there leadership trying to fire off WR and lose three Psykers. Tyranids first turn involves all creatures moving forwards and some running. Carnifex group start to move to my right flank and towards the Hellhound. Shooting phase and the Hellhound takes hits from the Zoans and HG but it’s the TL devourers of the Carnifex’s that finally wreck it! It’s now upturned and completely blocking his advance on that flank, his only option will be to go thru a mysterious forest. The Swarmlord moved out into plain view of most of my force and manges to cast Endurance on itself and the TP making him a T7 monster!
End of Imperial Guard’s First Turn Shooting
End on Tyranid Turn One
TURN TWO
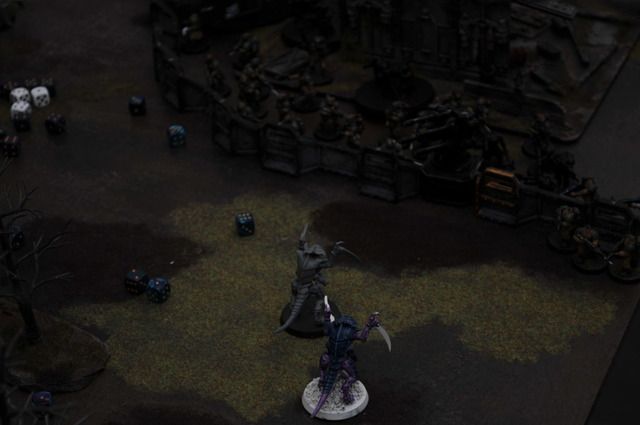
No moving. Shooting phase is a good one! The Swarmlord feels the effects of the Vet Squad Plasma Gunners (1 Killed himself) Snipers (thankyou rending!)plus the HWT and Quad Cannon. It finally dies to the Executioner tank pumping plasma blasts into its big ugly face! TP left standing all alone. PBS fail there leadership again trying to cast WR and lose another three Psykers (Spot the reoccurring theme?) The Manticore opens up on the Carnifex group and wounds one and a Zoan plus kills a few more Termagaunts. Tyranids move forward again and open fire killing a three Vets.
Now you see him (Swarmlord)
Now you don’t…..
TURN THREE
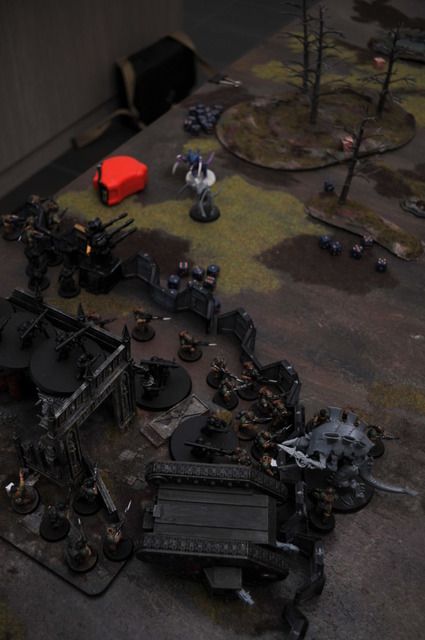
No reserves for the IG. Shooting phase starts with combined fire killing the TP and a Warrior. Manticore and the Executioner clean up a Carnifex and a Zoan. PBS finally blow themselves up failing there leadership test for the third time!! Tyranids kill a few more guys from the Vet squad and move in for the assault. Zoan stuns the Executioner and knocks off a HP using Objuration Mechanicum leaving my right flank exposed. Hormagaunts attempt to charge the Vet squad but lose two to overwatch and fail there charge
Turn Three (just before the Nids try and try and charge) Left Flank

Turn Three Right Flank
TURN FOUR
Reserves finally come in on the left. Combined fire kills a HG and kills a few more Hormagaunts. Lasgun volleys kill the remaining Termagaunts. Manticore fires its last missile blowing a HG on the right flank to oblivion. HWT wounds the remaining Carnifex. Tyranids move thru the mysterious terrain on the right with the sole remaining Carnifex and moves the Hormagaunts and Warriors up to assault the exposed Vet Squad 1. Shooting kills all but two Vets. The last HG blows the Vet Squad 2’s Chimera up and they lose four Guardsmen in the ensuing explosion but manage to pass there pinning test. The Carnifex kills 3 Guardsmen from the blob squad and the Zoan casts Objuration Mechanicum again against the Executioner stunning it again and removing another HP Warriors and Hormagaunts assault the Vets making mincemeat out of them and then consolidate towards my front line.
Warriors ripping guardsmen to pieces
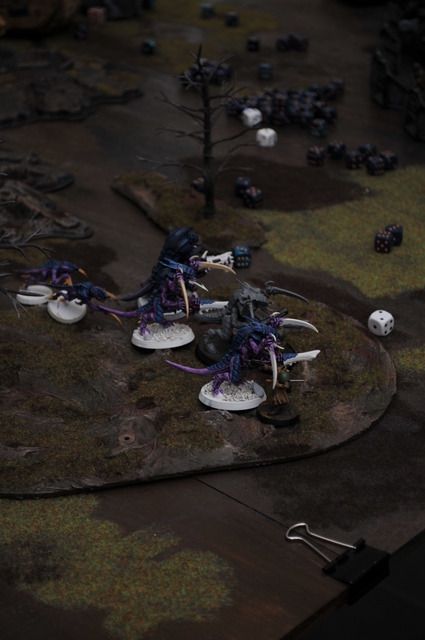
The Carnifex approaches…
TURN FIVE
I move my Primaris Psyker to be within 12”of the Carnifex. Shooting phase kicks off with combined fire finishing off the remaining Hormagaunts, HG and one Warrior. The Primaris Psyker pulls off Psychic Shriek against the Carnifex rolling 10 to wound (minus its leadership of 7 which means it would take three wounds off!) only for him to roll aM O T H E R C H U C K I N G SIX!! For his DENY THE WITCH!! WTF!! All other shooting it drops it to one wound! The Zoan finally wrecks the Executioner removing its last HP. The Carnifex assaults the Blob Squad killing three guardsmen who pass their morale check but fail to wound it at all. The Warriors then attempt to charge the lob squad as well only for them to fail their charge roll (he only needed a 5 but rolled a 4!!)
Warriors in the open
The Carnifex hits!
TURN SIX
Well with the Warrior stuck in no man’s land it doesn’t take that long for them to be wiped away. Zoan finally goes down to the HW Teams missile launchers. The blob squad fail to wound the Carnifex and he kills one guardsman. His last turn sees his Carnifex finally going down to a lonely guardsman who stabbed it in the eye! No kidding I had 13 Attacks and 3 for the Primaris Psyker and after rolling to hit and wound he only needed to make two 3 plus saves….he rolled a 5 and a 1!!
WIN FOR THE GUARD!! 10KPS – 7KPS
The aftermath
LESSONS LEARNT
1 – Carnifex’s are brutal beasts that do not want to die!
2 – Missile launchers kill big things and generally rule
3- the Swarmlord will be back
4- Psyker Battle Squads can go horribly wrong
5- Executioner tanks are freaking awesome
6- But not as good as Manticores
7- Orders are reliable but I must remember to issue them correctly, twice I issued them wrong and had orders left over but no one to give them to
8- the new Psychic powers are pretty darn good, especially if you roll good at the start
9 – Target priority is everything, work from your lowest strength weapons up to the highest strength
10- sniper rifles seem better in 6th, will nedd a few more games tho
11- Overwatch can be hit and miss, I killed two Hormagaunts but also blew one of my Plasma Gunners up trying to snap shot!
Hoped you enjoyed it and well done for getting this far!!
We stand alone together!
Comments Welcome
Danger Rod
Well yesterday I and a friend had our first game of 6th Edition, 1500Pts nothing too big!
What I can say from our first game is that the game has evolved into a more logical game (although some people will still find a way to break wound allocation and such…) the pregame and setup took us ages along with selecting Warlord traits (both of which we never used in the game) and Psychic powers
The Mission, Map, & Battlefield
We rolled off for Mission, Purge the Alien (how fitting) which is basically the old Annihilation
The map selected was Vanguard where the table is divided diagonally with deployment areas in the corners
The battlefield was a mix of two large forest areas (both mysterious) and three large ruined buildings along with a number of impact craters some line of site blocking clumps of trees and area terrain. At this point I had placed my Aegis Defence Line in my corner in a half-moon shape along with the Quad gun.
Imperial Guard List
HQ
CCS
X3 Snipers
Primaris Psyker
w/ Psychic Scream and Dominate
Elites
Psyker Battle Squad
X4 additional Sanctioned Psykers
Chimera
Troops
x20 Guardsmen Blob Squad
Commissar
X2 Missile Launcher Teams
Vet Squad 1
X3 Plasma Gunners
X1 Missile Launcher Team
Forward Sentries
Vet Squad 2
X3 Plasma Gunners
Chimera
HWT
X3 Missile Launchers
Fast Attack
Hellhound
w/ Searchlight
Heavy Support
Executioner
HB Sponsons
Manticore
Fortifications
Aegis Defence Line
w/ quad Gun
The Plan
Well I think it’s pretty obvious, turtle in one corner and unleash hell! The Hellhound to scoot up and harass his forward units (He hates them!) Psyker Battle Squad to drop WR on his Zoans and deny him his Psychic attacks. Vet Squad 1 to act as a front line unit and aiming to draw his fire giving the units behind the chance to punish his MC and large units. The rest of the army to pound away as hard as possible to break his army from distance, I did not want him up in my face! Vet Squad 2 to hang back in reserve and come in late to attack his flank
The Tyranids
Not sure what all his upgrades were
HQ
The Swarmlord
w/ Endurance, Iron Arm, Smite and Warp Speed Psychic powers
Tyrant Guard
Tyranid Prime
X2 Bone Swords
Regeneration
Elites
Hive Guard
X2
Hive Guard
X2
Zoanthropes
X2
X1 w/ Objuration Mechinicum, Shockwave
X1 w/ Crush, Objuration Mechanicum
Troops
Tyranid Warrior Brood
X3 w/ Deathspitters
X1 w/ Venom Cannons
Hormagaunts Brood
X10 Adrenal Glands
Termagaunts Brood
X11
Devourers
Heavy Support
Carnifex Brood
X2 Carnifex
w/ T/L Devourers
Brain Leech Worms
Adrenal Glands
Thoughts
As soon as I saw this list I was concerned about the Swarmlord, having never faced him before and not wanting to find out how bad he really is I labelled him target number one. The only problem was that he had the Tyrant Guard and the Tyranid Prime all mixed in together and that’s a lot of high toughness and plenty of wounds to get thru first. The Carnifex’s were next on my list followed closely by the Zoans, both can be absolutely devastating close up and nightmares to kill. Tyranid warriors and Hive Guards were next as the HG open Chimeras and even a LR if not dealt with and Warriors would tear thru any guardsmen
Deployment
The 20 Man Blob Squad in the middle
Nids deployed in two groups one with the two Carnifex’s, Zoans, HG’s and Termaguants with the Swarmlord behind with his Tyrant Guard and TP then the Hormagaunts. The second group was further back in his deployment area with the Warriors and the remaining HG. The forward group were just in view of most of my army
Imperial Guard deployment
Tyranid deployment
TURN ONE
Night fighting! Imperial Guard main force holds still but the Hellhound moves forward to be within range of the Carnifex group and opens fire killing four Termagaunts and promptly illuminates the Carnifex allowing the Manticore to fire a salvo (1 Missile) at the group wounding the Carnifex and killing a HG. The Executioner and HWT open up on the Tyrant Guard and blow it away. PBS fail there leadership trying to fire off WR and lose three Psykers. Tyranids first turn involves all creatures moving forwards and some running. Carnifex group start to move to my right flank and towards the Hellhound. Shooting phase and the Hellhound takes hits from the Zoans and HG but it’s the TL devourers of the Carnifex’s that finally wreck it! It’s now upturned and completely blocking his advance on that flank, his only option will be to go thru a mysterious forest. The Swarmlord moved out into plain view of most of my force and manges to cast Endurance on itself and the TP making him a T7 monster!
End of Imperial Guard’s First Turn Shooting
End on Tyranid Turn One
TURN TWO
No moving. Shooting phase is a good one! The Swarmlord feels the effects of the Vet Squad Plasma Gunners (1 Killed himself) Snipers (thankyou rending!)plus the HWT and Quad Cannon. It finally dies to the Executioner tank pumping plasma blasts into its big ugly face! TP left standing all alone. PBS fail there leadership again trying to cast WR and lose another three Psykers (Spot the reoccurring theme?) The Manticore opens up on the Carnifex group and wounds one and a Zoan plus kills a few more Termagaunts. Tyranids move forward again and open fire killing a three Vets.
Now you see him (Swarmlord)
Now you don’t…..
TURN THREE
No reserves for the IG. Shooting phase starts with combined fire killing the TP and a Warrior. Manticore and the Executioner clean up a Carnifex and a Zoan. PBS finally blow themselves up failing there leadership test for the third time!! Tyranids kill a few more guys from the Vet squad and move in for the assault. Zoan stuns the Executioner and knocks off a HP using Objuration Mechanicum leaving my right flank exposed. Hormagaunts attempt to charge the Vet squad but lose two to overwatch and fail there charge
Turn Three (just before the Nids try and try and charge) Left Flank
Turn Three Right Flank
TURN FOUR
Reserves finally come in on the left. Combined fire kills a HG and kills a few more Hormagaunts. Lasgun volleys kill the remaining Termagaunts. Manticore fires its last missile blowing a HG on the right flank to oblivion. HWT wounds the remaining Carnifex. Tyranids move thru the mysterious terrain on the right with the sole remaining Carnifex and moves the Hormagaunts and Warriors up to assault the exposed Vet Squad 1. Shooting kills all but two Vets. The last HG blows the Vet Squad 2’s Chimera up and they lose four Guardsmen in the ensuing explosion but manage to pass there pinning test. The Carnifex kills 3 Guardsmen from the blob squad and the Zoan casts Objuration Mechanicum again against the Executioner stunning it again and removing another HP Warriors and Hormagaunts assault the Vets making mincemeat out of them and then consolidate towards my front line.
Warriors ripping guardsmen to pieces
The Carnifex approaches…
TURN FIVE
I move my Primaris Psyker to be within 12”of the Carnifex. Shooting phase kicks off with combined fire finishing off the remaining Hormagaunts, HG and one Warrior. The Primaris Psyker pulls off Psychic Shriek against the Carnifex rolling 10 to wound (minus its leadership of 7 which means it would take three wounds off!) only for him to roll a
Warriors in the open
The Carnifex hits!
TURN SIX
Well with the Warrior stuck in no man’s land it doesn’t take that long for them to be wiped away. Zoan finally goes down to the HW Teams missile launchers. The blob squad fail to wound the Carnifex and he kills one guardsman. His last turn sees his Carnifex finally going down to a lonely guardsman who stabbed it in the eye! No kidding I had 13 Attacks and 3 for the Primaris Psyker and after rolling to hit and wound he only needed to make two 3 plus saves….he rolled a 5 and a 1!!
WIN FOR THE GUARD!! 10KPS – 7KPS
The aftermath
LESSONS LEARNT
1 – Carnifex’s are brutal beasts that do not want to die!
2 – Missile launchers kill big things and generally rule
3- the Swarmlord will be back
4- Psyker Battle Squads can go horribly wrong
5- Executioner tanks are freaking awesome
6- But not as good as Manticores
7- Orders are reliable but I must remember to issue them correctly, twice I issued them wrong and had orders left over but no one to give them to
8- the new Psychic powers are pretty darn good, especially if you roll good at the start
9 – Target priority is everything, work from your lowest strength weapons up to the highest strength
10- sniper rifles seem better in 6th, will nedd a few more games tho
11- Overwatch can be hit and miss, I killed two Hormagaunts but also blew one of my Plasma Gunners up trying to snap shot!
Hoped you enjoyed it and well done for getting this far!!
We stand alone together!
Comments Welcome
Danger Rod

