|
|
Post by KRIEGEIRK on Mar 7, 2012 18:08:09 GMT -5
Thanks a lot guys! zeke- In all honesty, I did nearly all the work in one day. About another half to do the rest of some of the detailing. The longest part is waiting for what I use for the ground to dry. Trooper- Thank you very much! I have another one that I am currently working on as well. I should be posting some WIPs tomorrow. I also have something else that I have decided to add to the one posted above to make it look more... closed in? I guess you could say? Less open space on the outer parts. It will make sense when I have it finished  empirespy- Thank you so much!  I posted the thread on Thursday, but didn't really post any pictures until saturday as that is when work on it really began. *Just a reminder this is a thread for anyone who builds their own terrain/diorama's to post how they go about making things. dcrabb has been posting some of his stuff as well, the more people who post the more ideas other people can get. Twas my plan  * |
|
|
|
Post by Cosmic on Mar 7, 2012 18:13:41 GMT -5
That was suspense building! the scroll to the bottom of the page, then back up again!!! 10/10 for theatrics! ;D An awesome job, however I would like you to paint/cover the bare polystyrene edges, it spoils what is otherwise perfect. It looks like Cosmic has something to aspire to with his shelf project  Nevvvvveeeerrrrrr!!!!!  This has made me want to finish mine right now though, damn the lack of paint! Looking great Krieg  those Gothic Ruins definitely caught my interest! |
|
|
|
Post by KRIEGEIRK on Mar 7, 2012 20:06:36 GMT -5
Thank you, Cosmic! Like I said, they are great in quality and in price. Very detailed for the 20 USD I payed. Plus you get two huge corner pieces in the box. I have a whole other corner of ruins that I will use in a future diorama sometime  |
|
|
|
Post by KRIEGEIRK on Mar 8, 2012 15:55:46 GMT -5
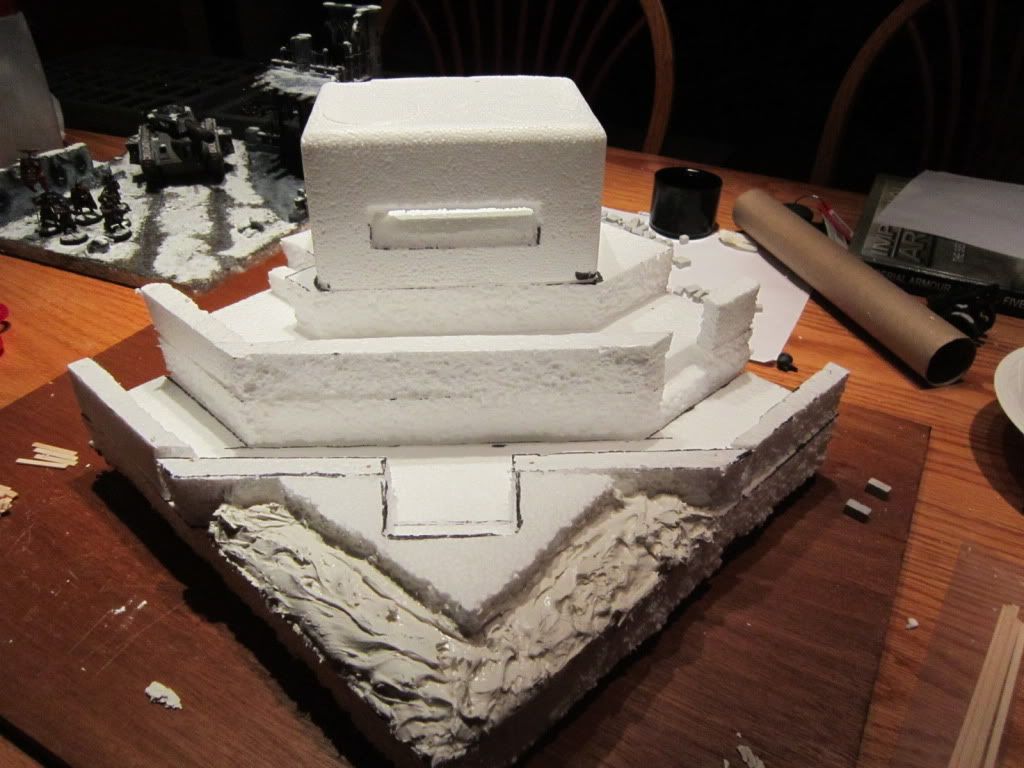
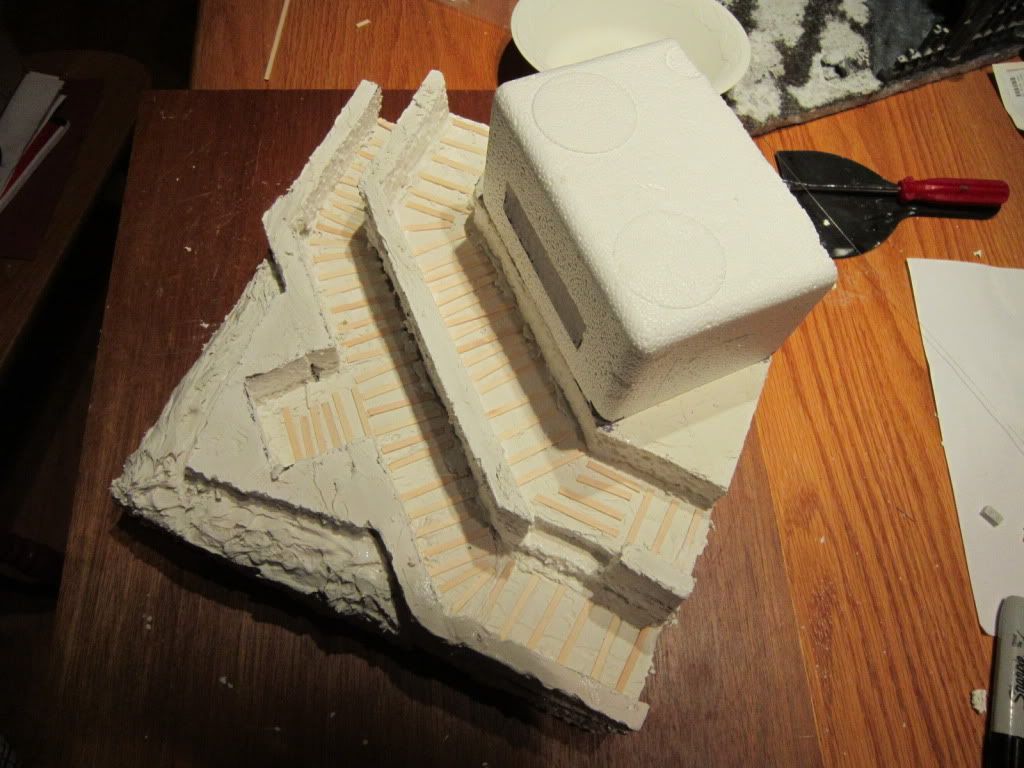
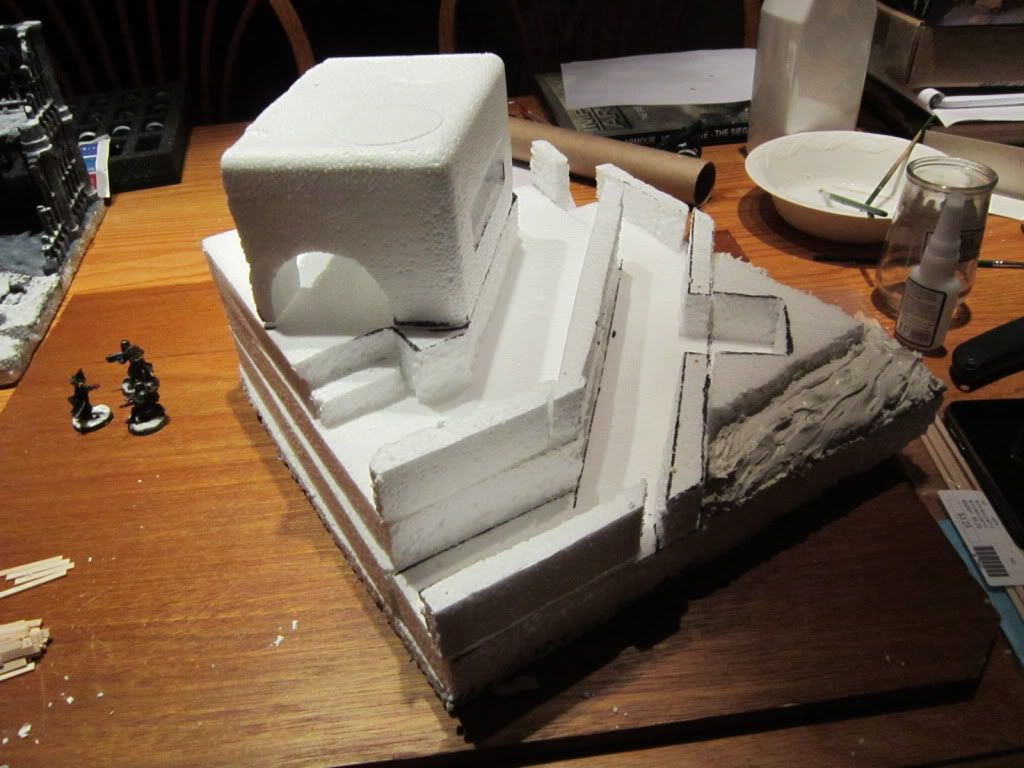
Building a Trench and Bunker SystemTime for my next creation this week. A trench and bunker system made completely from scratch. I again began with a rough sketch of what I was looking for with pen and paper. Once I had a design I liked, I began measuring out styrofoam and began cutting. The end result of my madness was this...    The tiers were glued together in layers like a cake using Elmer's glue again. As can be seen in the pictures above, the same DIY filler I used on my previous diorama was used to create the mud at the base of the trench and on the trench floors, and a nice smoother looking concrete layer on top of the trench walls and at the base of the bunker as well. The wooden bits of trench floors were made using small pieces of a balsa type wood I picked up at a hobby store and were cut to various lengths to give the trench floors a different feel than just mud. The exposed styrofoam was then prepped for its undercoat with Elmer's White All Purpose Glue to give a good layer between paint and foam. Again... WARNING: Spray paints eat styrofoam and can cause a nasty vapor that can be harmful if ingested. It is pertinent that all exposed styrofoam is sealed with glue prior to undercoating. The diorama was left to dry for over 24hrs as the DIY filler was a little thick at the base and a lot more glue was used to seal exposed styrofoam. Once all components are dry, the undercoat is ready to be applied. Chaos Black was used again, and the diorama was left to dry again for an hour or two before paints can be applied. Once dry the mud and trench floors were painted using my same technique from the past. A mix of Adeptus Battle Grey drybrush, Scorched Brown drybrush, light Bestial Brown dry brush, and very very light dry brush of Snakebite leather. The wooden panels on the trench floor were lightly drybrushed with Bestial Brown and a slightly thicker drybrush of Snakebite Leather, as I did not want the wood panels to look exactly like the mud on the floor. The concrete walls of the trench and the base of the bunker were drybrushed Adeptus Battle Grey, Codex Grey, and Astronomicon Grey. The colors were drybrushed and blended to give a natural look. The result is this...    I am currently waiting for the top of the bunker piece to dry from its undercoat. I hope to have another update for you all later on this evening. In the meantime, enjoy and C&C is always welcome!
|
|
|
|
Post by optimat on Mar 8, 2012 17:57:11 GMT -5
Far be it from the new guy to attempt to offer advice, but just browsing through this forum for some inspiration for stuff and this thread is like a magnet because the work is really good to look at. However, the snow piece has one very minor niggle that makes my toes itch.
The corner of that building is much too large. If you compare the building corner (which, bear in mind, is an internal corner) to the size of the full diorama, either they are driving a tank through what would be the middle of the building* or they're still driving outside in the snow**
* - in which case more interior-like details would've added an amazing finishing touch and given the overall scene that continuity that makes it excellent
** - in which case the building corner would be better re-positioned to make it look like a street in between buildings.
I hope these comments are taken as friendly as I mean for them to be read. I was ultimately inspired and really impressed.
|
|
|
|
Post by KRIEGEIRK on Mar 8, 2012 18:08:40 GMT -5
Hi there, optimat and welcome to the IGMB!!  I understand what you are saying fully. I am still working on that particular diorama as well. In fact I am working on a piece for it as I type. I am adding an additional wall as I wanted the diorama to look like they were traversing through the ruins of what was once a building. The concrete wall bit you see in the one corner is a piece of the interior of what was once that building. I am currently working on an inner wall for the concrete wall bit to show some interior bits of the building. It will make a little more sense when I finish it. As we all basically know, buildings in the 40k universe are huge. I am hoping to have the piece I am working on finished this evening. I am also going to be adding some more rubble to the building area. I was going for a "the building was destroyed centuries ago and nature has kind of taken back over the area" I am planning on writing a little fluff on the diorama's themselves to kind of tie the scene together. All the C&C I can get is more than welcome and I appreciate your input  |
|
|
|
Post by KRIEGEIRK on Mar 9, 2012 0:39:40 GMT -5
Hello all, I have finally completed the first diorama I posted back on page one. I added the final detail tonight and am quite pleased with how it looks now. I hope you enjoy the final product  optimat optimat- this is what I was trying to explain to you in my post above. If you read the description I give before the final set of pictures you will see what I was aiming for. Also thank you for motivating my butt to finally build this final piece, I was beating around the bush to do it for a few days now. If anyone has any questions on how I went about doing anything feel free to ask here or PM me  C&C always welcome as well! The trench and bunker diorama should be nearly complete by tomorrow. So you can expect an update on that soon  for now, it is time for me to count sheep. You stay classy, IGMB. |
|
|
|
Post by optimat on Mar 9, 2012 2:01:16 GMT -5
Looking forward to seeing some more pictures tomorrow!
|
|
|
|
Post by KRIEGEIRK on Mar 26, 2012 12:46:43 GMT -5
Time for an update on the trench and bunker system I've been working on. Sorry about the slow update, but progress has been even slower since my Midterm Break ended. I have the bunker battle damaged, painted and snowed up. The rest of the trench has had snow added to it. Progress is slow, but I hope to keep working on this little by little.   These are the only pictures I have right now, I hope I can get some more for you all maybe this evening. As always C&C is welcomed and appreciated. Enjoy  |
|
|
|
Post by commissarbob on Mar 31, 2012 9:33:09 GMT -5
Nice work overall, my only gripes are the mud texture used and the fact that you can see the texture of the expanded foam beads. Something that would really help with the foam texture and assist in the cast look of concrete/rockrete, is while you do the seal coat apply a layer of fine sand (sugar sand). This will give it a more durable surface and eliminates the beaded foam bead appearance which looks out of place in an otherwise well executed diorama. As for the mud, it seems that you are applying the sponge while the filler is too wet and you are getting streaks and 'pulled' arcs of putty. Try waiting for the putty to dry to the point that it has just 'skinned' over and take the sponge (moistened) and tap it gently into the putty to create the desired texture. This is also a good stage to add the tank tracks and wheel ruts.
|
|
|
|
Post by KRIEGEIRK on Mar 31, 2012 15:47:42 GMT -5
Yea that has been bugging me too about the damn foam beads. Thank you for the suggestion, I will try it out the next time I have time to do another diorama. As for the mud and sponge, I thought about what you said a few weeks ago and figured it would probably turn out a lot better. I will also try this again on a board in the future  The tracks were added after it had been nearly dry. These are my first terrain and diorama attempts ever, so it was a huge learning experience  Over all though, I am pleased with how my first works turned out. Only room for improvement as I progress! |
|
|
|
Post by commissarbob on Apr 2, 2012 17:41:21 GMT -5
For your first dioramas, they look really nice. And as you said it was a learning experience.
|
|
|
|
Post by dcrabb on Apr 5, 2012 13:09:31 GMT -5
the fact that you can see the texture of the expanded foam beads. . Another thing to look at to eliminate the foam bead problem is to get ahold of some pink or blue insulation foam instead of the white stuff. It's harder to find free stuff but if you check construction sites for scraps (don't steal their good stuff!) etc you can find some. I also bought a 1/2" think 4' x 8' sheet at Home Depot for under $20. I have enough for multiple projects. |
|
|
|
Post by syphon on Apr 5, 2012 14:59:16 GMT -5
I love what you did with the styrofoam. But you don't have problems with cutting it? I've taken to actually buying foamcore after finding out styrofoam crumbles all over the place, any way you cut it (pun intended, both meanings are valid  ). |
|
|
|
Post by KRIEGEIRK on Apr 5, 2012 17:47:10 GMT -5
Yea cutting it is a mess, but it was what I had on hand for free  I will be using insulation foam from here on. College student on a very tight budget  I have a few more projects that I would like to do, all of which I think I'd like to try and make modular pieces for a table I'd like to build at some point. |
|
|
|
Post by Trooper One-Nine-Seven-Four on Apr 5, 2012 18:14:27 GMT -5
Actually, regarding the styrofoam pattern, I'm wondering if the new Citadel textured paints might come in handy...
<.<
>.>
|
|
|
|
Post by dangerrod on Apr 5, 2012 18:46:40 GMT -5
Actually, regarding the styrofoam pattern, I'm wondering if the new Citadel textured paints might come in handy... <.< >.> Sounds like we have a mole from GW HQ among us! Such blatant promotion!! Danger Rod |
|
|
|
Post by KRIEGEIRK on Apr 5, 2012 18:48:00 GMT -5
Could be worth a shot! I just don't have the spare cash to dish out right now. Perhaps in the near future I could try it out and let you all know how it goes?
|
|
|
|
Post by vegna on Apr 5, 2012 18:54:18 GMT -5
i've got some on order...will let you know how i think it goes  |
|
|
|
Post by KRIEGEIRK on Apr 5, 2012 19:00:51 GMT -5
Egggggcellent!
|
|
|
|
Post by Peter Cooman on Apr 6, 2012 1:21:24 GMT -5
No this can't be a GW employee.
His response lacked the words "price rise", "advance order" and "get yours today"
Trooper might be on to something though.
|
|
|
|
Post by dcrabb on Apr 6, 2012 9:38:36 GMT -5
For easy clean cutting of styrofoam I use a hot wire cutter I got at Michaels or Hobby Lobby for under $10. Works great but don't breath the smoke to much.
For textured paint try going to the paint department at Home Depot they sometimes have half pints of test colors or OOOps paints for about $.50. Take one of those home (the color doesn't matter) and pour some into a small container, add a bit of sand, mix and presto you have textured paint. Apply thickly to your stryrofoam and let dry. Then paint the item the color you want it to be. Might take longer but should have the same effect.
|
|
|
|
Post by KRIEGEIRK on Apr 6, 2012 10:20:31 GMT -5
That's a good idea dcrabb! One of these days Im going to go to a DIY store and just scope out cool crap to buy. I have an Idea for an abandoned Mine or Refinery type display board.
|
|
|
|
Post by Trooper One-Nine-Seven-Four on Apr 6, 2012 14:26:29 GMT -5
Actually, regarding the styrofoam pattern, I'm wondering if the new Citadel textured paints might come in handy... <.< >.> Sounds like we have a mole from GW HQ among us! Such blatant promotion!! Danger Rod Nope. I currently am an unemployed graduate student... <.< >.> But I am friends with the previous and current manager of my local GW... |
|
|
|
Post by dangerrod on Apr 6, 2012 19:21:51 GMT -5
Sounds like we have a mole from GW HQ among us! Such blatant promotion!! Danger Rod Nope. I currently am an unemployed graduate student... <.< >.> But I am friends with the previous and current manager of my local GW...A very nice cover story......MOLE!! lol  Back to the thread, DIY texture paint seems like a great idea, any ideas on what type of sand is best? |
|