Post by danesk on Apr 29, 2014 9:36:27 GMT -5
This thread is to be a tutorial, a help-maker and a progress-blog for me. The "tutorial" part is for all those of us that never-ever-ever-ever gonna win something based on our paintings. We might be decent (as I hope I am), or even good, but never THAT good.
And it also a bit of a help for all those that speaks a language that doesn't involve things like "white spirit" and such. As I'm not a native speaker a lot of my explanations will be fairly simple, describing what I'm using instead of names.
The thread started with the Baneblade, but it wont end with the Baneblade! There's allways another tank to paint, and as I'm a tanker, there will be a lot of tanks.
Well, you might have guessed that by the name!
Soooo... Lets get started, eh? If you have any questions just ask them, or anything else that you think about!
**DISCLAIMER - I'm not the best painter around, and I know it! I'm just trying to help painters in my own level or that is new to the hobby! - END DISCLAIMER**
Background:
So, I've had my eyes on the GW Baneblade since it hit the stores, but never been close to actually bying or building it. The reasons for that was the price, it's not the cheapest plastic around, and my own skills in painting. Not to mention the huge scale of it, and the thought of painting it all with a brush was daunting.
BUT in later time the economy is shaping up and I've bought and practised with an airbrush. So about 2 weeks ago all was set, but I still hadn't made the decision to buy it.
That was until I discovered a 10% discount on every model on a site, and after clearing it with the wifey, I ordered it.
The very same evening I was scouring the net for tips, how to's and scale comparisons, looking on forums, youtube and other places. I was terrified and inspired at the same time when I realized exactly how big it would be. And then I started to plan the build and painting.
I'm a tanker in the real world, and as such I decided to build it according to how I would have built it if it was real. That decision could either be a huge undertaking, or a very small one. What it became will be shown a bit later.
The unboxing:
I got home yesterday after a week in the field with the real deal, to find the kit waiting for me. The box it was delivired in was big, but they are mostly air to protect the model. Well, not this time. The size of the box was magnificient!
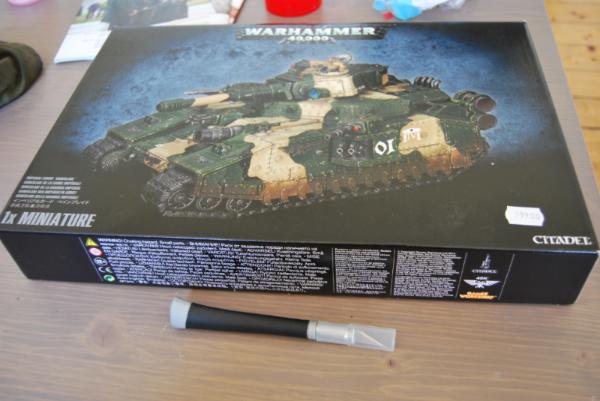
I couldn't wait to open it up and inspect it, and the first reflection made was that the kit seemed to be excellent. Almost no flash, and of all the sprues there were only one with mould lines that needed extra time to take care of.
I decided early on to build the ordinary Baneblade (real surprise there, huh?) and when I inspected the parts I discovered that a bit on the upper hull was a bit broken.
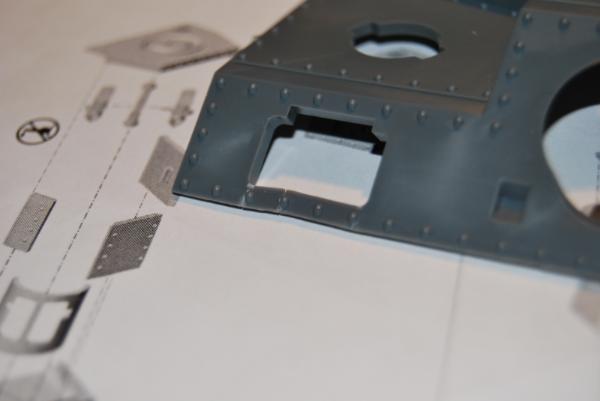
It was easily fixed, just a little bending and it snapped right back. Now, to the interesting part.
The build:
Building the beats is a real blast (ain't done yet)! The pieces fit very well togheter and it feels very well thinked out in most bits!
The only part that is a bit tedious is the track assembly and sides. Mostly because it's the only part built twice. The track links fit togheter with ease, as long as you dry-fit them first and try it. They can be a bit fiddly in the fit when you get to the single track-links, but not in a scale that will ruin the model.
I knew from the beginning that it would be big, but it was bigger than expected.
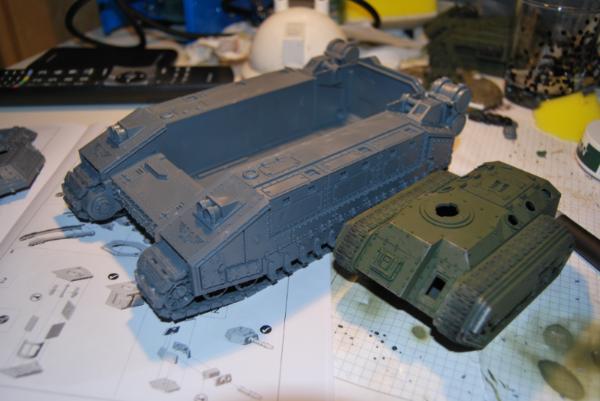
The chimera looks like a toddler toy when put beside the beast.
One thing I want to share is the weight and thickness of the plastic.
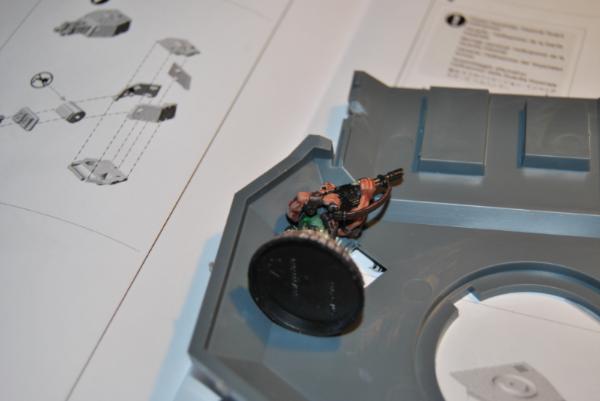
That was a shocker (chocker?). Real heavy duty stuff, and when I'd gotten this far in the build I had a hard time believing that this was a model from GW. It's that wonderful!
But, I have more than praise for the kit. It has some downsides, and the biggest one is without doubt the instructions. The only numbered parts is a couple of wheels, and they are the first thing to be built. So this kit is not for beginners, it will take some energy and thinking to figure out where all parts is supposed to be. For a kit with 200+ parts there should be numbers on every one, or at the very least a drawing over the sprues. But no.
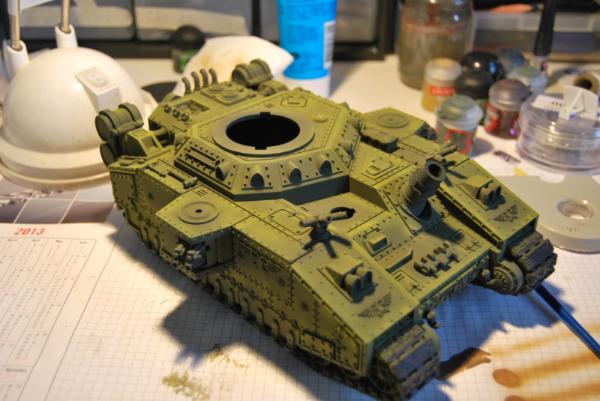
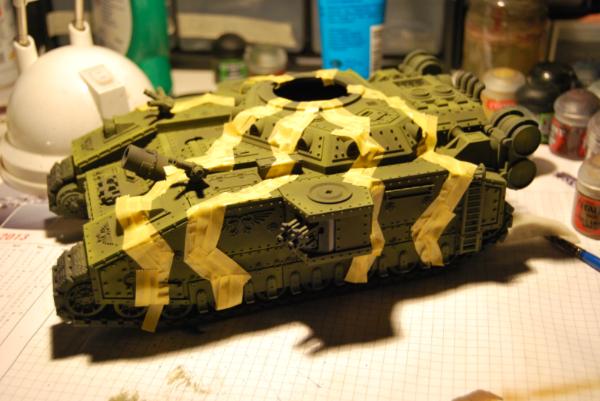
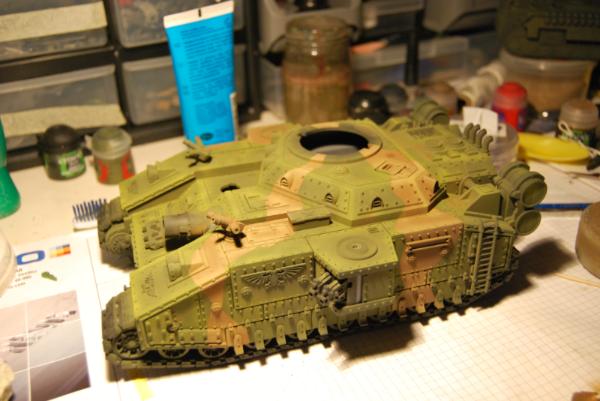
Oh well, the build carries on! The upper hull was very easy to get in place, and when all the big parts were put togheter the model was perfectly balanced, unlike the risk with the older Leman Russ or Chimera kits.
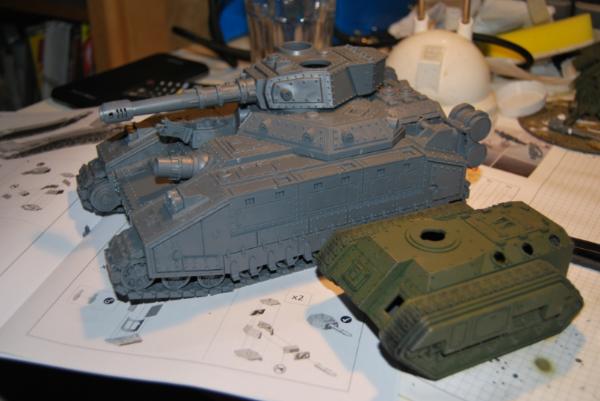
I can't get over the size. It's huge and wonderful. I'm afraid that I have to build one more in the future...
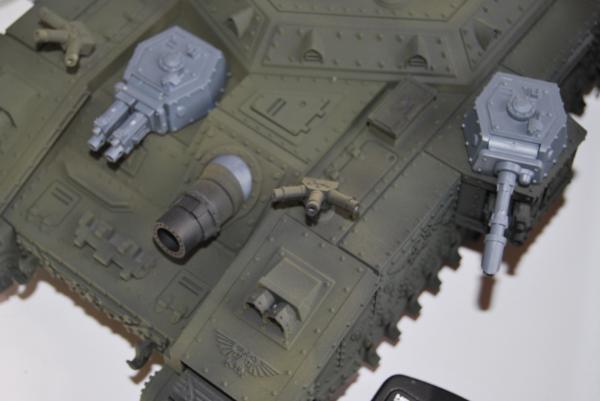
A part that people will build different is the lascannon turrets on the heavy bolter sponsons. When building the turret the bottom plate doesnt have a pin to stick into the hole, you're to mount a larger pin through the turret.
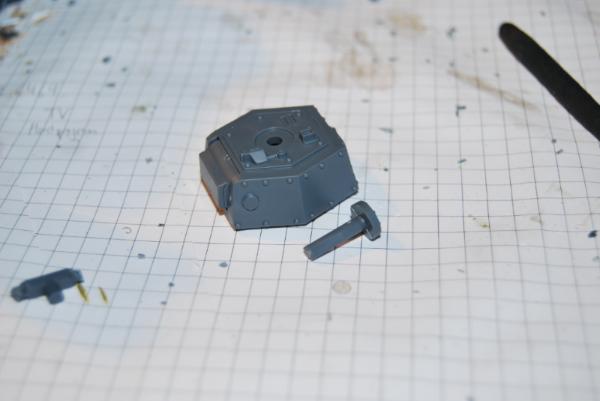
My first thought was to glue the pin to the sponson, thus getting a turret that would stick until the end of times. Then I was thinking about it again. If I was to do that the painting would have been more difficult and the modification for the cannon wouldn't be an option. Yes, I could have glued it after painting. But I like to be able to remove my turrets.
In the end, the pin was glued onto the turret. And the modification for the lascannon I have in mind as due to the sloppiness. If you look at GWs own bandblades the lascannons is hanging. I don't want that but I don't want to glue it stuck either. I will fix it with a small piece of plasticard glued beneath the gun, thus giving it some resistance.
Well, the last thing then. The "real-tanker-modifications". At this moment they're not as big as they could have been, but they to exist. This is due to many smart solutions on the kit that is surprisingly correct (besides the size of the beast) compared to a real tank.
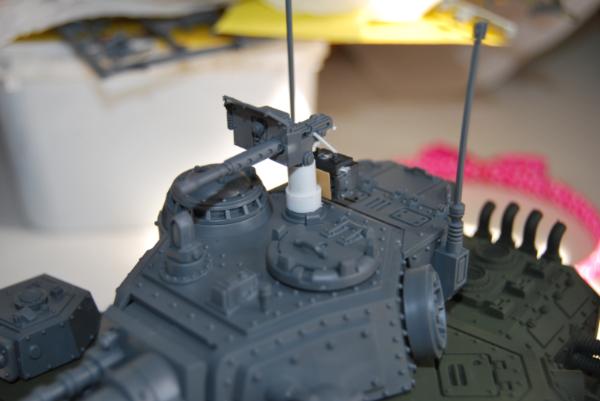
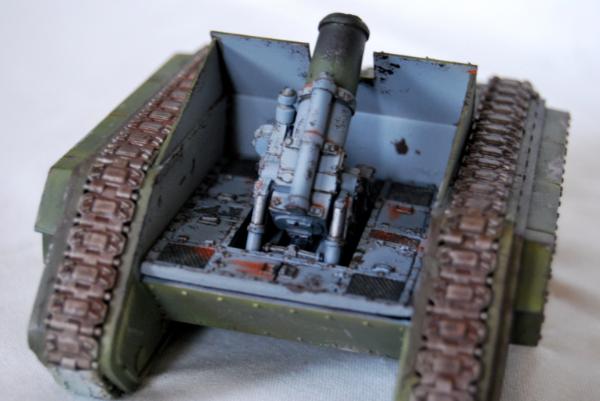
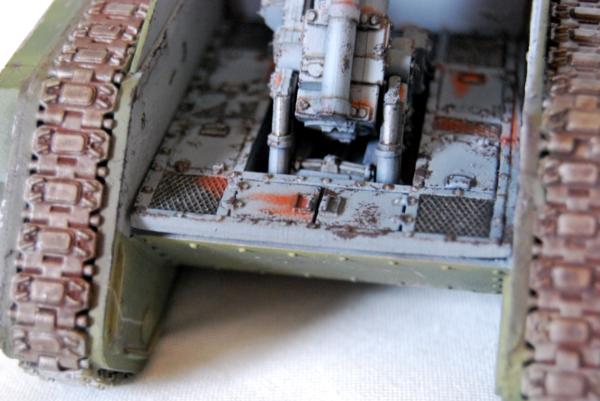
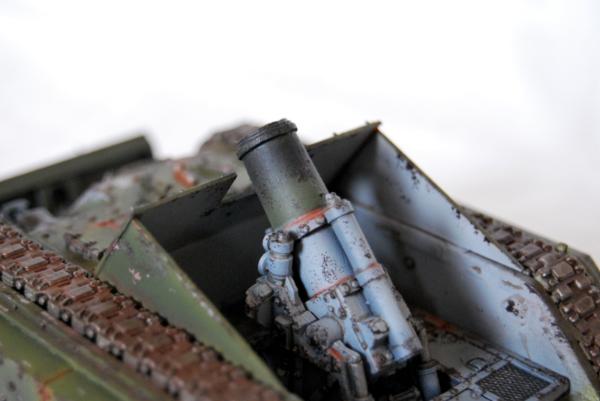
One thing that DON'T exist on the kit but is getting common today is a RWS, Remote Weapon Station. This is basically a platform where you mount everything from light machineguns to automatic cannons. As the baneblade have an autocannon as coax I looked on a smaller scale, and the Heavy Stubber was the perfect match. I've always loved that weapon, and with this kit you get a couple that has a somewhat different look from the usual one.
*Wait what? Why just not have the stubber as pintle???*
Well, because you don't want to stand in the open, and who is to man it? The baneblade can hardly rely on stealth, so every crewman that pops his hatch will be prime target for snipers! Besides, who is going to stand up and operate it? The gunner? Commander? No, better to have the option to use it from the cover inside the tank.
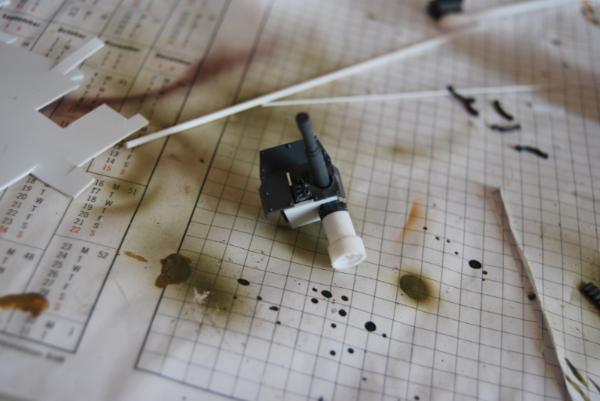
A small preview of it before I mount it.
You notice how I aim for it to be true to real life (well, as said, as close as the size in 38 000 years from now will allow)? That's one of the things that I find so wonderful with this game, we all have possibility to make it wath we want!
Oh well, lets move on to the turret.
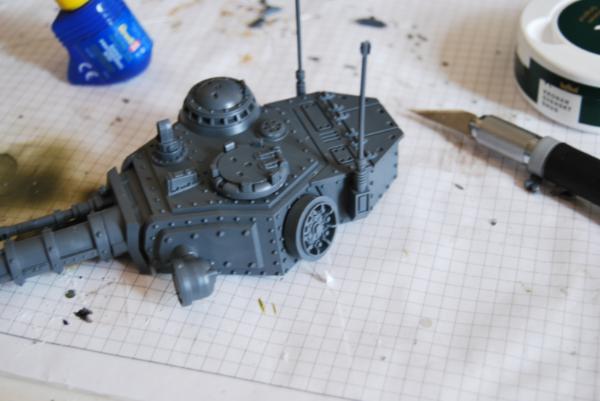
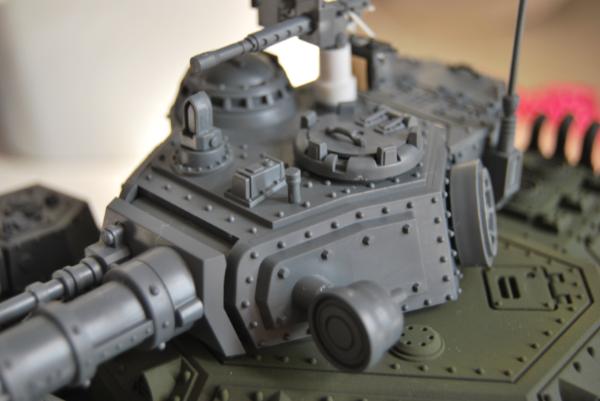
They provide you with a spare road wheel, and that is wonderful! I can imagine how easily they get destroyed when rolling in speed on this beast, so why not mount it? So I made a simple attachment with a piece of plasticard tube and glued it on. You might notice that there ain't nothing on the wheel visible, and that is due to how you attach spare parts. Many times they are mounted with the same kind of nuts and bolts as they would be later on.
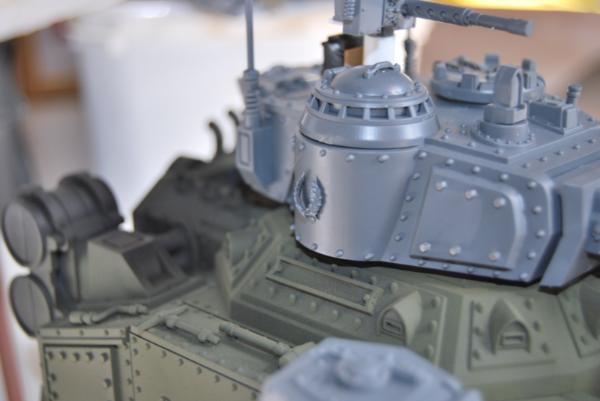
Lastly, have a look on the back of the turret on the last pic. You'll see that I've mounted the rear stowage compartments and antennas. This is highly optional, but if you want to build realistic you should mount it. And for me it just looks better.
So, done for now! Next update will bring a finished stubber and the first pics and thoughts of the paintwork.
I hope you liked it so far!
And it also a bit of a help for all those that speaks a language that doesn't involve things like "white spirit" and such. As I'm not a native speaker a lot of my explanations will be fairly simple, describing what I'm using instead of names.
The thread started with the Baneblade, but it wont end with the Baneblade! There's allways another tank to paint, and as I'm a tanker, there will be a lot of tanks.
Well, you might have guessed that by the name!
Soooo... Lets get started, eh? If you have any questions just ask them, or anything else that you think about!
**DISCLAIMER - I'm not the best painter around, and I know it! I'm just trying to help painters in my own level or that is new to the hobby! - END DISCLAIMER**
Background:
So, I've had my eyes on the GW Baneblade since it hit the stores, but never been close to actually bying or building it. The reasons for that was the price, it's not the cheapest plastic around, and my own skills in painting. Not to mention the huge scale of it, and the thought of painting it all with a brush was daunting.
BUT in later time the economy is shaping up and I've bought and practised with an airbrush. So about 2 weeks ago all was set, but I still hadn't made the decision to buy it.
That was until I discovered a 10% discount on every model on a site, and after clearing it with the wifey, I ordered it.
The very same evening I was scouring the net for tips, how to's and scale comparisons, looking on forums, youtube and other places. I was terrified and inspired at the same time when I realized exactly how big it would be. And then I started to plan the build and painting.
I'm a tanker in the real world, and as such I decided to build it according to how I would have built it if it was real. That decision could either be a huge undertaking, or a very small one. What it became will be shown a bit later.
The unboxing:
I got home yesterday after a week in the field with the real deal, to find the kit waiting for me. The box it was delivired in was big, but they are mostly air to protect the model. Well, not this time. The size of the box was magnificient!

I couldn't wait to open it up and inspect it, and the first reflection made was that the kit seemed to be excellent. Almost no flash, and of all the sprues there were only one with mould lines that needed extra time to take care of.
I decided early on to build the ordinary Baneblade (real surprise there, huh?) and when I inspected the parts I discovered that a bit on the upper hull was a bit broken.

It was easily fixed, just a little bending and it snapped right back. Now, to the interesting part.
The build:
Building the beats is a real blast (ain't done yet)! The pieces fit very well togheter and it feels very well thinked out in most bits!
The only part that is a bit tedious is the track assembly and sides. Mostly because it's the only part built twice. The track links fit togheter with ease, as long as you dry-fit them first and try it. They can be a bit fiddly in the fit when you get to the single track-links, but not in a scale that will ruin the model.
I knew from the beginning that it would be big, but it was bigger than expected.

The chimera looks like a toddler toy when put beside the beast.
One thing I want to share is the weight and thickness of the plastic.

That was a shocker (chocker?). Real heavy duty stuff, and when I'd gotten this far in the build I had a hard time believing that this was a model from GW. It's that wonderful!
But, I have more than praise for the kit. It has some downsides, and the biggest one is without doubt the instructions. The only numbered parts is a couple of wheels, and they are the first thing to be built. So this kit is not for beginners, it will take some energy and thinking to figure out where all parts is supposed to be. For a kit with 200+ parts there should be numbers on every one, or at the very least a drawing over the sprues. But no.
Oh well, the build carries on! The upper hull was very easy to get in place, and when all the big parts were put togheter the model was perfectly balanced, unlike the risk with the older Leman Russ or Chimera kits.

I can't get over the size. It's huge and wonderful. I'm afraid that I have to build one more in the future...
A part that people will build different is the lascannon turrets on the heavy bolter sponsons. When building the turret the bottom plate doesnt have a pin to stick into the hole, you're to mount a larger pin through the turret.

My first thought was to glue the pin to the sponson, thus getting a turret that would stick until the end of times. Then I was thinking about it again. If I was to do that the painting would have been more difficult and the modification for the cannon wouldn't be an option. Yes, I could have glued it after painting. But I like to be able to remove my turrets.
In the end, the pin was glued onto the turret. And the modification for the lascannon I have in mind as due to the sloppiness. If you look at GWs own bandblades the lascannons is hanging. I don't want that but I don't want to glue it stuck either. I will fix it with a small piece of plasticard glued beneath the gun, thus giving it some resistance.
Well, the last thing then. The "real-tanker-modifications". At this moment they're not as big as they could have been, but they to exist. This is due to many smart solutions on the kit that is surprisingly correct (besides the size of the beast) compared to a real tank.
One thing that DON'T exist on the kit but is getting common today is a RWS, Remote Weapon Station. This is basically a platform where you mount everything from light machineguns to automatic cannons. As the baneblade have an autocannon as coax I looked on a smaller scale, and the Heavy Stubber was the perfect match. I've always loved that weapon, and with this kit you get a couple that has a somewhat different look from the usual one.
*Wait what? Why just not have the stubber as pintle???*
Well, because you don't want to stand in the open, and who is to man it? The baneblade can hardly rely on stealth, so every crewman that pops his hatch will be prime target for snipers! Besides, who is going to stand up and operate it? The gunner? Commander? No, better to have the option to use it from the cover inside the tank.

A small preview of it before I mount it.
You notice how I aim for it to be true to real life (well, as said, as close as the size in 38 000 years from now will allow)? That's one of the things that I find so wonderful with this game, we all have possibility to make it wath we want!
Oh well, lets move on to the turret.

They provide you with a spare road wheel, and that is wonderful! I can imagine how easily they get destroyed when rolling in speed on this beast, so why not mount it? So I made a simple attachment with a piece of plasticard tube and glued it on. You might notice that there ain't nothing on the wheel visible, and that is due to how you attach spare parts. Many times they are mounted with the same kind of nuts and bolts as they would be later on.
Lastly, have a look on the back of the turret on the last pic. You'll see that I've mounted the rear stowage compartments and antennas. This is highly optional, but if you want to build realistic you should mount it. And for me it just looks better.
So, done for now! Next update will bring a finished stubber and the first pics and thoughts of the paintwork.
I hope you liked it so far!


