|
|
Post by Pax Urbis Pax Imperi on Jun 26, 2012 6:31:45 GMT -5
may I ask where you got the scope from. At first I thought it was one half of the binocs from the heavy weapons sprue...but that isn't it...Great paint job anyways! Its the targeter from a mortar Heavy Weapons team. I just filed a grove down the middle and stuck it on top of the gun. Simple conversions are often the best conversion, in my opinion. |
|
|
|
Post by Pax Urbis Pax Imperi on Jul 31, 2012 2:36:01 GMT -5
I've set aside the Stormtroopers for the moment, and started to focus on my Primaris Psyker. Here is WIP paint progress of the Primaris Psyker that I am working on. This is also my first attempt at Non-metallic Mettalics, and marbling. I am pleased with the look of the gold, the marble not so much. 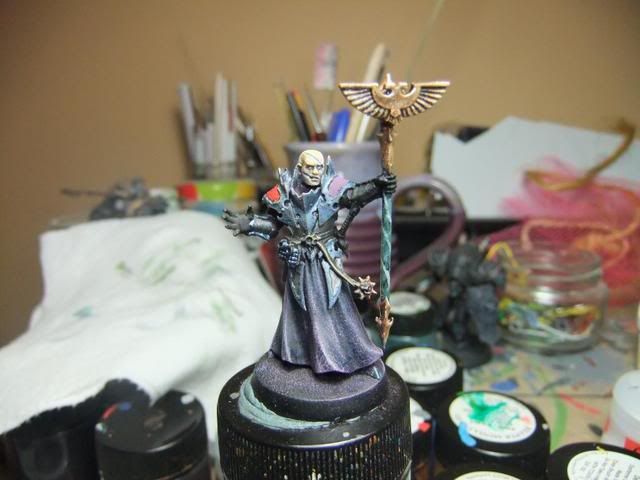 |
|
|
|
Post by Pax Urbis Pax Imperi on Aug 1, 2012 1:31:03 GMT -5
Well, I finished him tonight. I am actually pleased with the model, and the paint job, which was fun to do. I encourage everyone to challenge yourself now and again, try new techniques. You may surprise yourself. I added another coat of 'hardcoat to the marble, make it more shiny. I also tried to paint his face as if he had his eyes closed and he was concentrating. It looks better in person, the photo doesn't look as good I'm afraid. Front 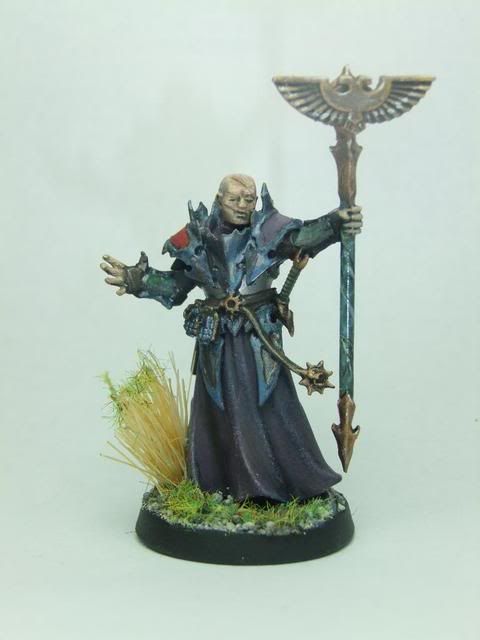 Back 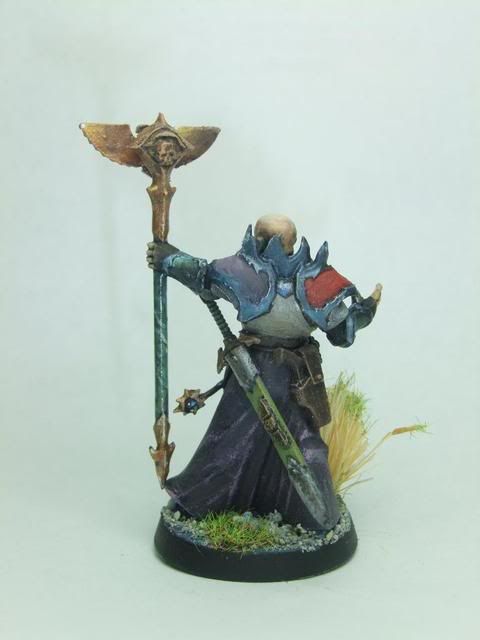 Edit: Upon closer inspection, I'll have to fix that right eye. It doesn't look right. Edit: Upon closer inspection, I'll have to fix that right eye. It doesn't look right. |
|
|
|
Post by Pax Urbis Pax Imperi on Oct 23, 2012 20:45:17 GMT -5
Here are some more WIP pics that I have made. I love power weapons, even if they seem to do nothing for me. There has been more than one occasion when I was "WHY did I take power weapons again?!" Still.... Power weapons have the option to upgrade to a power axe, for free. Its I1 but AP 2, so may be worth it to insta kill Terminators as a "just in case" scenario. What Guardsman WANTS to be in combat with Termies? Anway, the power axes were easy to make. Take a dwarf axe arm, shave off the runes on either side, cut hose from the rebreather, shave off the tube part of the rebeather, and attach to the back of the axe. Sargent #1 - wounded arm, holding axe out. I like the pose in this one. Even though he is hurt, he is ready to lead his men into combat. Bits use: Dwarven axe and hand, a re-cut rebreather, and an Space Marine Bike Scout head. 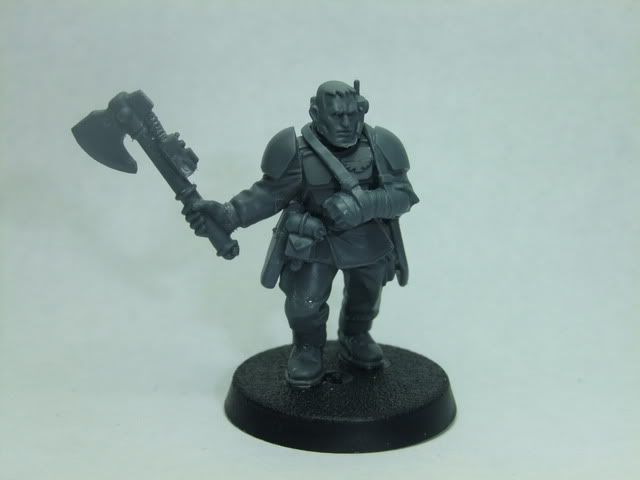 Sargent #2 - Pointing Sargent, axe in left hand Not 100% happy with this one, the axe held in the hand is at an awkward angle (awkward axe is held awkwardly). Here I used a Catachan head, a Space Marine blessing, and the dwarf axe with a re-cut rebreather. 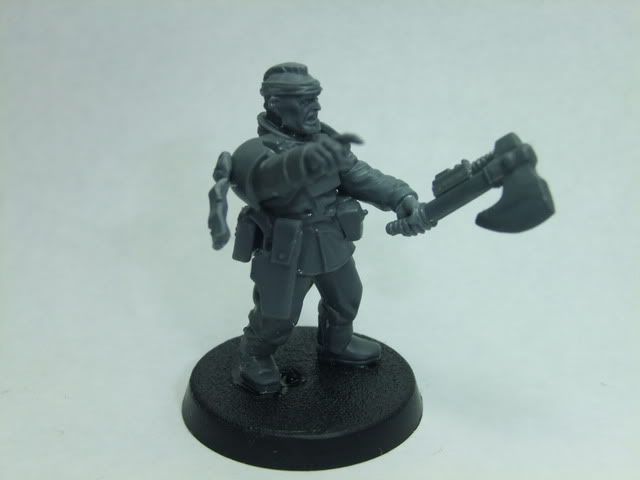 Sargent #3 - Kneeling Sargent, holding axe in a confident air. I really really like this one. The pose is cool, he looks cool in his shades, relaxed yet vigilant. Bits used: kept the dwarf arm intact, and drilled a shallow hole to hold the arm in. Took the shoulder pauldron from the Valkyrie pilot, and shaved off the skull on top. The head is also from a Space Marine Bike Scout. 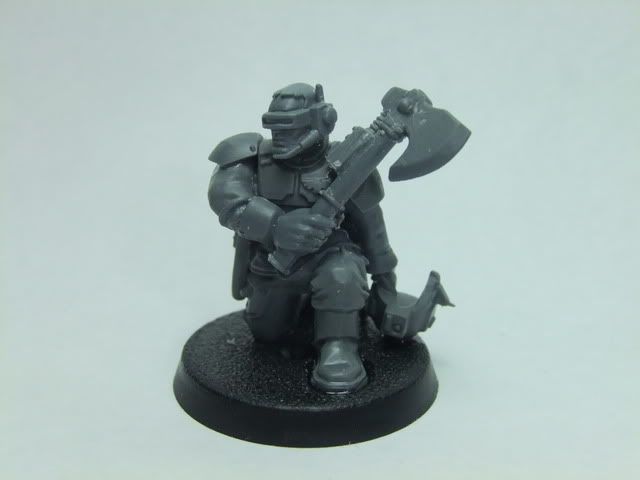 Sargent #4 - Sargent with a cigar, bionic arm. What sargent is NOT chewing or smoking a Cigar? I also liked the look of the bionic arm bit, so I chopped off the sword and added the dwarf axe to it. Added the chopped off rebreather, and viola! 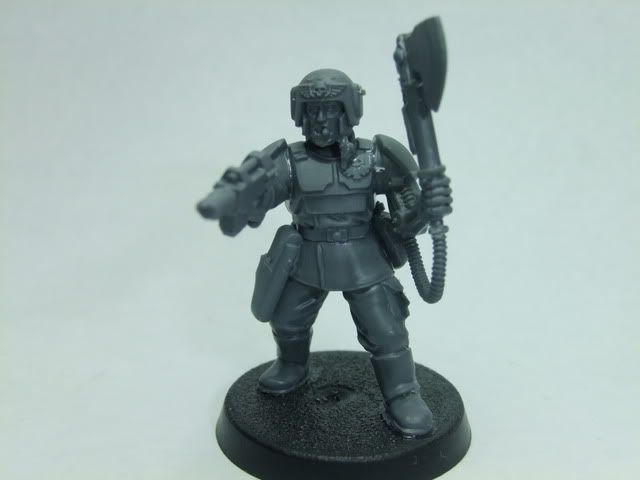 |
|
|
|
Post by hendrik on Oct 24, 2012 2:37:47 GMT -5
a quick yet very nice conversion! definetly better scaled them my space wolf axe on my commissar!
|
|
|
|
Post by 3ff3ct on Oct 25, 2012 15:49:28 GMT -5
Great idea with the rebreathers!
|
|
|
|
Post by Cosmic on Oct 26, 2012 6:34:11 GMT -5
Very nice, Pax. One thing though, the guy with the shades, his arm is backwards, the one holding the helmet is supposed to be a right arm, not a left  |
|
|
|
Post by Pax Urbis Pax Imperi on Oct 27, 2012 10:04:10 GMT -5
Doh! You are 100% right. Hopefully, no one will notice, other than you. Maybe shave off the thumb before I paint. So I've decided I'm going to make a Quad gun for my Aegis Defense Line. I wanted it to be different than anyone else, so I bought this. I'll attach it to a Quad gun base though. I think it just looks cool, and should get the point across. www.ebay.com/itm/180985900283?ssPag...984.m1497.l2649 |
|
|
|
Post by optimat on Oct 27, 2012 12:46:42 GMT -5
Man that's tragic that someone took part off the original 'Falcon model. It was amazing.
|
|
|
|
Post by Pax Urbis Pax Imperi on Oct 27, 2012 13:50:00 GMT -5
Man that's tragic that someone took part off the original 'Falcon model. It was amazing. Its going to be put to a good use, never fear! But I agree. |
|
|
|
Post by Pax Urbis Pax Imperi on Nov 6, 2012 1:25:28 GMT -5
Some work in progress of my Quad Gun for my Aegis Gun line. The Star Wars bit is just the right size, and with some modifications fits on the base. 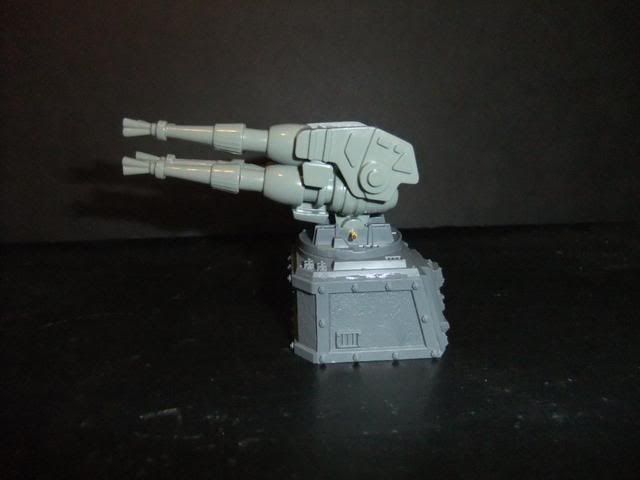 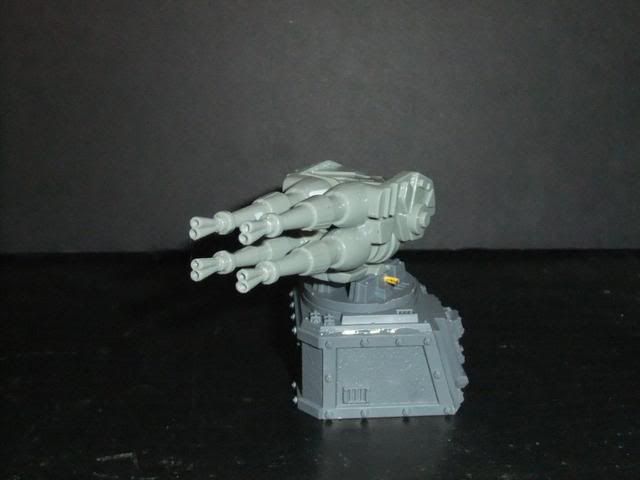 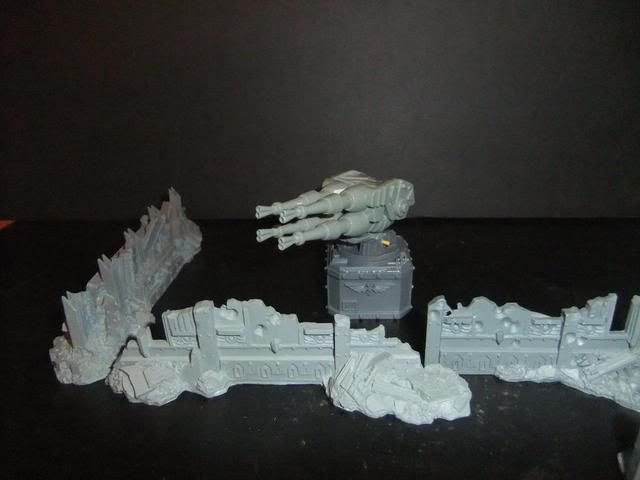 The gun itself is not attached to the base, allowing for me to remove it for easy storage, or when the gun is wrecked/destroyed, or swivel towards whatever threat. Originally, the gun itself was top heavy, and would tip over quite easy. By adding a nickle and two quarters, I was able to great a stable weighted base, so that it will stay where I need it. 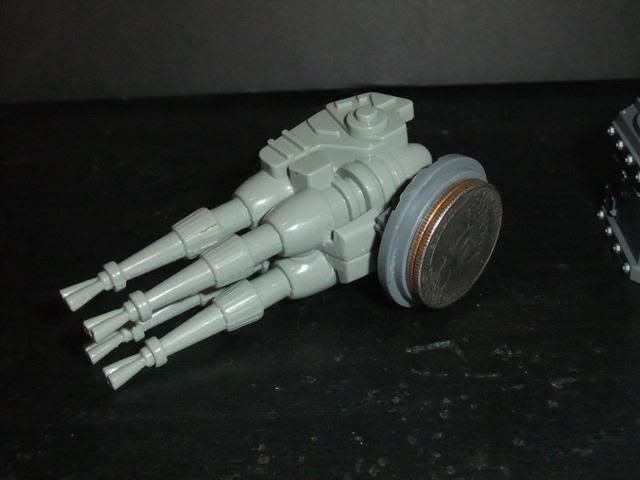 There were some holes and areas that I needed to fill in order to make it smooth for eventual painting. There were four in the guns themselves, easy to do. But on the top guns, there was a huge gap that needed to be filled. I used some greystuff, sculpted it into shape, and let cure over night. 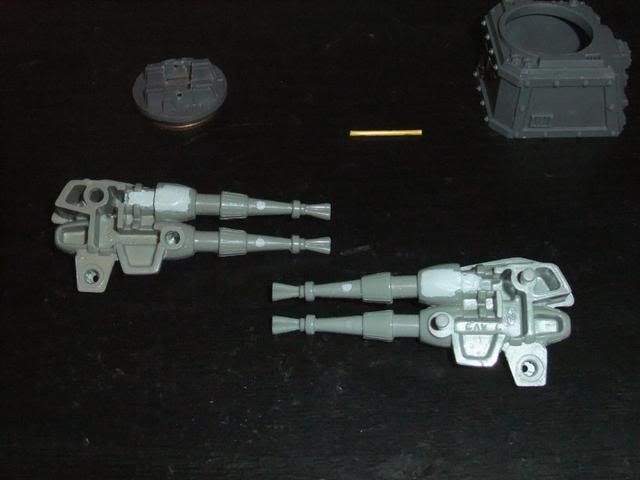 Some things left to do: - decided if the ends of the guns stay, or come up with an alternative solution
- work on articulation. The gun is fixed into place at the moment, and can only swivel. I was thinking of removing all of the parts around the round joint where the paperclip holds the the gun in place to allow for up/down motions
- Find a radar dish of some kind, and optics, for the gun.
what do you guys think? |
|
|
|
Post by Cosmic on Nov 6, 2012 8:05:19 GMT -5
Really nice! I would keep the ends of the barrels, I think they look different but great.  |
|
|
|
Post by Pax Urbis Pax Imperi on Nov 14, 2012 20:17:30 GMT -5
I sometimes hate the fact that I have these ideas for models, put them together, but then don't ever paint them. Sad really... My next idea is for a Banner (platoon or command, not sure yet). I've already got this model painted, so I needed a new look. Fortunately, I had some Ogres I was attempting to convert in Ogryn, and one of the bits included was this ripped banner. I shaved off most of the unneeded parts, and pinned the flag to the hand. I also added the Aquila to the top of the banner. 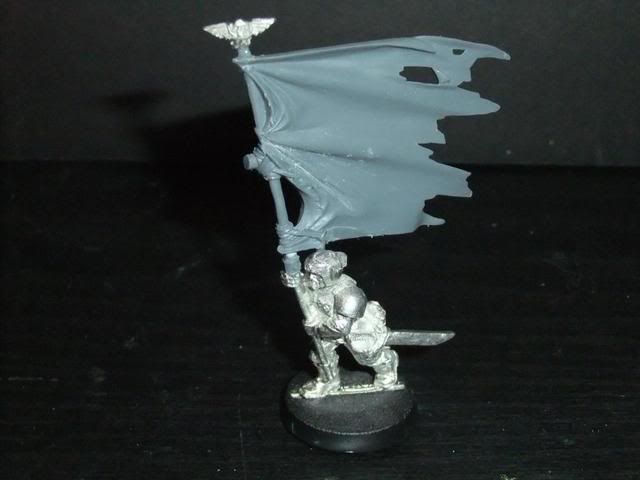 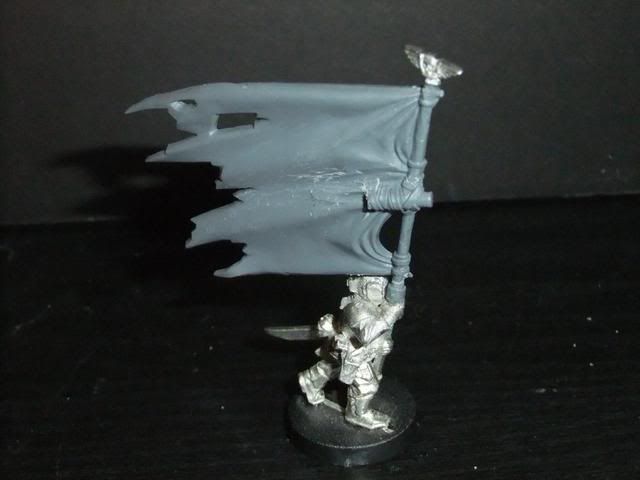 Not sure about what to do with the piece of wood in the middle of the banner. I think I will keep it, since the whole thing looks like its about to come apart. I like how it turned out, very dynamic. What do you think? |
|
|
|
Post by hendrik on Nov 15, 2012 5:11:21 GMT -5
the piece of wood in the middle doesn't really make any sense. I would try to remove it and resculpt the banner if possible. if the fit between the tin metal bannerpole and the plastic banner pole is not strong enough i would suggest drilling out/removing both and placing a small metal rod there
|
|
Deleted
Deleted Member
Posts: 0
|
Post by Deleted on Nov 15, 2012 5:19:45 GMT -5
I think it looks fine Pax, a proper veteran's flag. Good work
|
|
|
|
Post by Pax Urbis Pax Imperi on Nov 21, 2012 2:02:14 GMT -5
I have yet more WIP models that will need paint at some point. You have already seen my Quad gun that I will be using, but what use is a Quad Gun without the Aegis Defense wall to protect it? I was having a real problem even finding an Aegis wall after sixth came out, which is the real reason for me making my Quad gun. My local store didn't have it, other local stores didn't have it, and I didn't want to order it from GW. What I did find, however, was the Urban Barricades and Walls set. Since my army is supposed to be a force fighting riots and other insurrections per their fluff, this seemed to fit the bill. However, I added some additional touches: some metal posts and razor wire. I felt that it would seem to provide more protection as a real Aegis wall would, and still look cool. Five of the barricades measure to 28", which is how long the wall is. It is also slight shorter than the real wall. 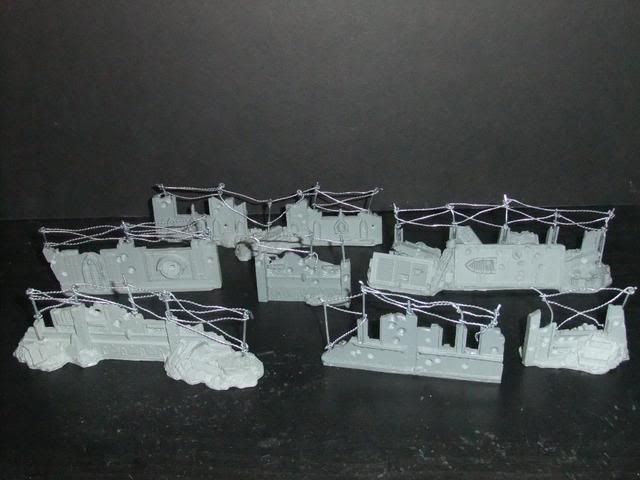 Here are some more close up picutures: 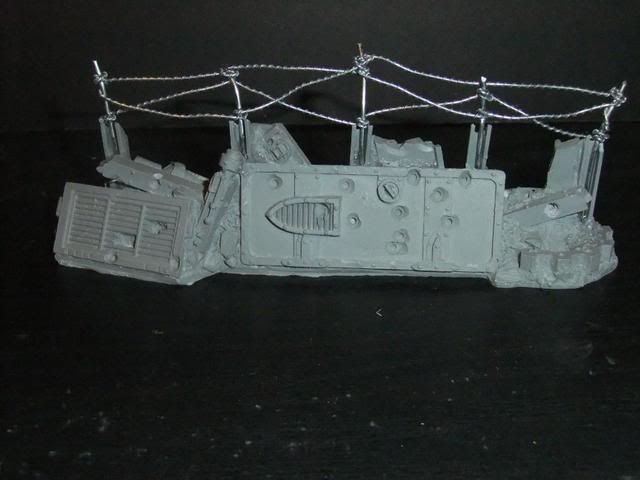 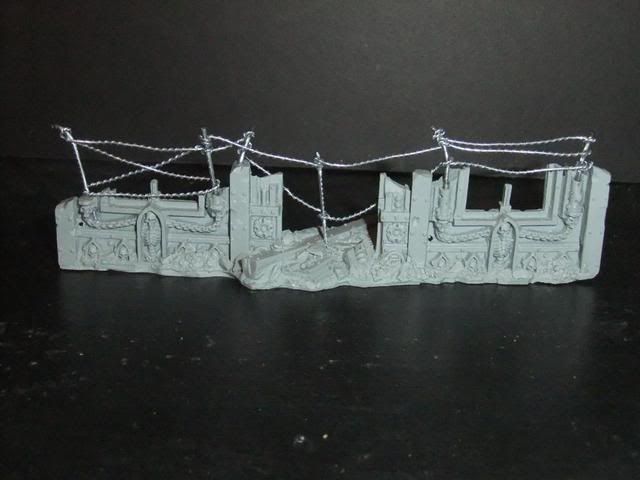 There are some smaller pieces as well. 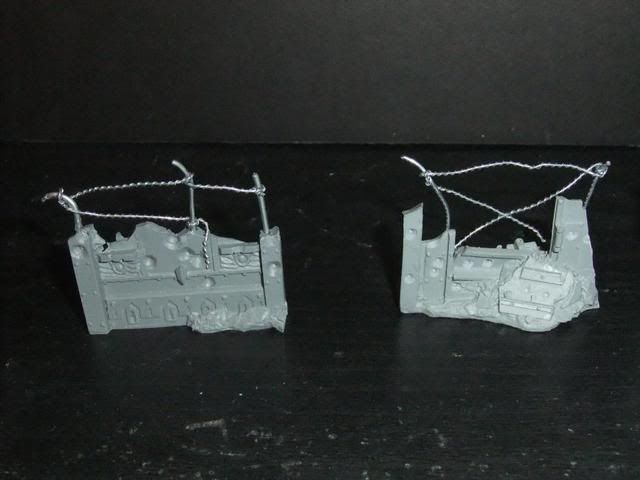 |
|
|
|
Post by The Hawk! on Nov 21, 2012 5:15:15 GMT -5
Thats great Pax! Propper Trenches!!!!!! Can't wait to see them painted mate  Dave |
|
|
|
Post by Pax Urbis Pax Imperi on Dec 31, 2012 3:28:03 GMT -5
After seeing this video on youtube for a wrecked vehicle marker, I decided to make my own. I bought some battery powered tea lights from Menard's (a local US hardware store), some white stuffing on sale for Christmas decorations, and viola! Wrecked vehicle markers. (Still need to prime black on top, but I am waiting for my wife to go to her part-time job so I can prime in the basement, and not have her complain of fumes. Its winter here atm, so no priming outdoors for a few months.) Bottom: 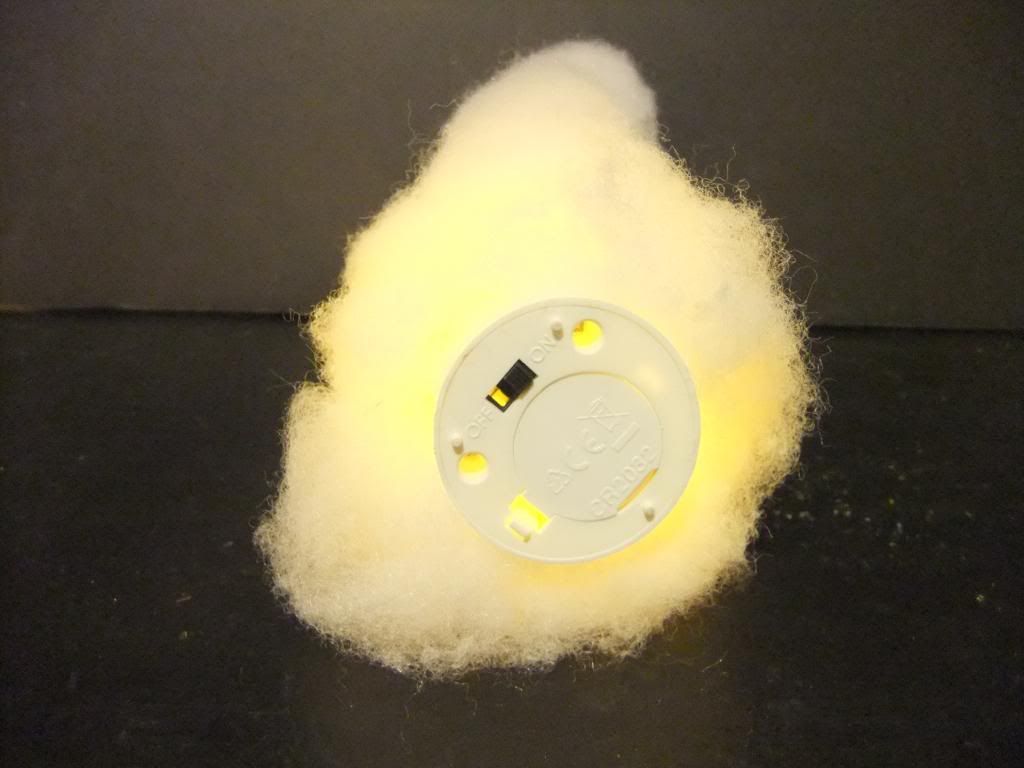 Smoke with light turn off: 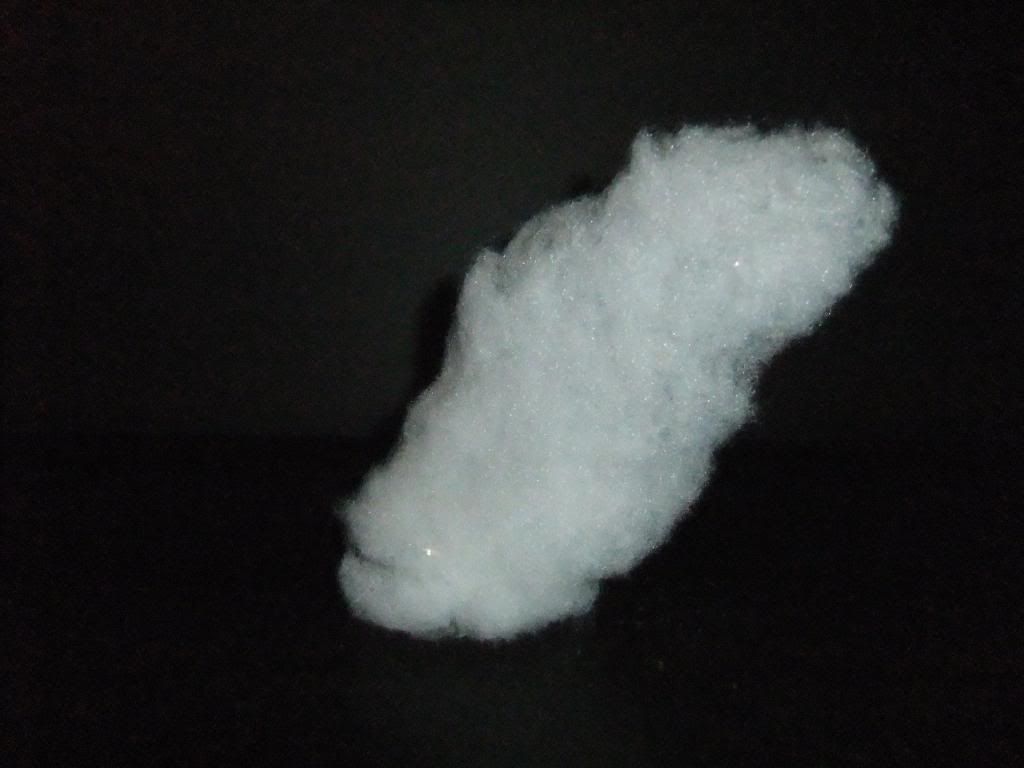 With Light turned on: 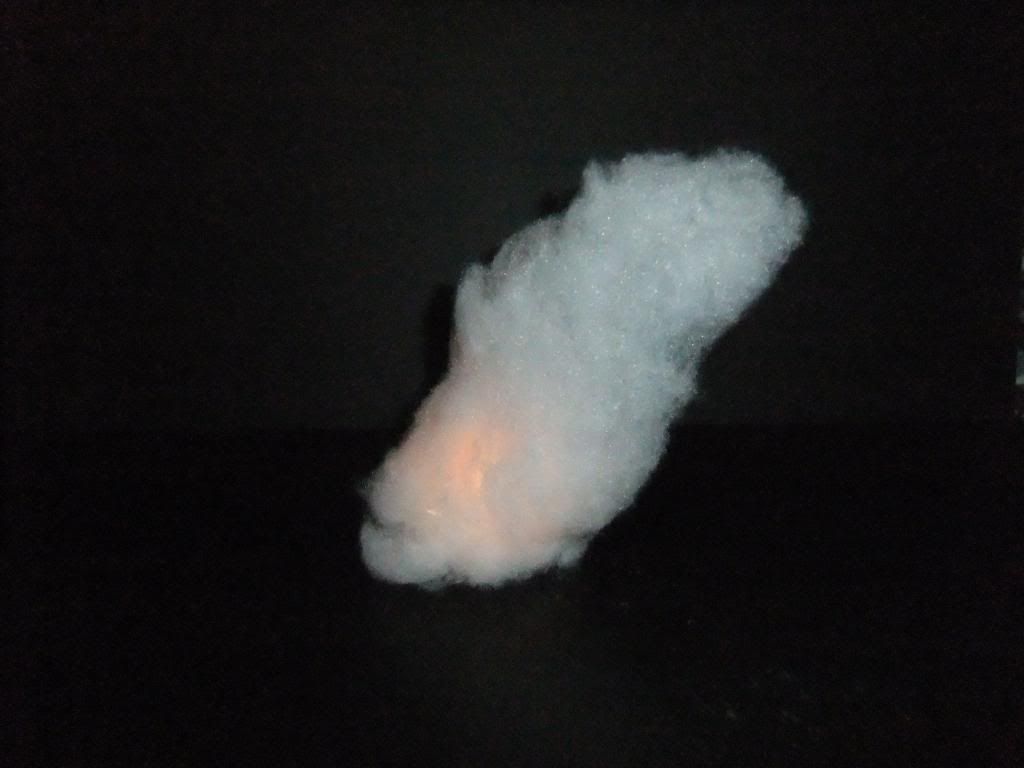 In the dark: 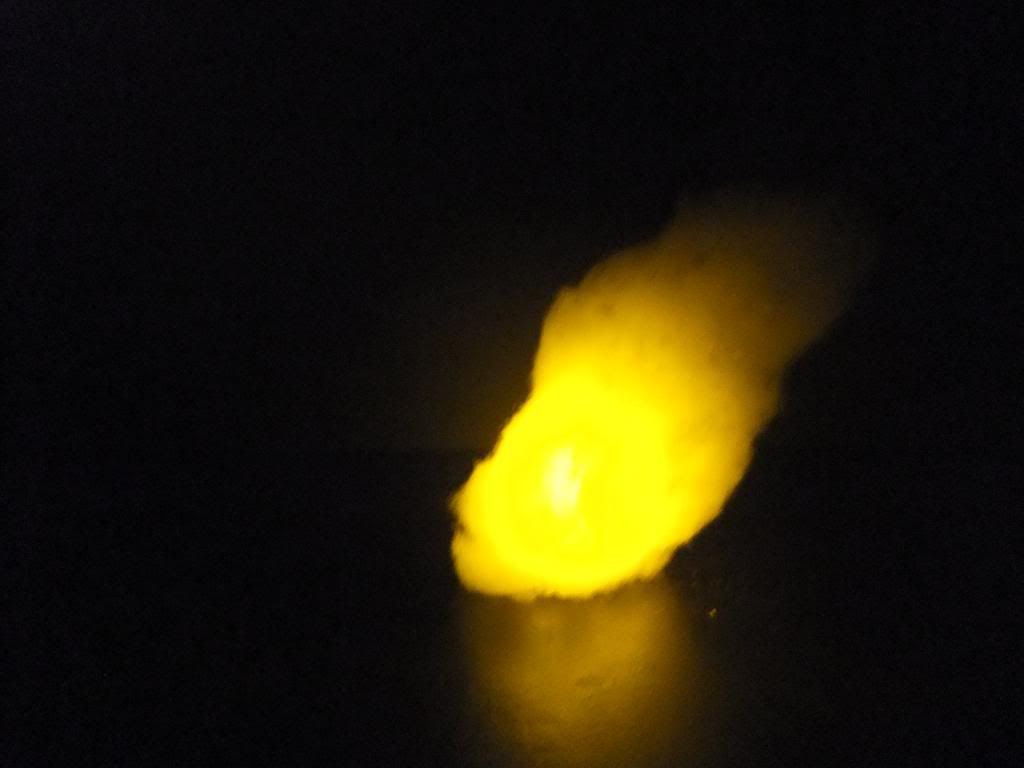 On a vehicle: 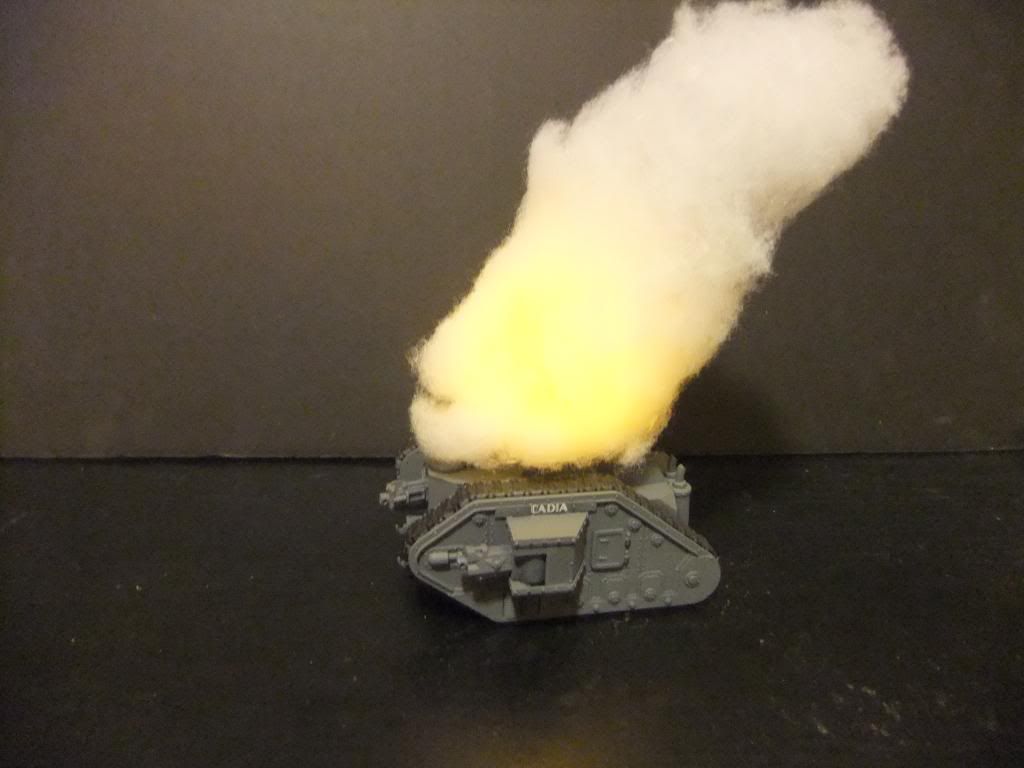 The effect is pretty damn striking, and this is super easy to do. To do yet on this small project: - Probably remove some of the smoke to make it a bit smaller. It looks maybe too big. - Prime black. |
|
|
|
Post by Wraelis on Dec 31, 2012 3:36:07 GMT -5
That's so cool!! I'm totally gonna make some of those now
|
|
Sgt. Rock
Captain
   Loungin' like a lizard.
Posts: 231
|
Post by Sgt. Rock on Dec 31, 2012 4:49:02 GMT -5
Your work is incredible. I'm totally stealing that technique for the shotgun vets. You just saved me a ton of money on Forge World stuff, good sir. And the tea light wreck markers are brilliant. Bravo!
|
|
|
|
Post by hendrik on Jan 2, 2013 15:32:47 GMT -5
I sprayed mine with some black, so it looks more like dirty-smoke
|
|
sapperq21
Captain
   Sappers lead the way!
Posts: 182
|
Post by sapperq21 on Jan 2, 2013 15:51:53 GMT -5
love the Psyker! for the barracades id maybe ad something like tin cans hung around the wires, ads to the hasty perimter set up
|
|
|
|
Post by macknight on Jan 3, 2013 3:26:30 GMT -5
very nice army, the basing especially is ace. I'm a fan of your catachans, very fluffy with individual bandanas.
|
|
|
|
Post by Pax Urbis Pax Imperi on Jan 29, 2013 3:04:27 GMT -5
Thanks for all the comments, I greatly appreciate them. I have also sprayed my wreck markers, I just ran out of primer right then. Sometimes I really can't help myself. I see a model and its just begging to be converted somehow. This used to be an Imperial Enforcer, a Forge World model you could only get at Games Day or Adepticon. Nice model, beautiful sculpt. Shame about the dog that comes with it. I knew with the scanner held in the left hand that would make a great Master of the Ordnance. So, I removed the power maul from the right hand, and replaced it with a pair of binoculars. I gave the MoO a pistol slung on one hip, and a close combat knife in the other. I provided a high-powered vox caster, and then connected floral wire with the vox to the scanner. Finally, I shaved off these gigantic skulls on his knee pads, removed a pair of handcuffs (he is Arbites, afterall), and then hand to pin the foot to the ankles for stability. 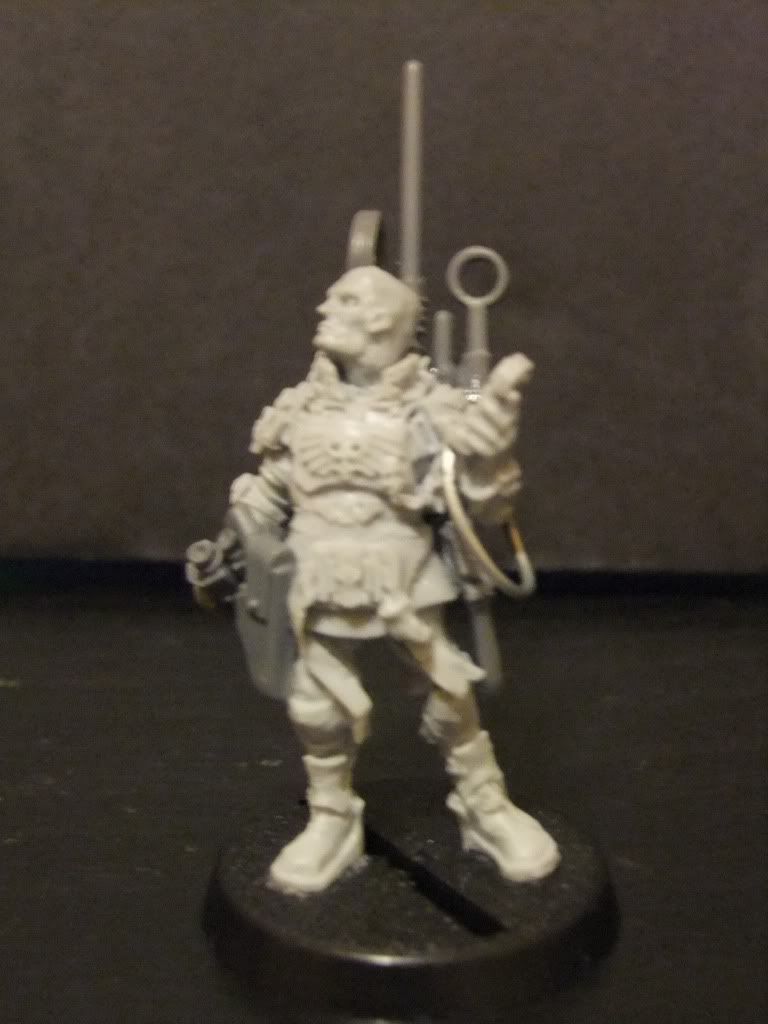 I think he looks great, except for one issue. The model bends backwards, like the vox is to heavy for him. I feel confident that some hot water should fix this issue. And if it doesn't, then its not like I use this particular soldier very often anyway. PAX |
|
|
|
Post by Cosmic on Jan 29, 2013 4:11:41 GMT -5
He does indeed bend backwards, it's a shame because it does make a great mini look a little odd from certain angles!
Impressive conversion, never would have thought of it! Now get painting!!
|
|